Alabama Chanin Tunic with modified neckline halfway done! Love the Marimekko inspired flower. Directions on how to make this lovely tunic here: http://alabamachanin.com/journal/2013/04/diy-tunics-marimekko-style/
Books
As I clear out a former office to make a sewing/craft room for myself (Yes, I am going to have a Girl Cave!), I have been jockeying around my craft books. I am a definite convert to the digital reader when reading fiction but I can’t imagine making that switch when dealing with all things knitting, sewing and crafting.
As I sorted through the books to make room for them all I set aside the “Knitting for infants” books, the retro looking Burda pattern magazines and the 80s knitting books. It is hard to give up these books as dated as they are, I think because my past is interweaved with them all. I have spent many evenings browsing my collection of Rowan magazines, Alabama Chanin and Kaffe Fassett Quilt books finding inspiration for projects. And the results can be seen all over my house in the quilts, clothing and sweaters they have produced. Funny to me that I can form such attachments to these inanimate objects.
Now that I have more room however, I’m delighted to add some new ones to the collection. Brave New Quilts by Kathreen Ricketson is so inspiring and I am convinced that if I keep Simple Crocheting by Erika Knight up close and center, I will finally learn how to crochet. Drape Drape One and Two by Hisako Sato also stare at me, inviting me to get more comfortable with my serger. Anyone else as attached and inspired by their craft books as I am?
Volumes
Latest and last (?) Noodlehead Super tote complete. Made out of grey linen and “Volumes” from the Drawing Room Collection by Anna Maria Horner. You can purchase the pattern here: http://www.noodle-head.com/2013/05/super-tote-pattern.html
Monday Musings
While my work schedule is not traditional, Mondays still mean the end of the weekend, the start of the kids’ school schedule and back to homework for us. I often muse about previous vacations and places I would rather be. Are their places you dream about on your Mondays? (This picture is from the city of Ravello on the Amalfi Coast in Italy. It is one of the most picturesque towns I have ever visited)
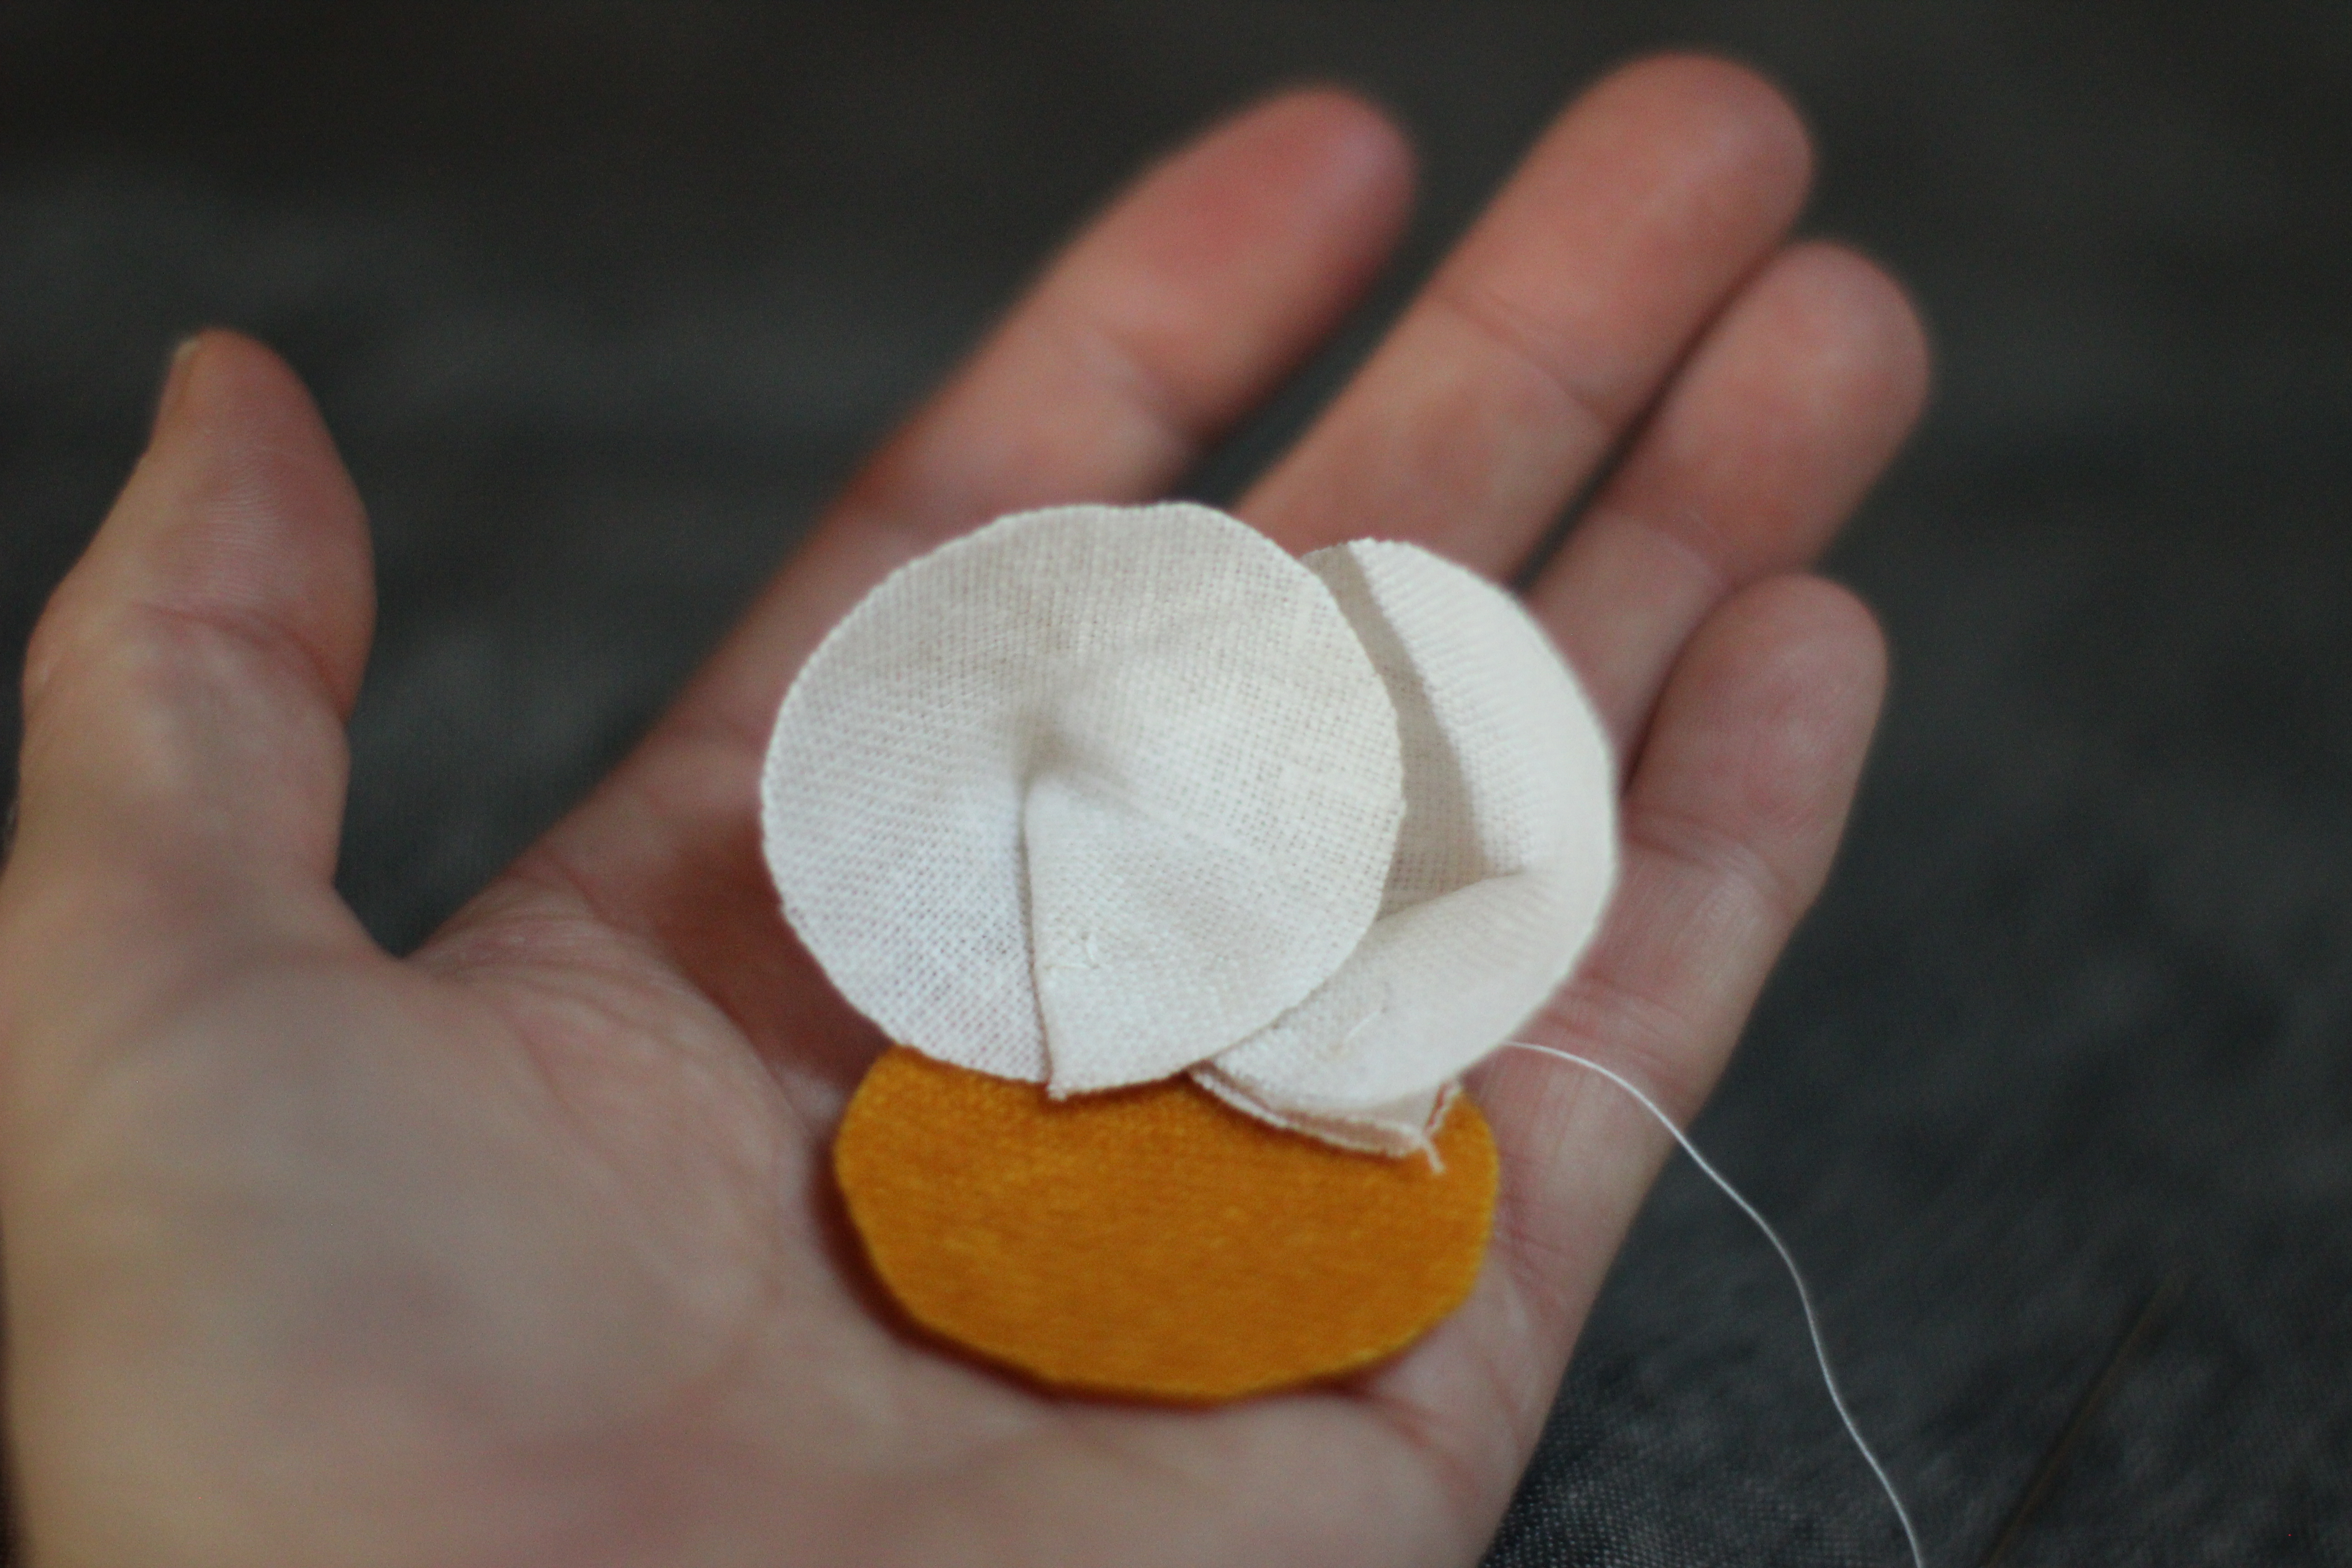
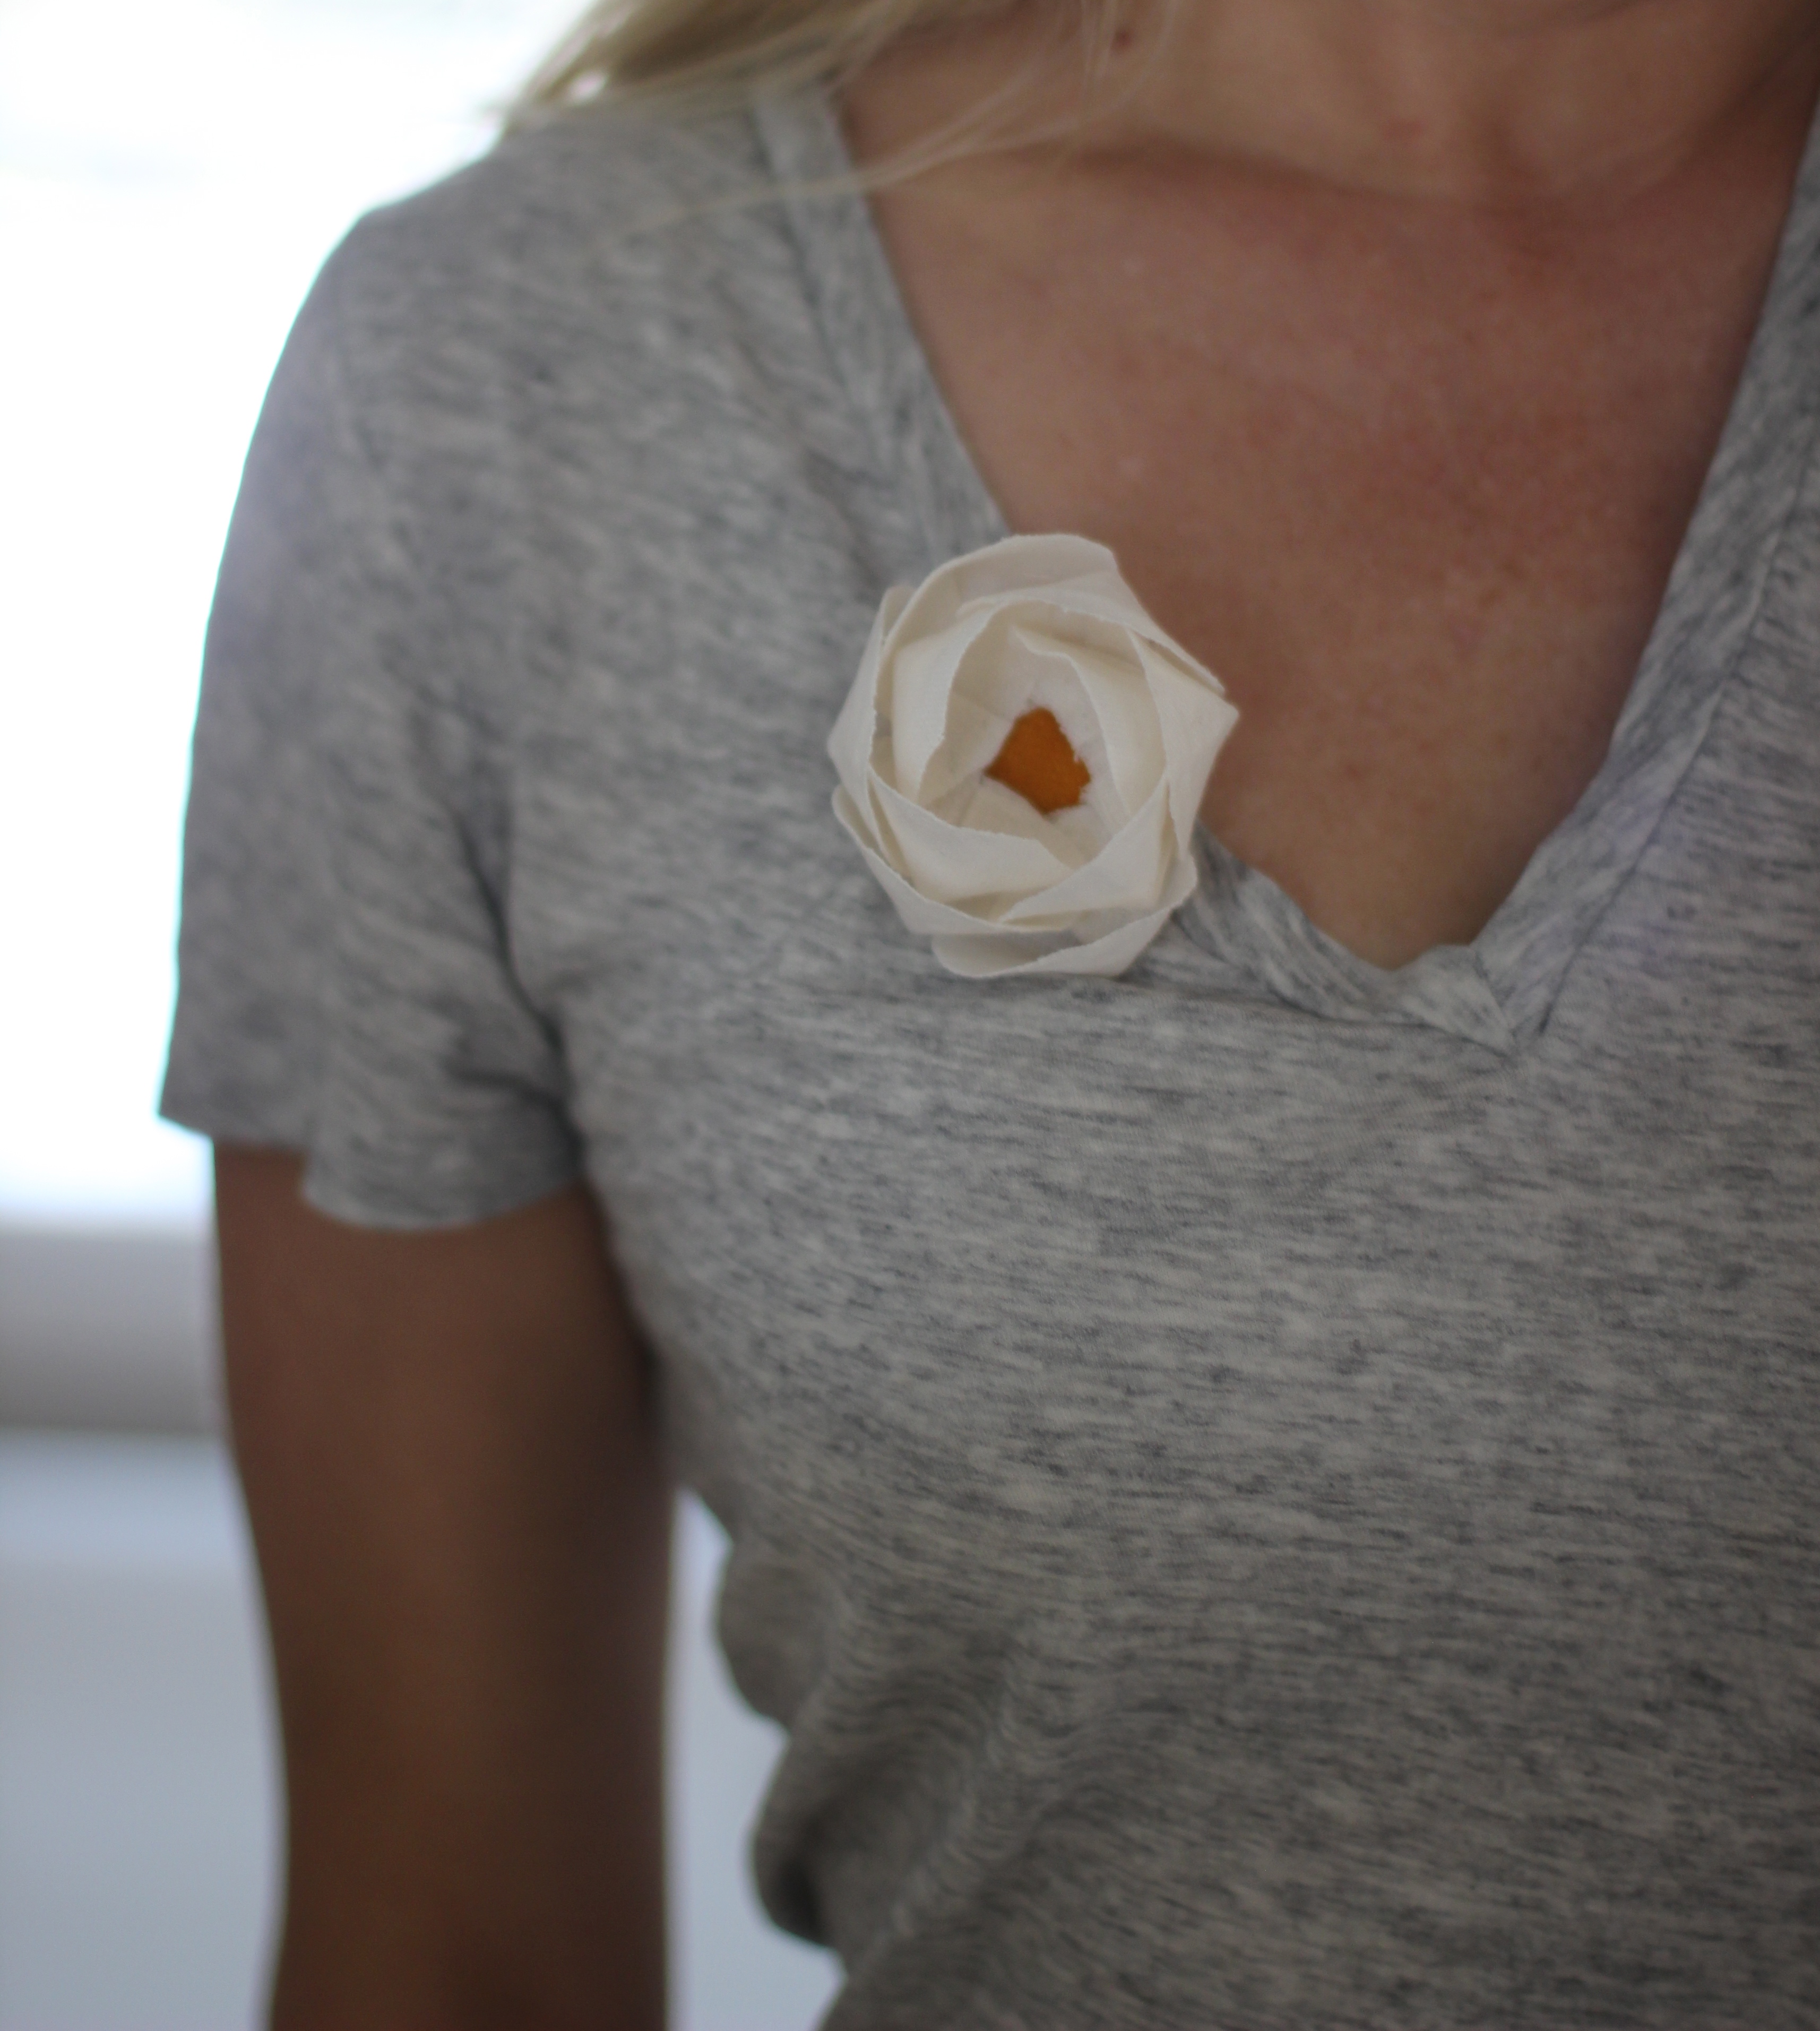
Linen Rosebud Flower Tutorial
Several years ago I bought a linen flower from Emersonmade. Ever since I’ve been hooked on the idea of making linen flowers myself. Emerson no longer produces the flowers though her company does make drool-worthy clothing and accessories.
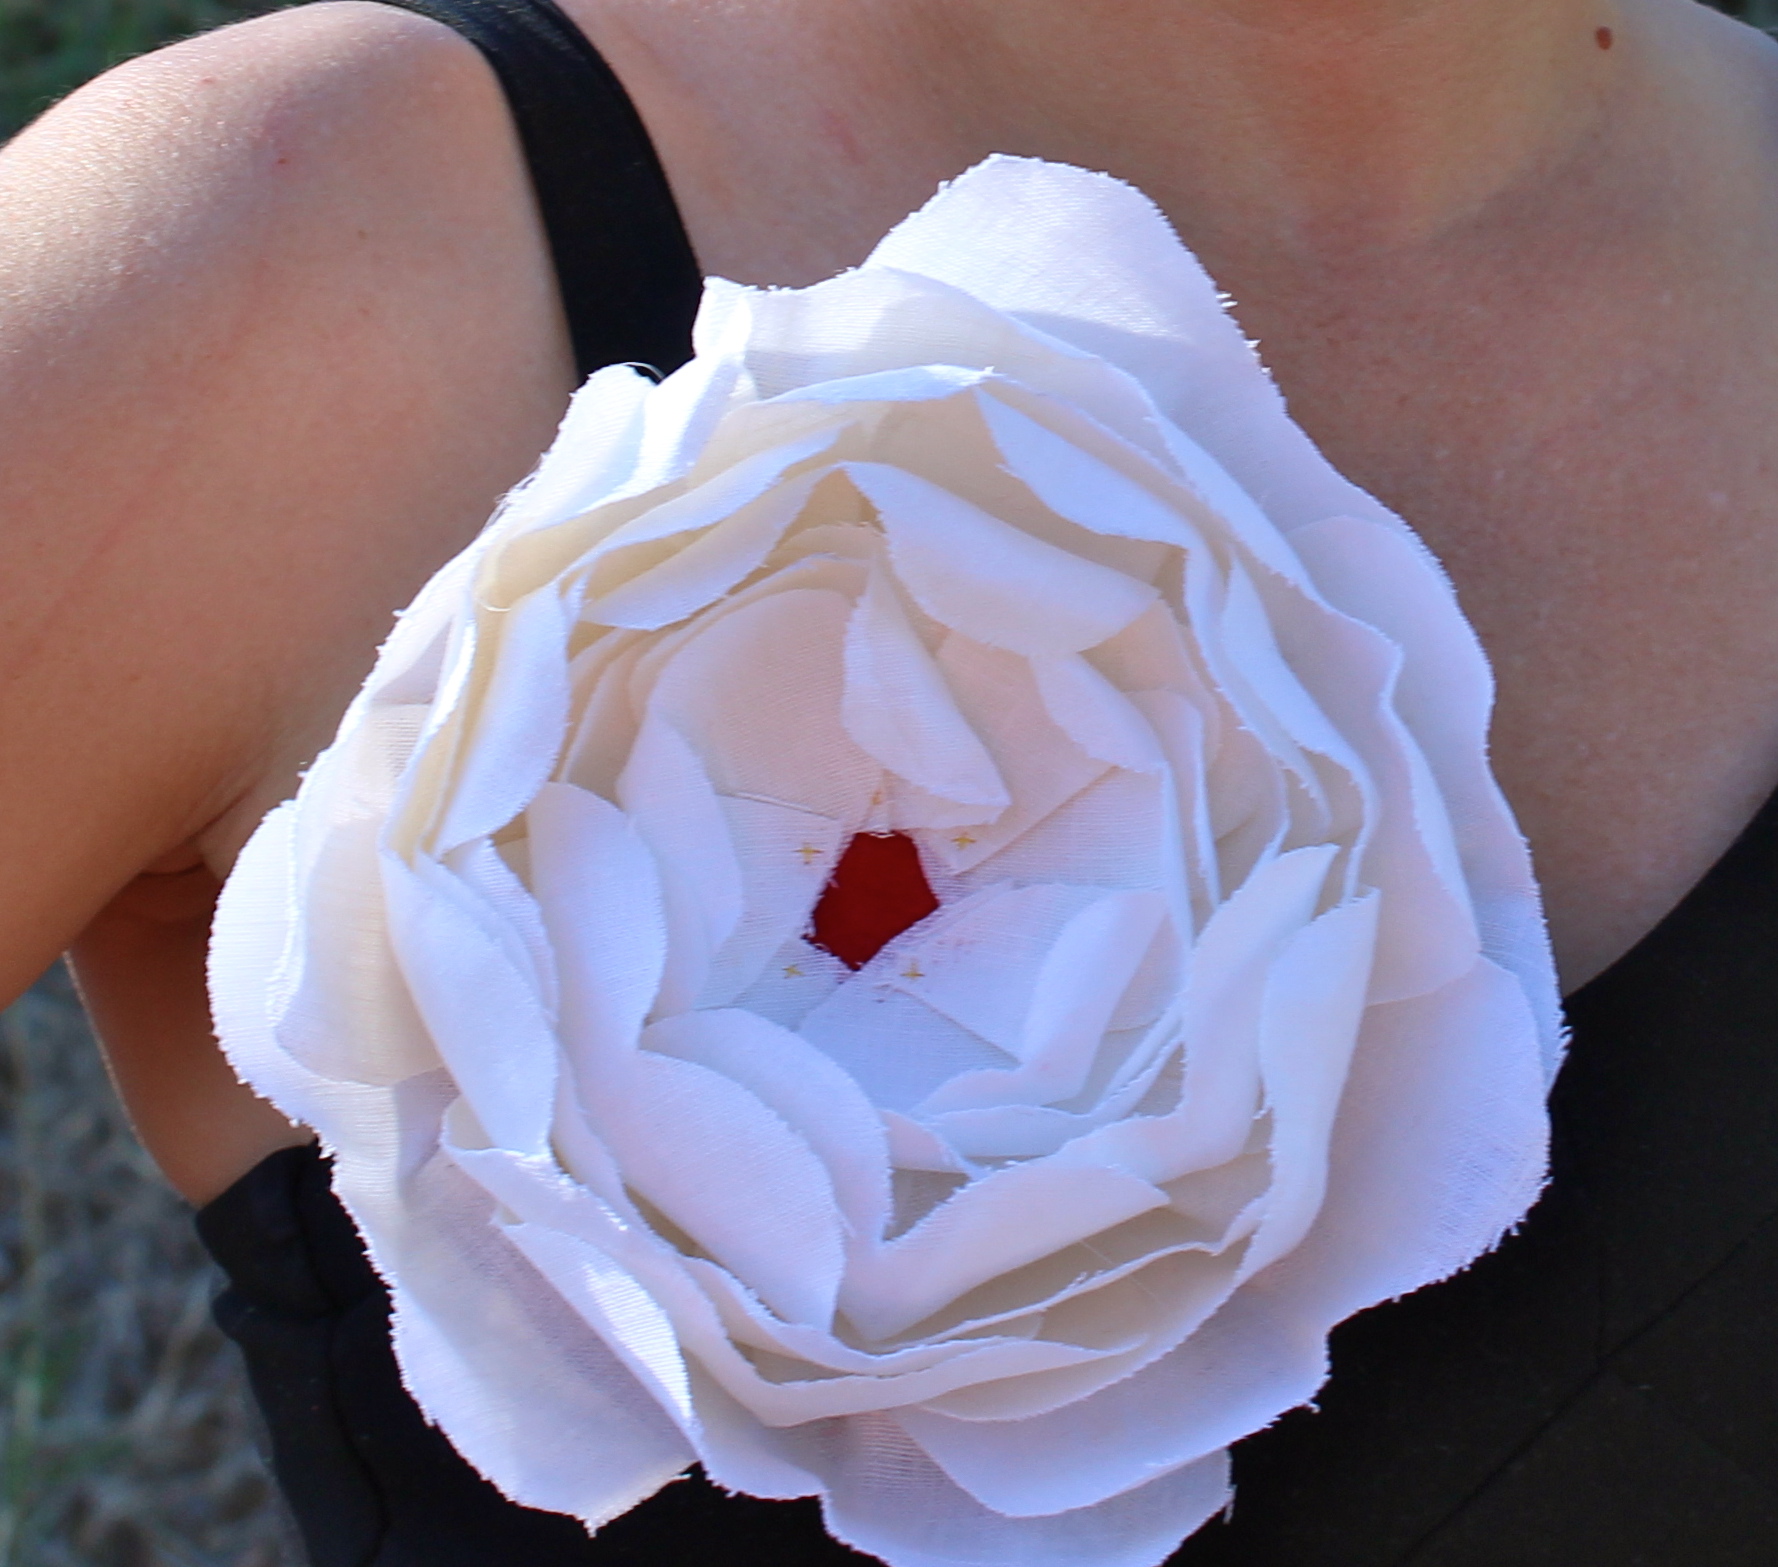
There have been a few tutorials on making these flowers on the internet. I used this tutorial, http://www.playingsublimely.com/2011/02/perfecting-emersons-flower-a-tutorial/ to guide me in making my first linen flower above. Since then I’ve been pondering other flower designs and wanted to share one I came up with that looks a little like a rosebud.
Materials needed: 100% linen fabric, heavy starch or a commercial product called Terial Magic, a big bowl, an iron, felted wool, scissors, a circle form, needle, thread to match the linen and an attachment pin.
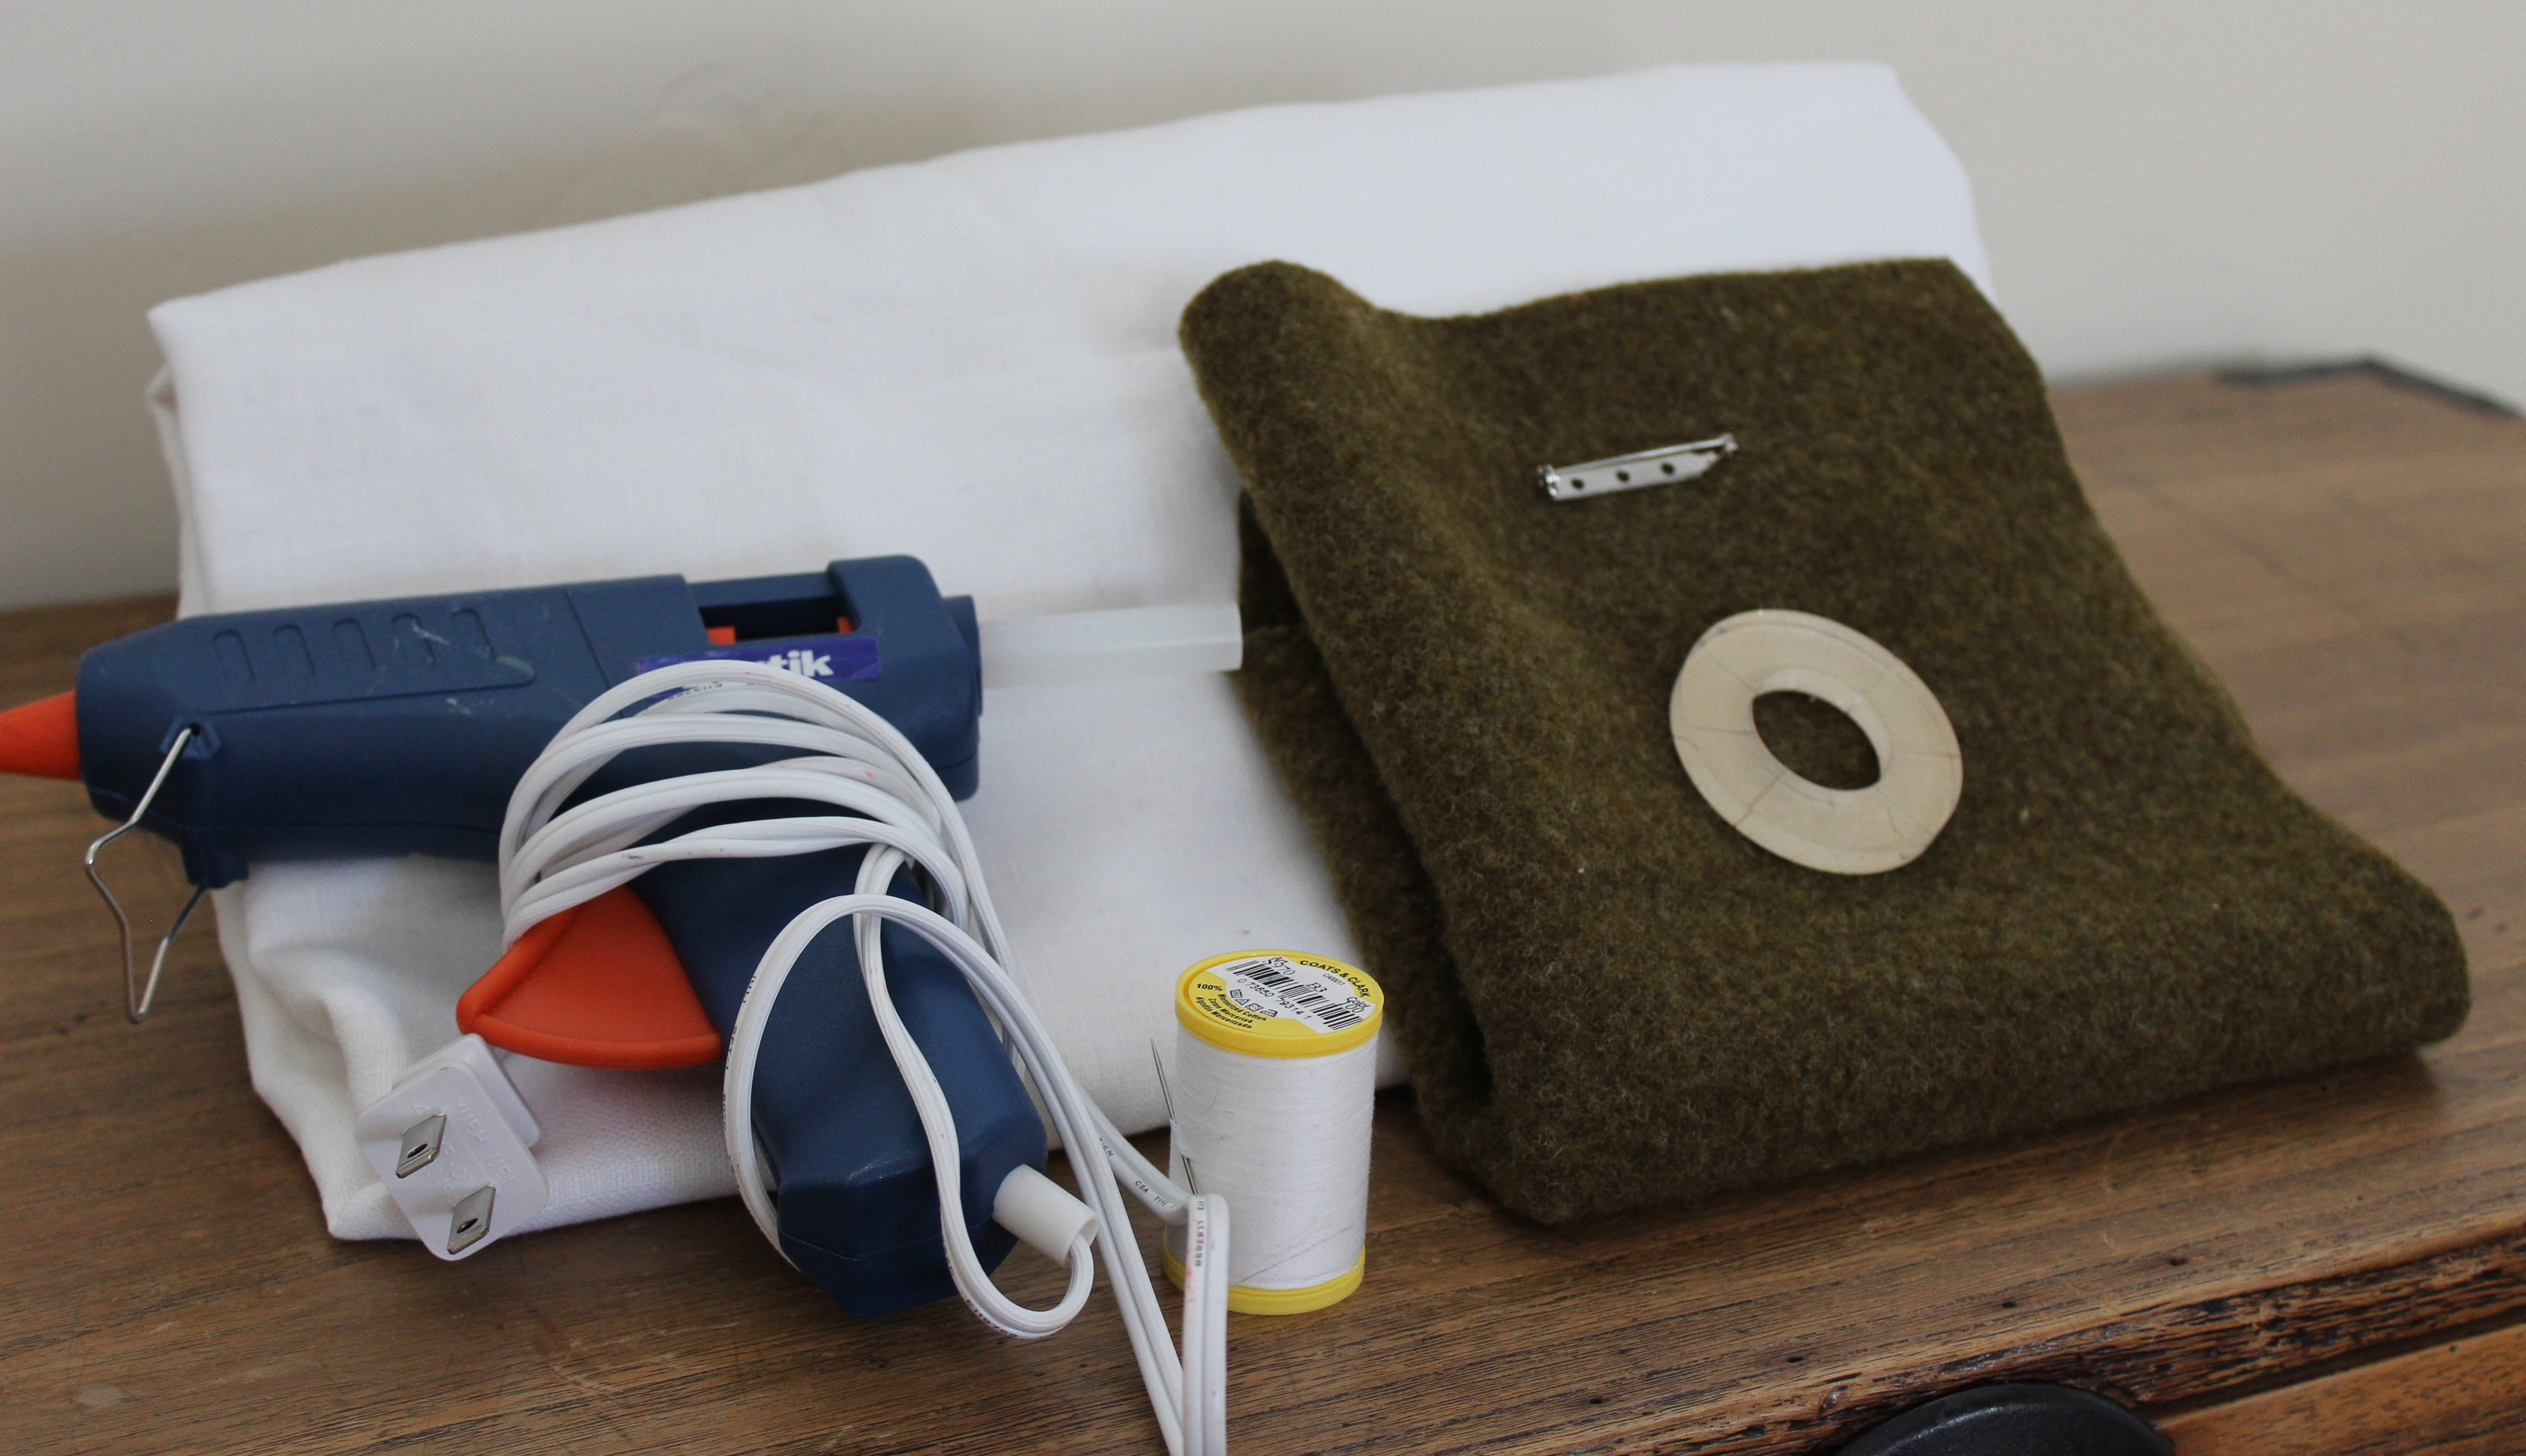
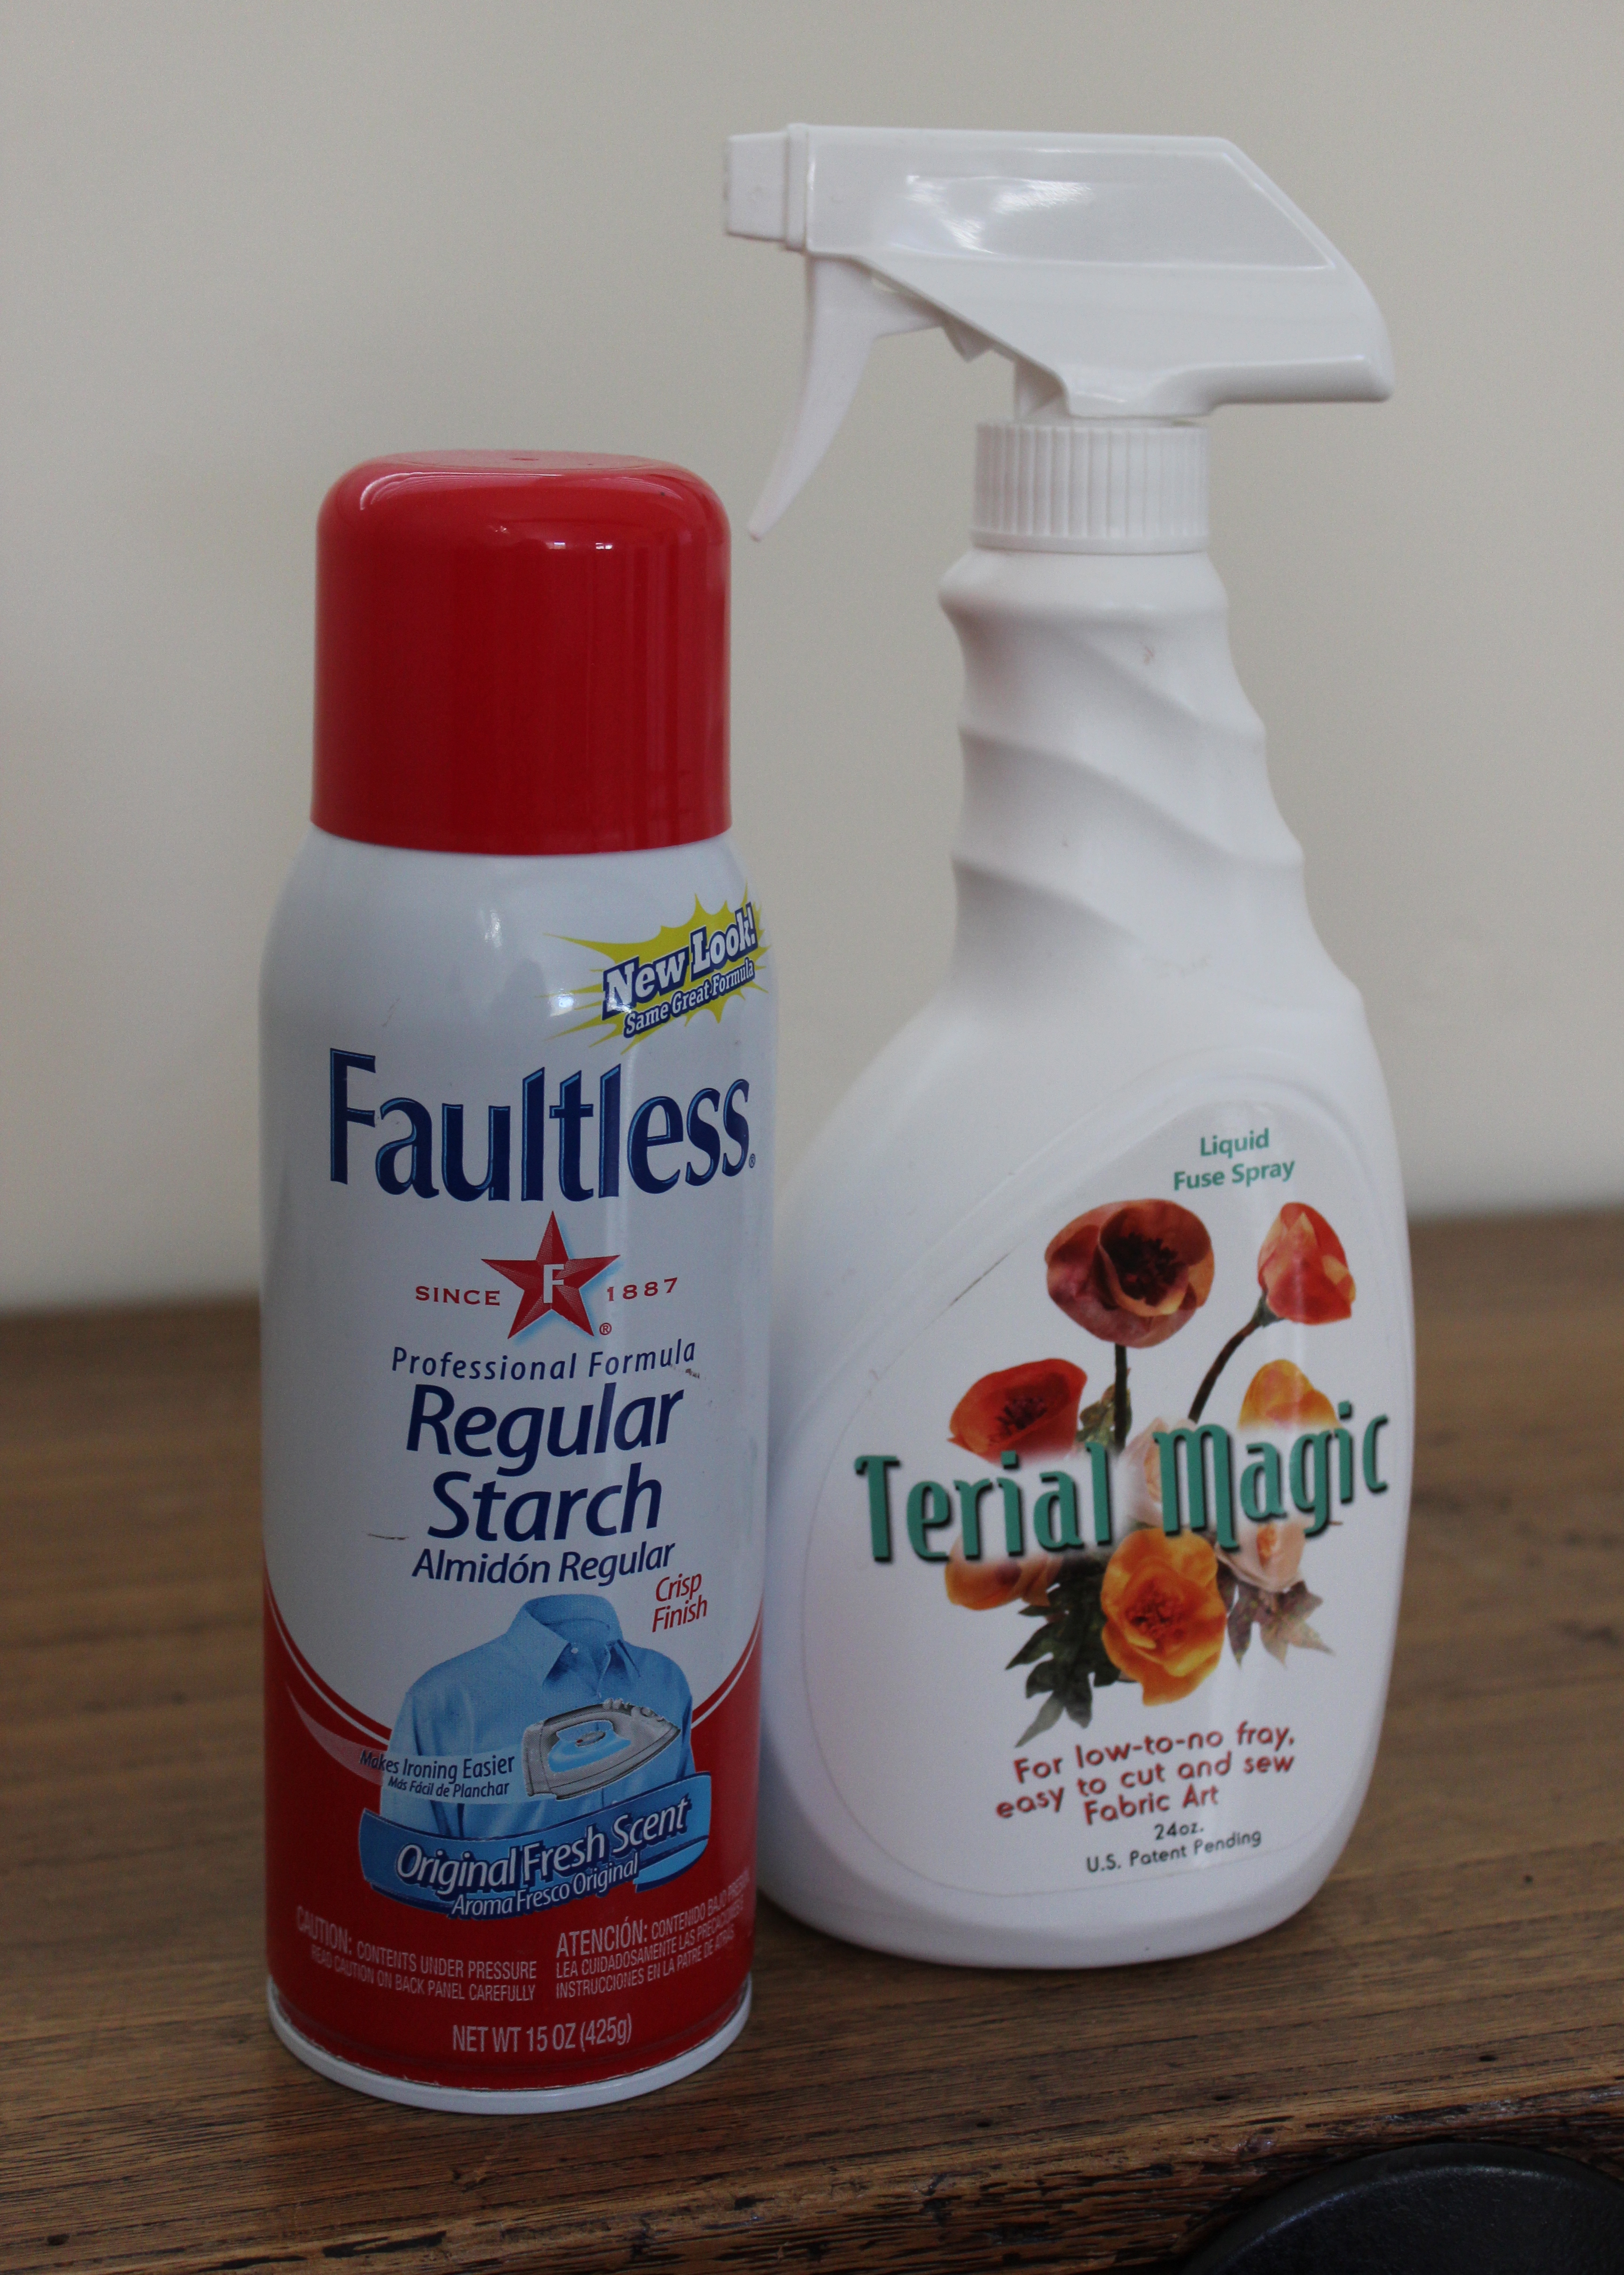
For the first step, fully soak your linen in a big bowl. Make sure all the fabric is saturated. Next, air dry the fabric until completely dry and then steam iron it. (I have used both the spray starch and the Terial Magic and they work equally well.)
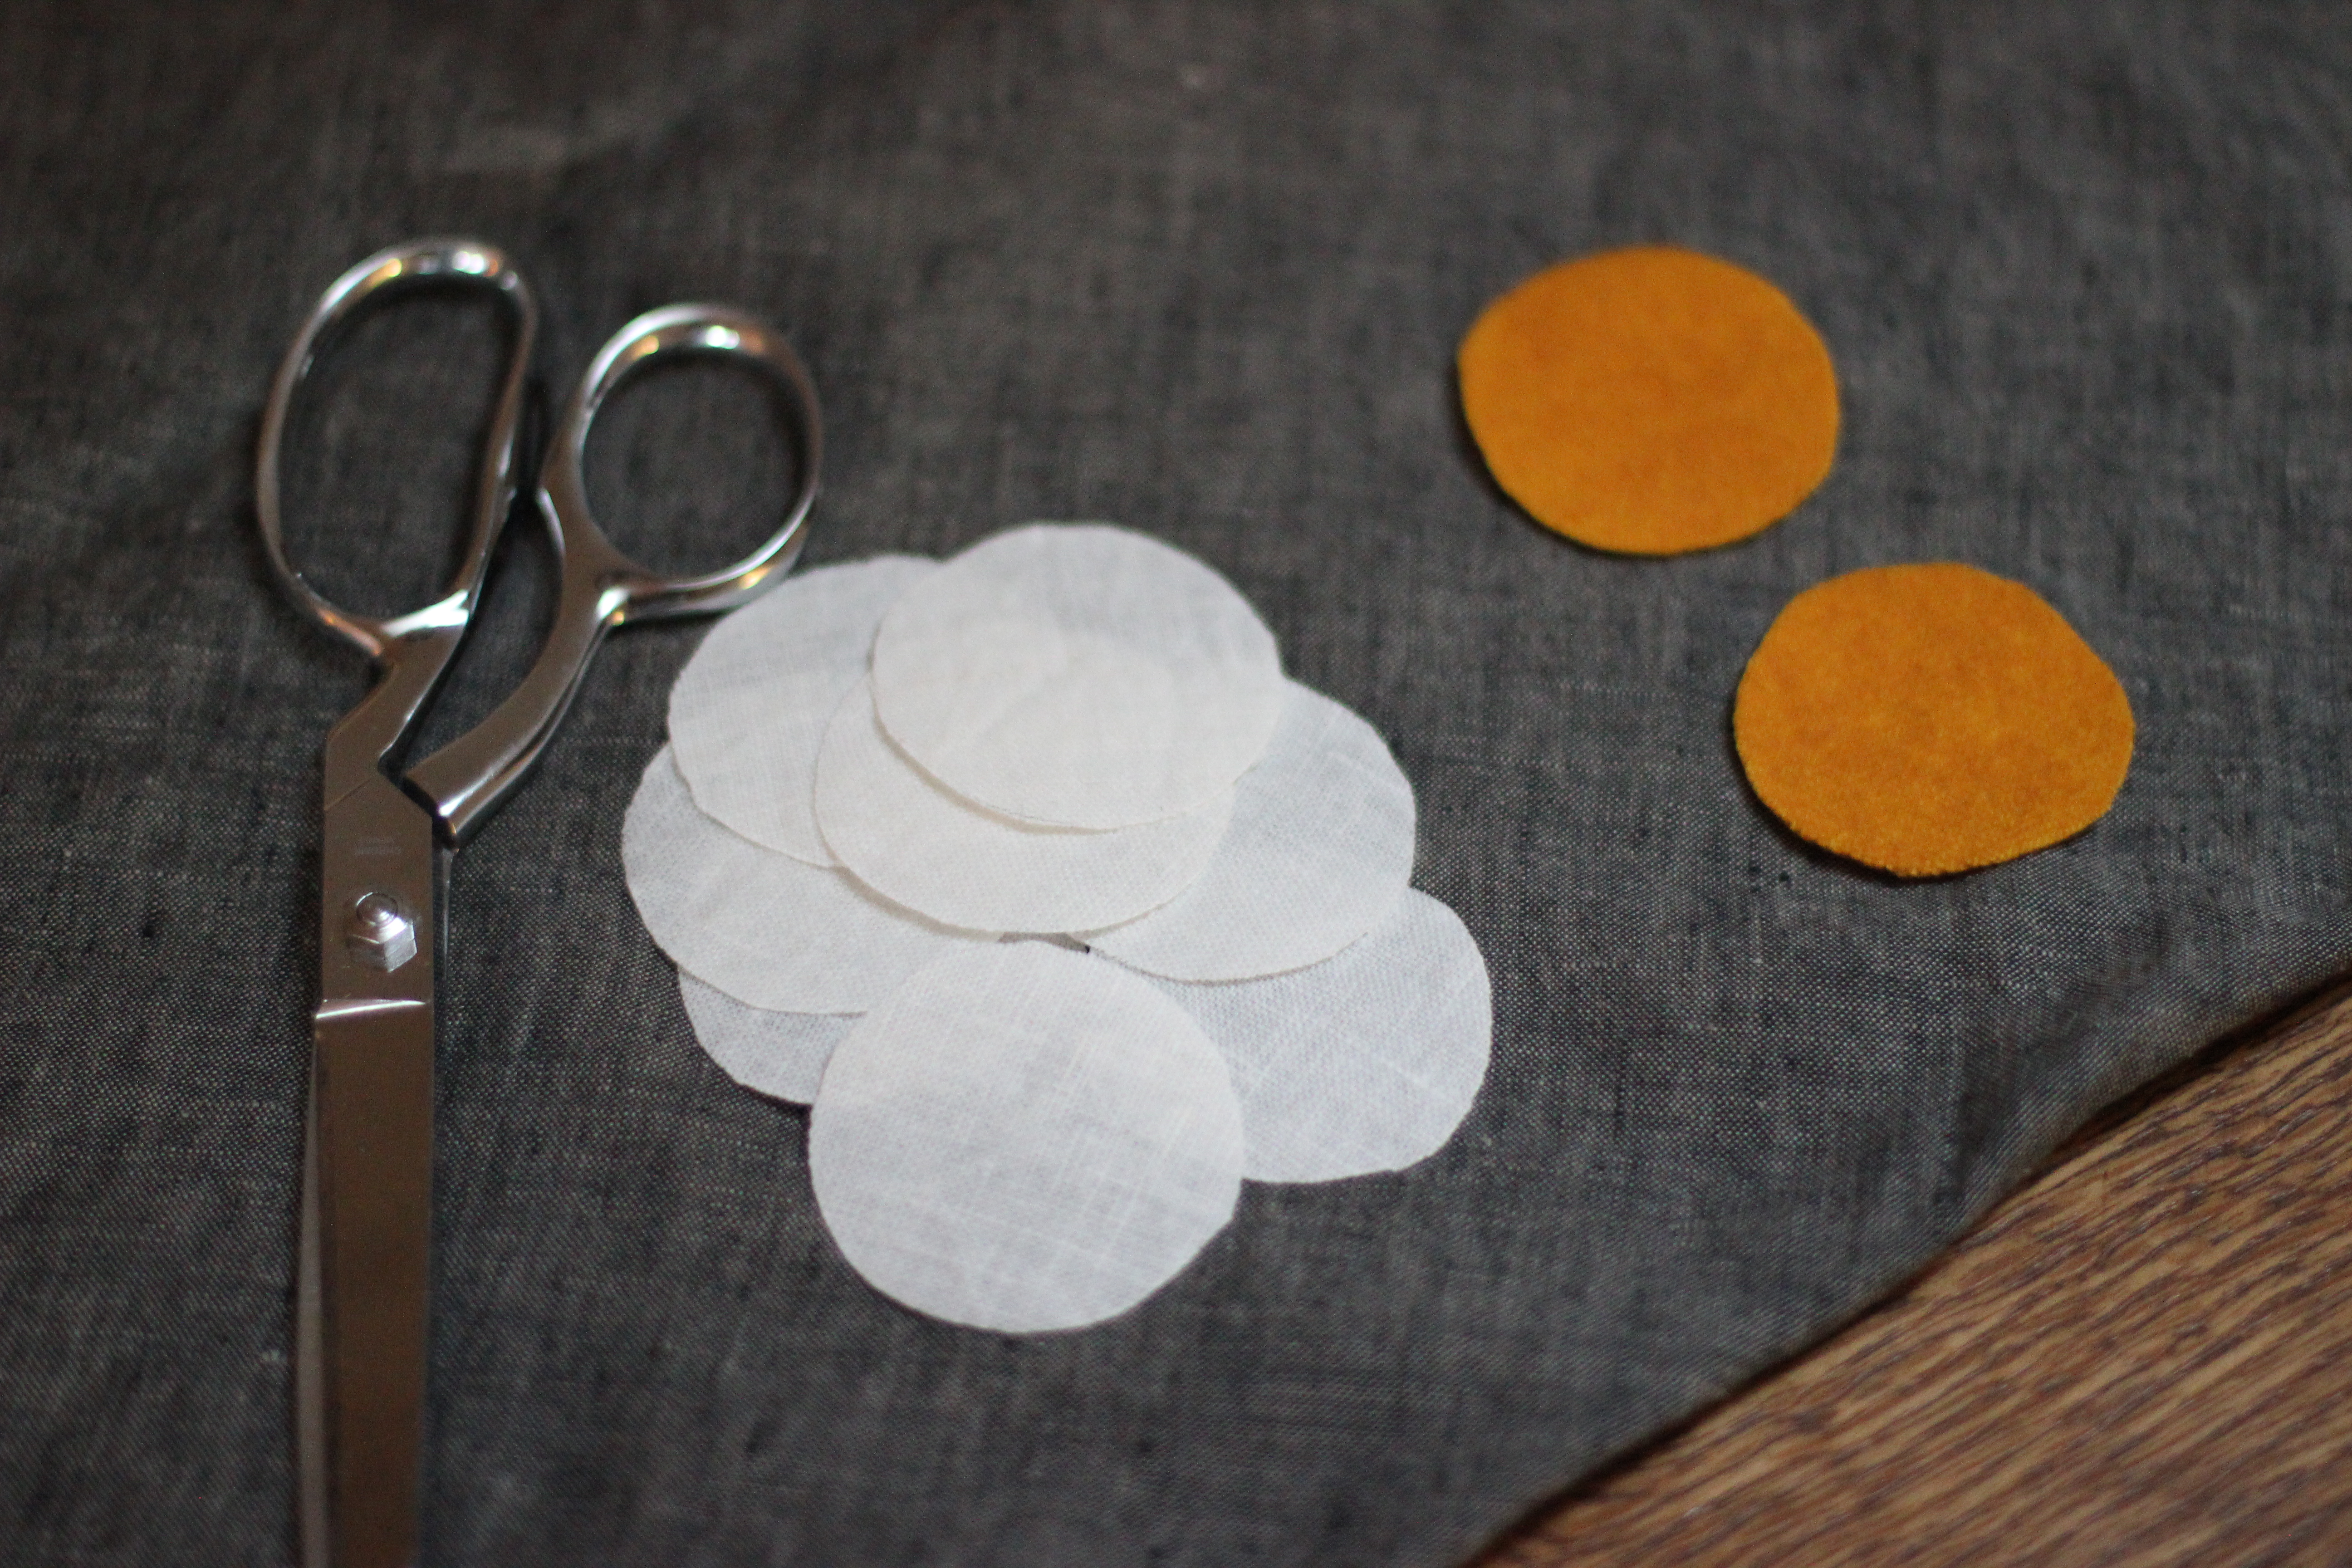
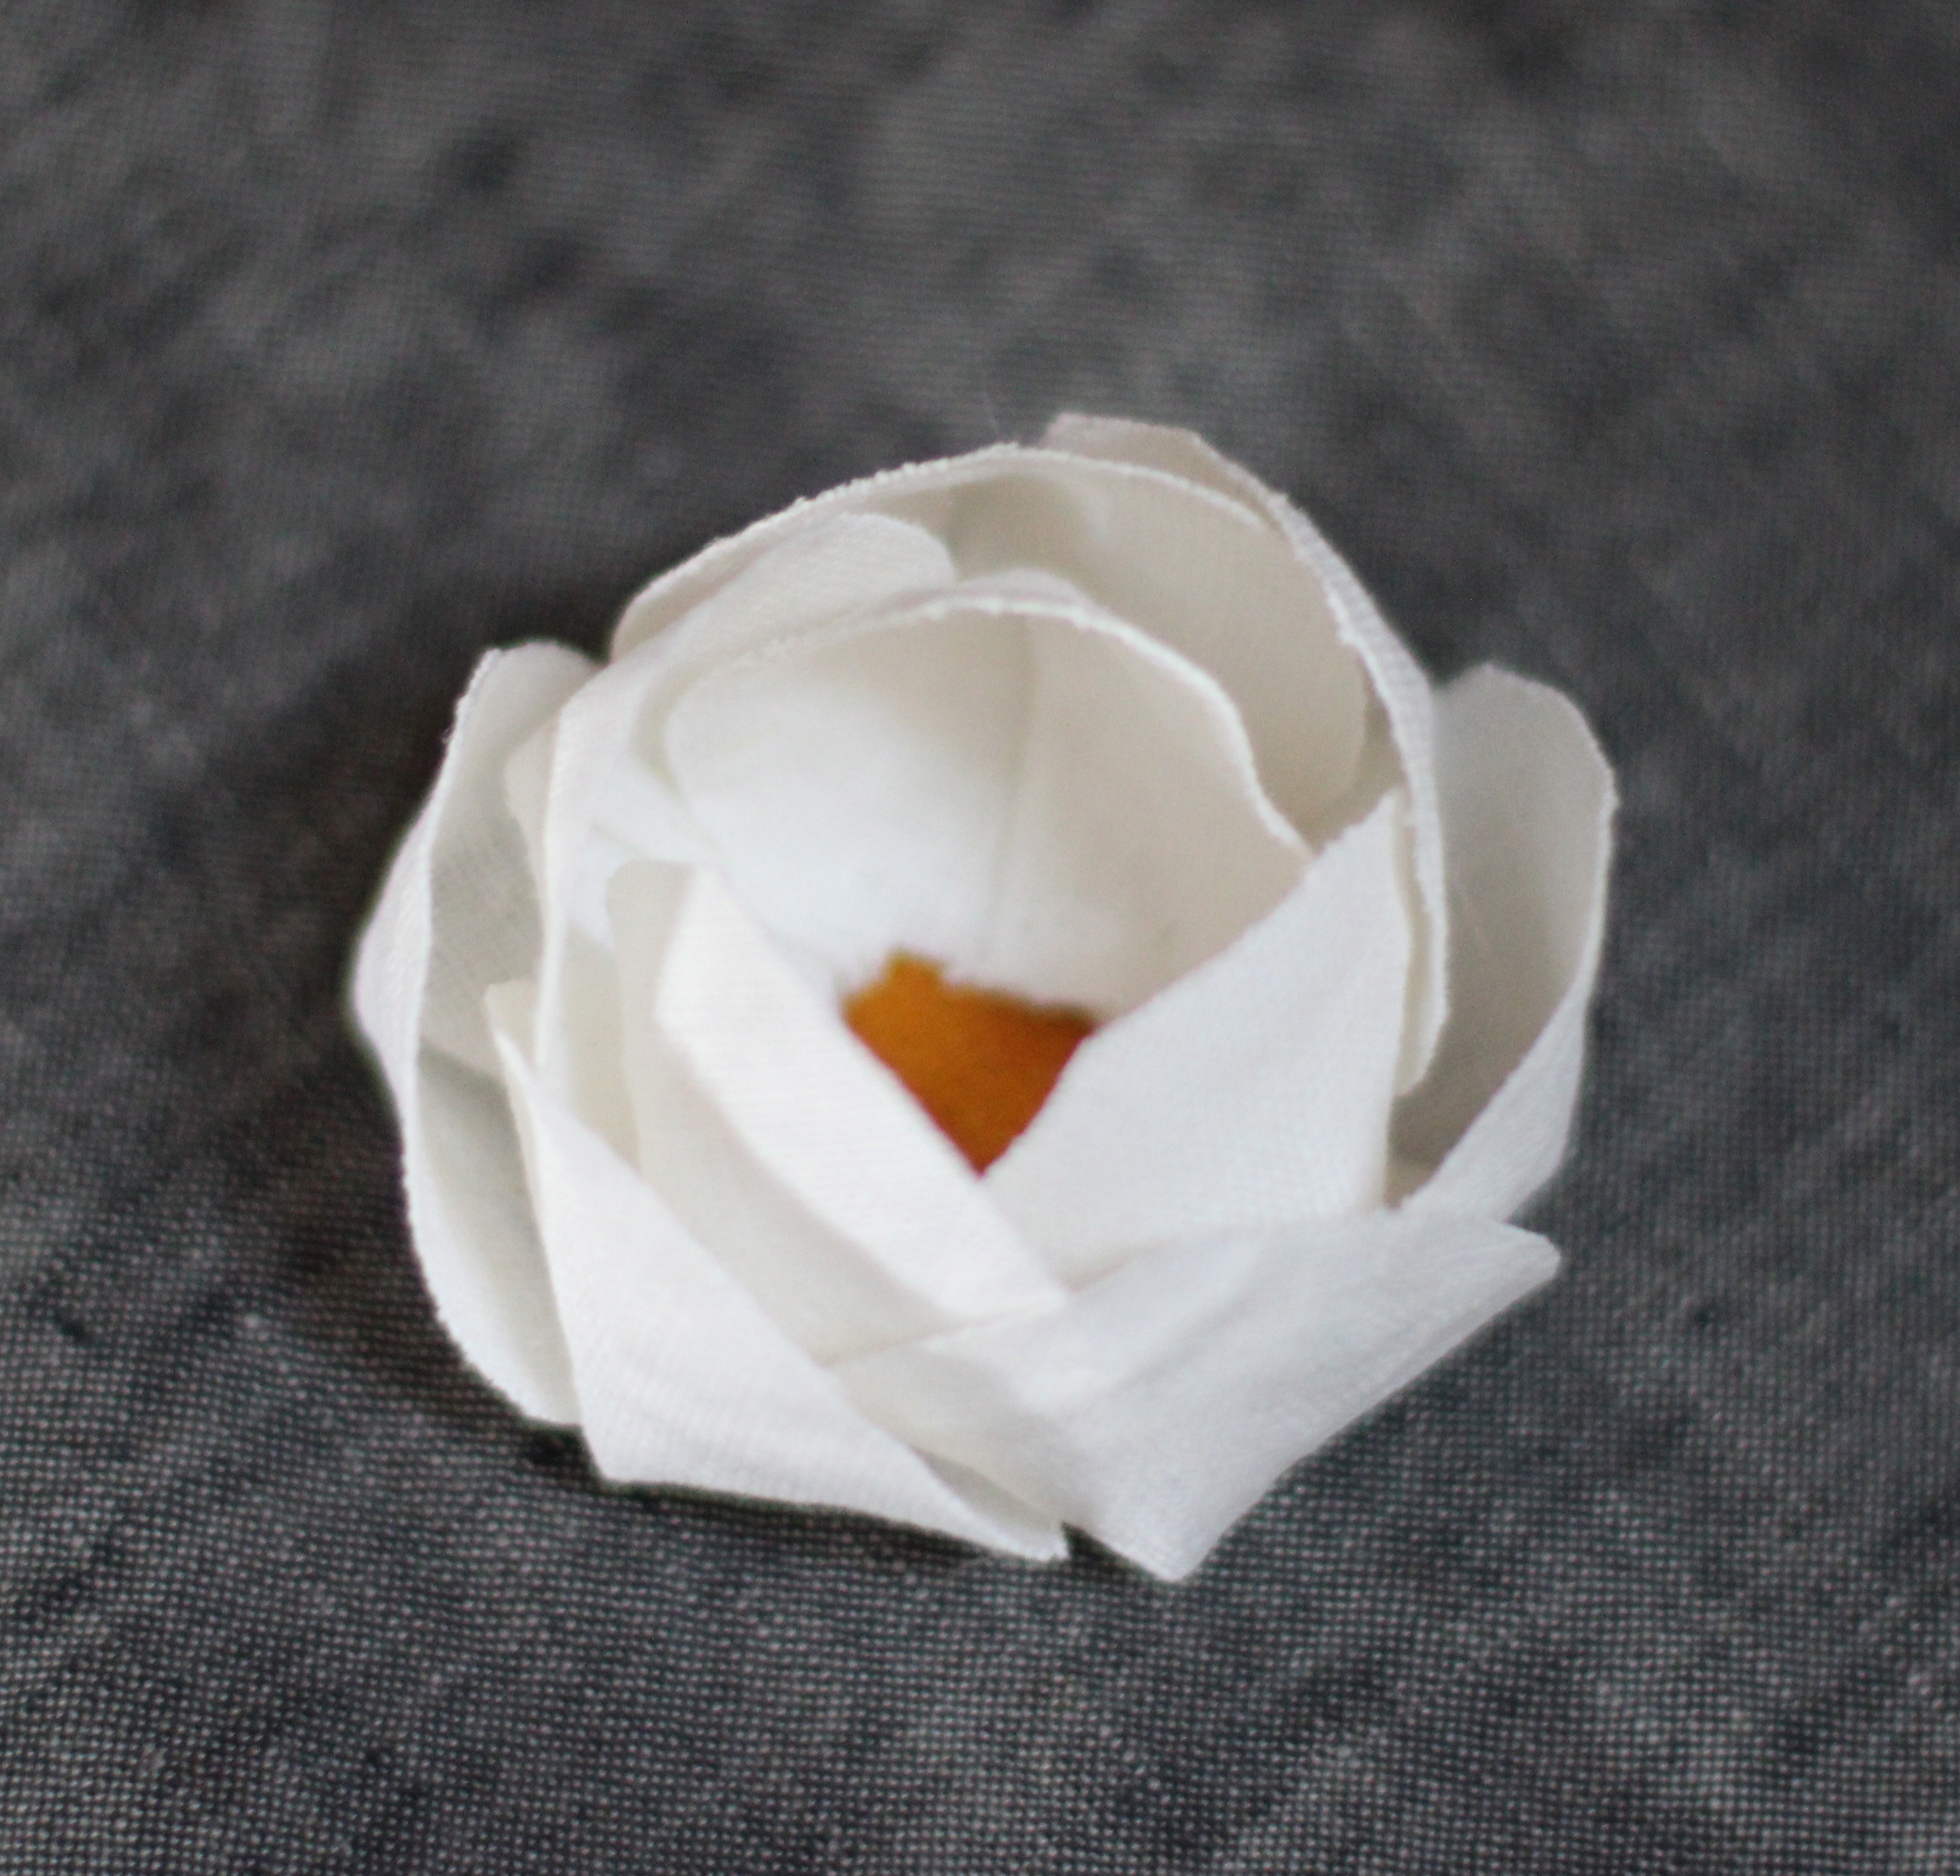
Next cut 10, 2 inch circular pieces of linen and 2, 2 inch circular pieces of the felted wool. (I tended with more attempts at this to trim the wool pieces a bit so they didn’t show through the side of the flower).
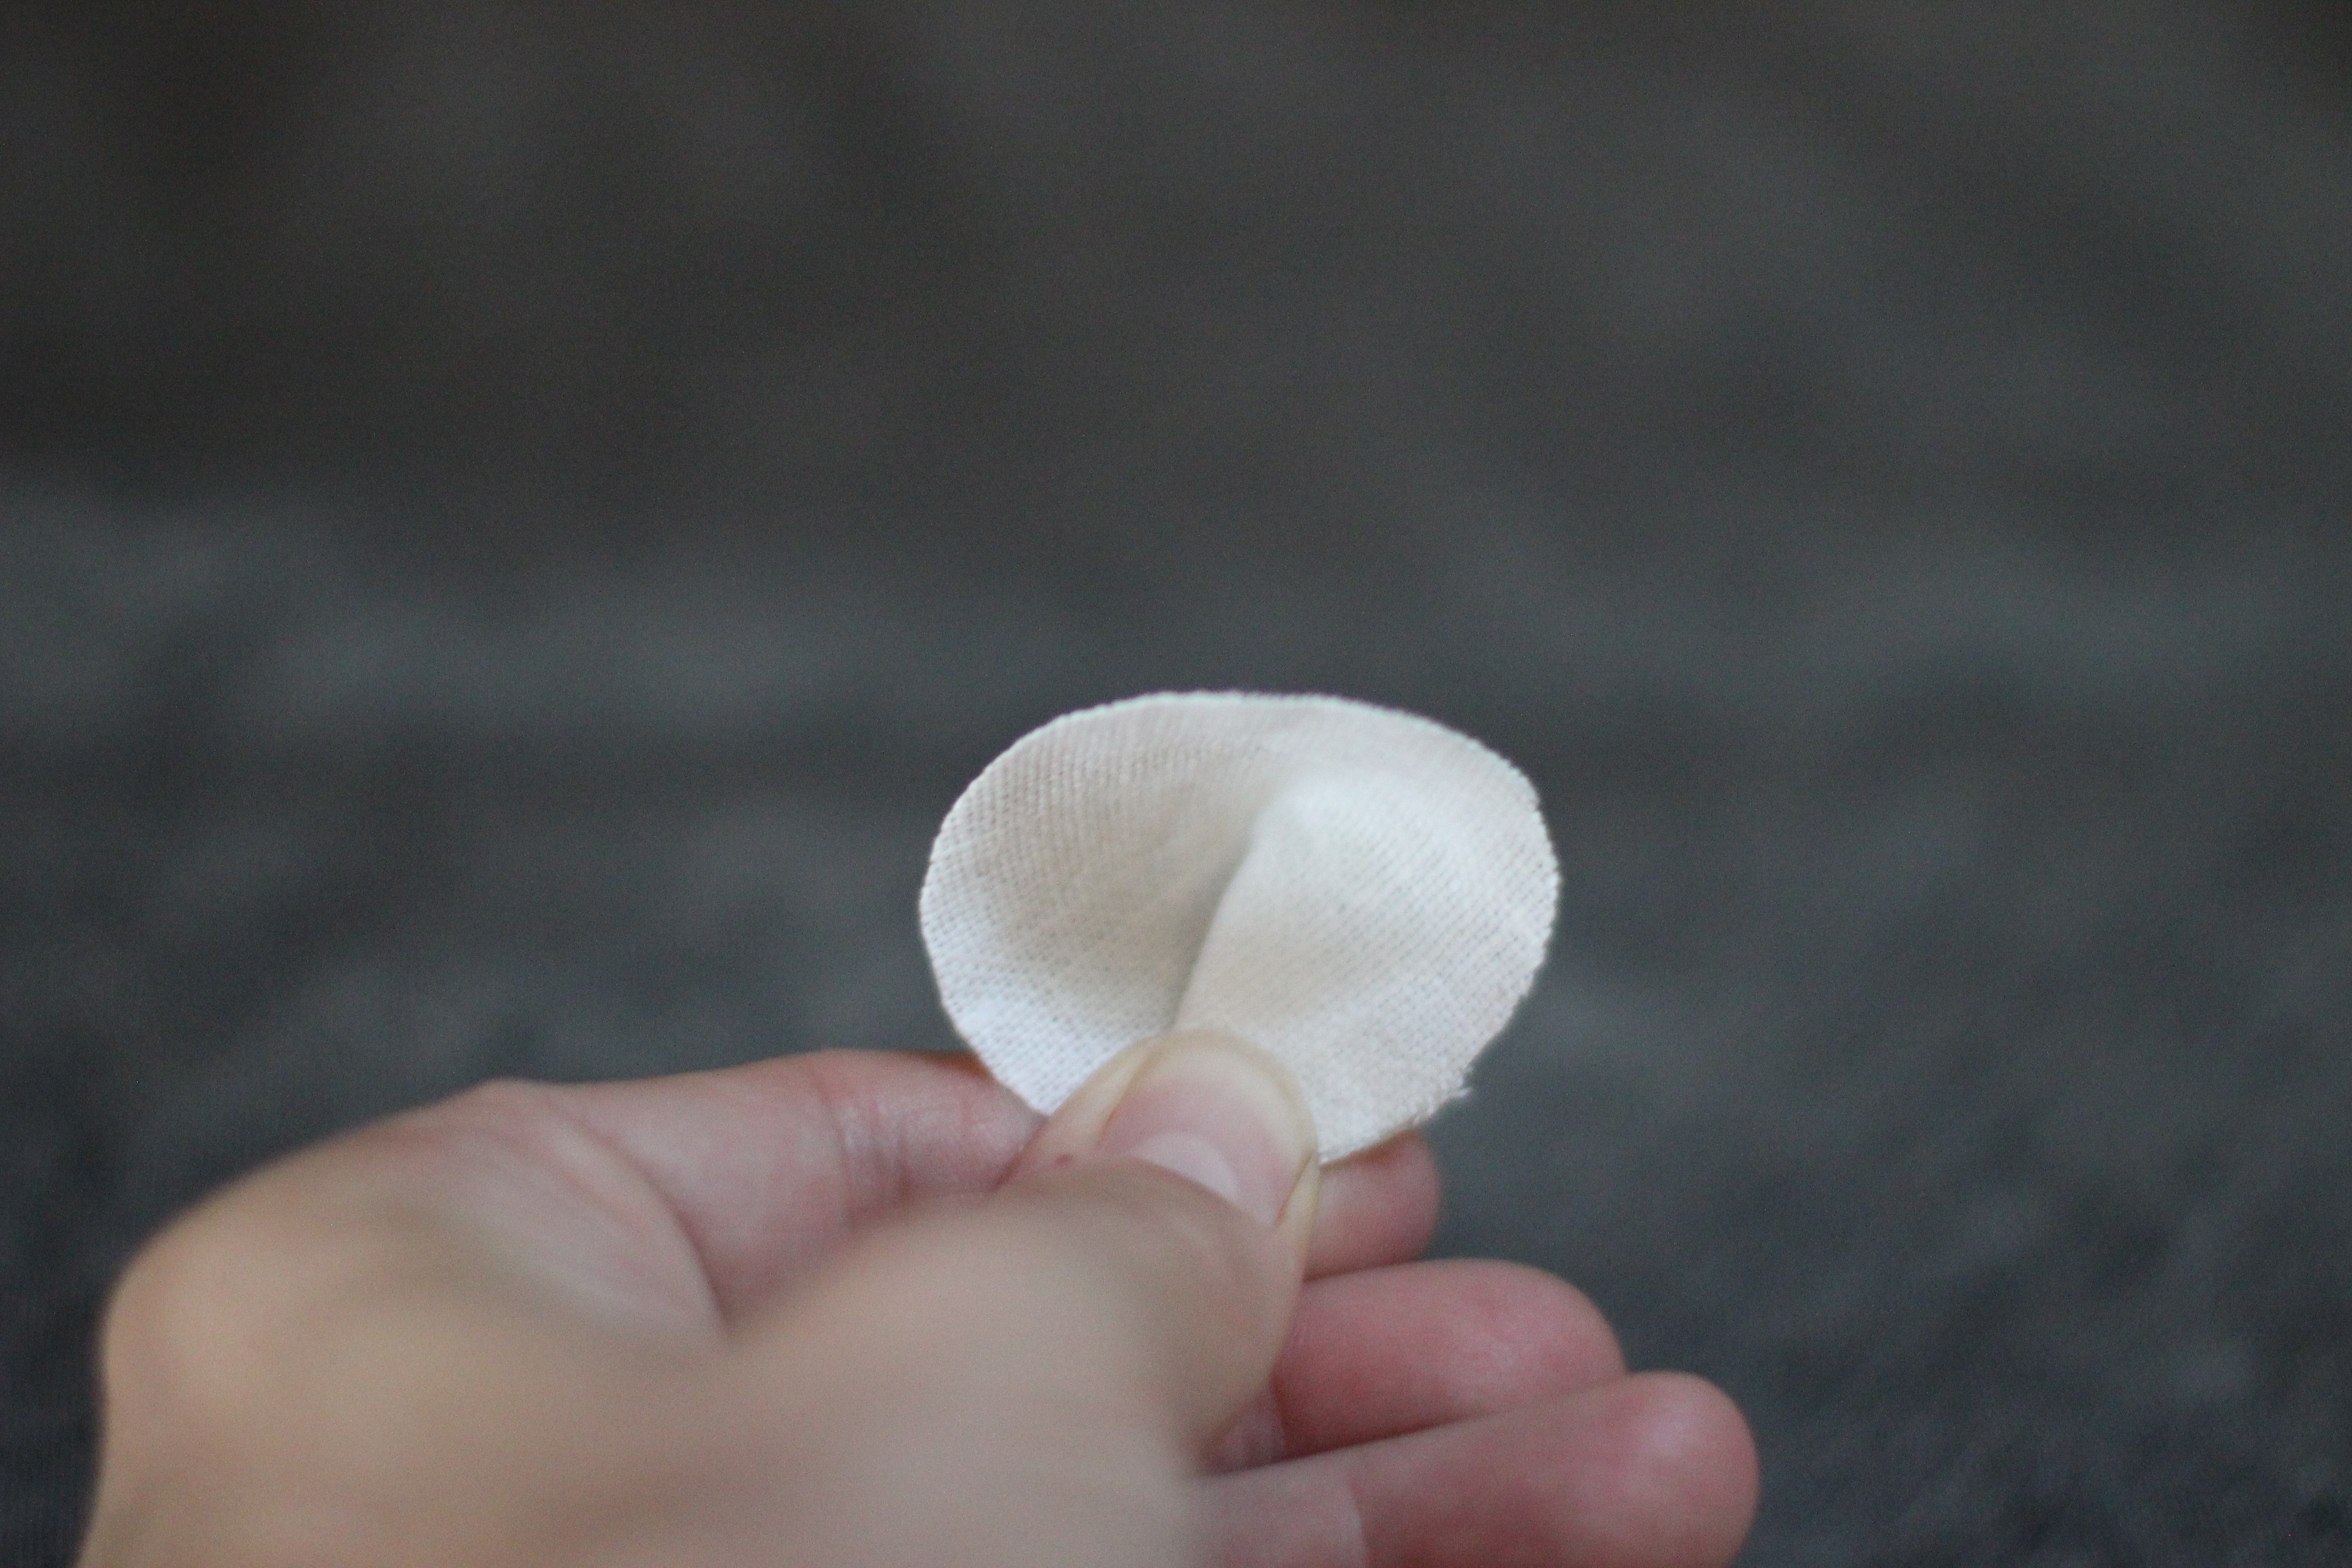
Next fold each linen piece as shown and begin hand sewing to one of the felted wool pieces. Add additional petals in the same manner overlapping each piece.
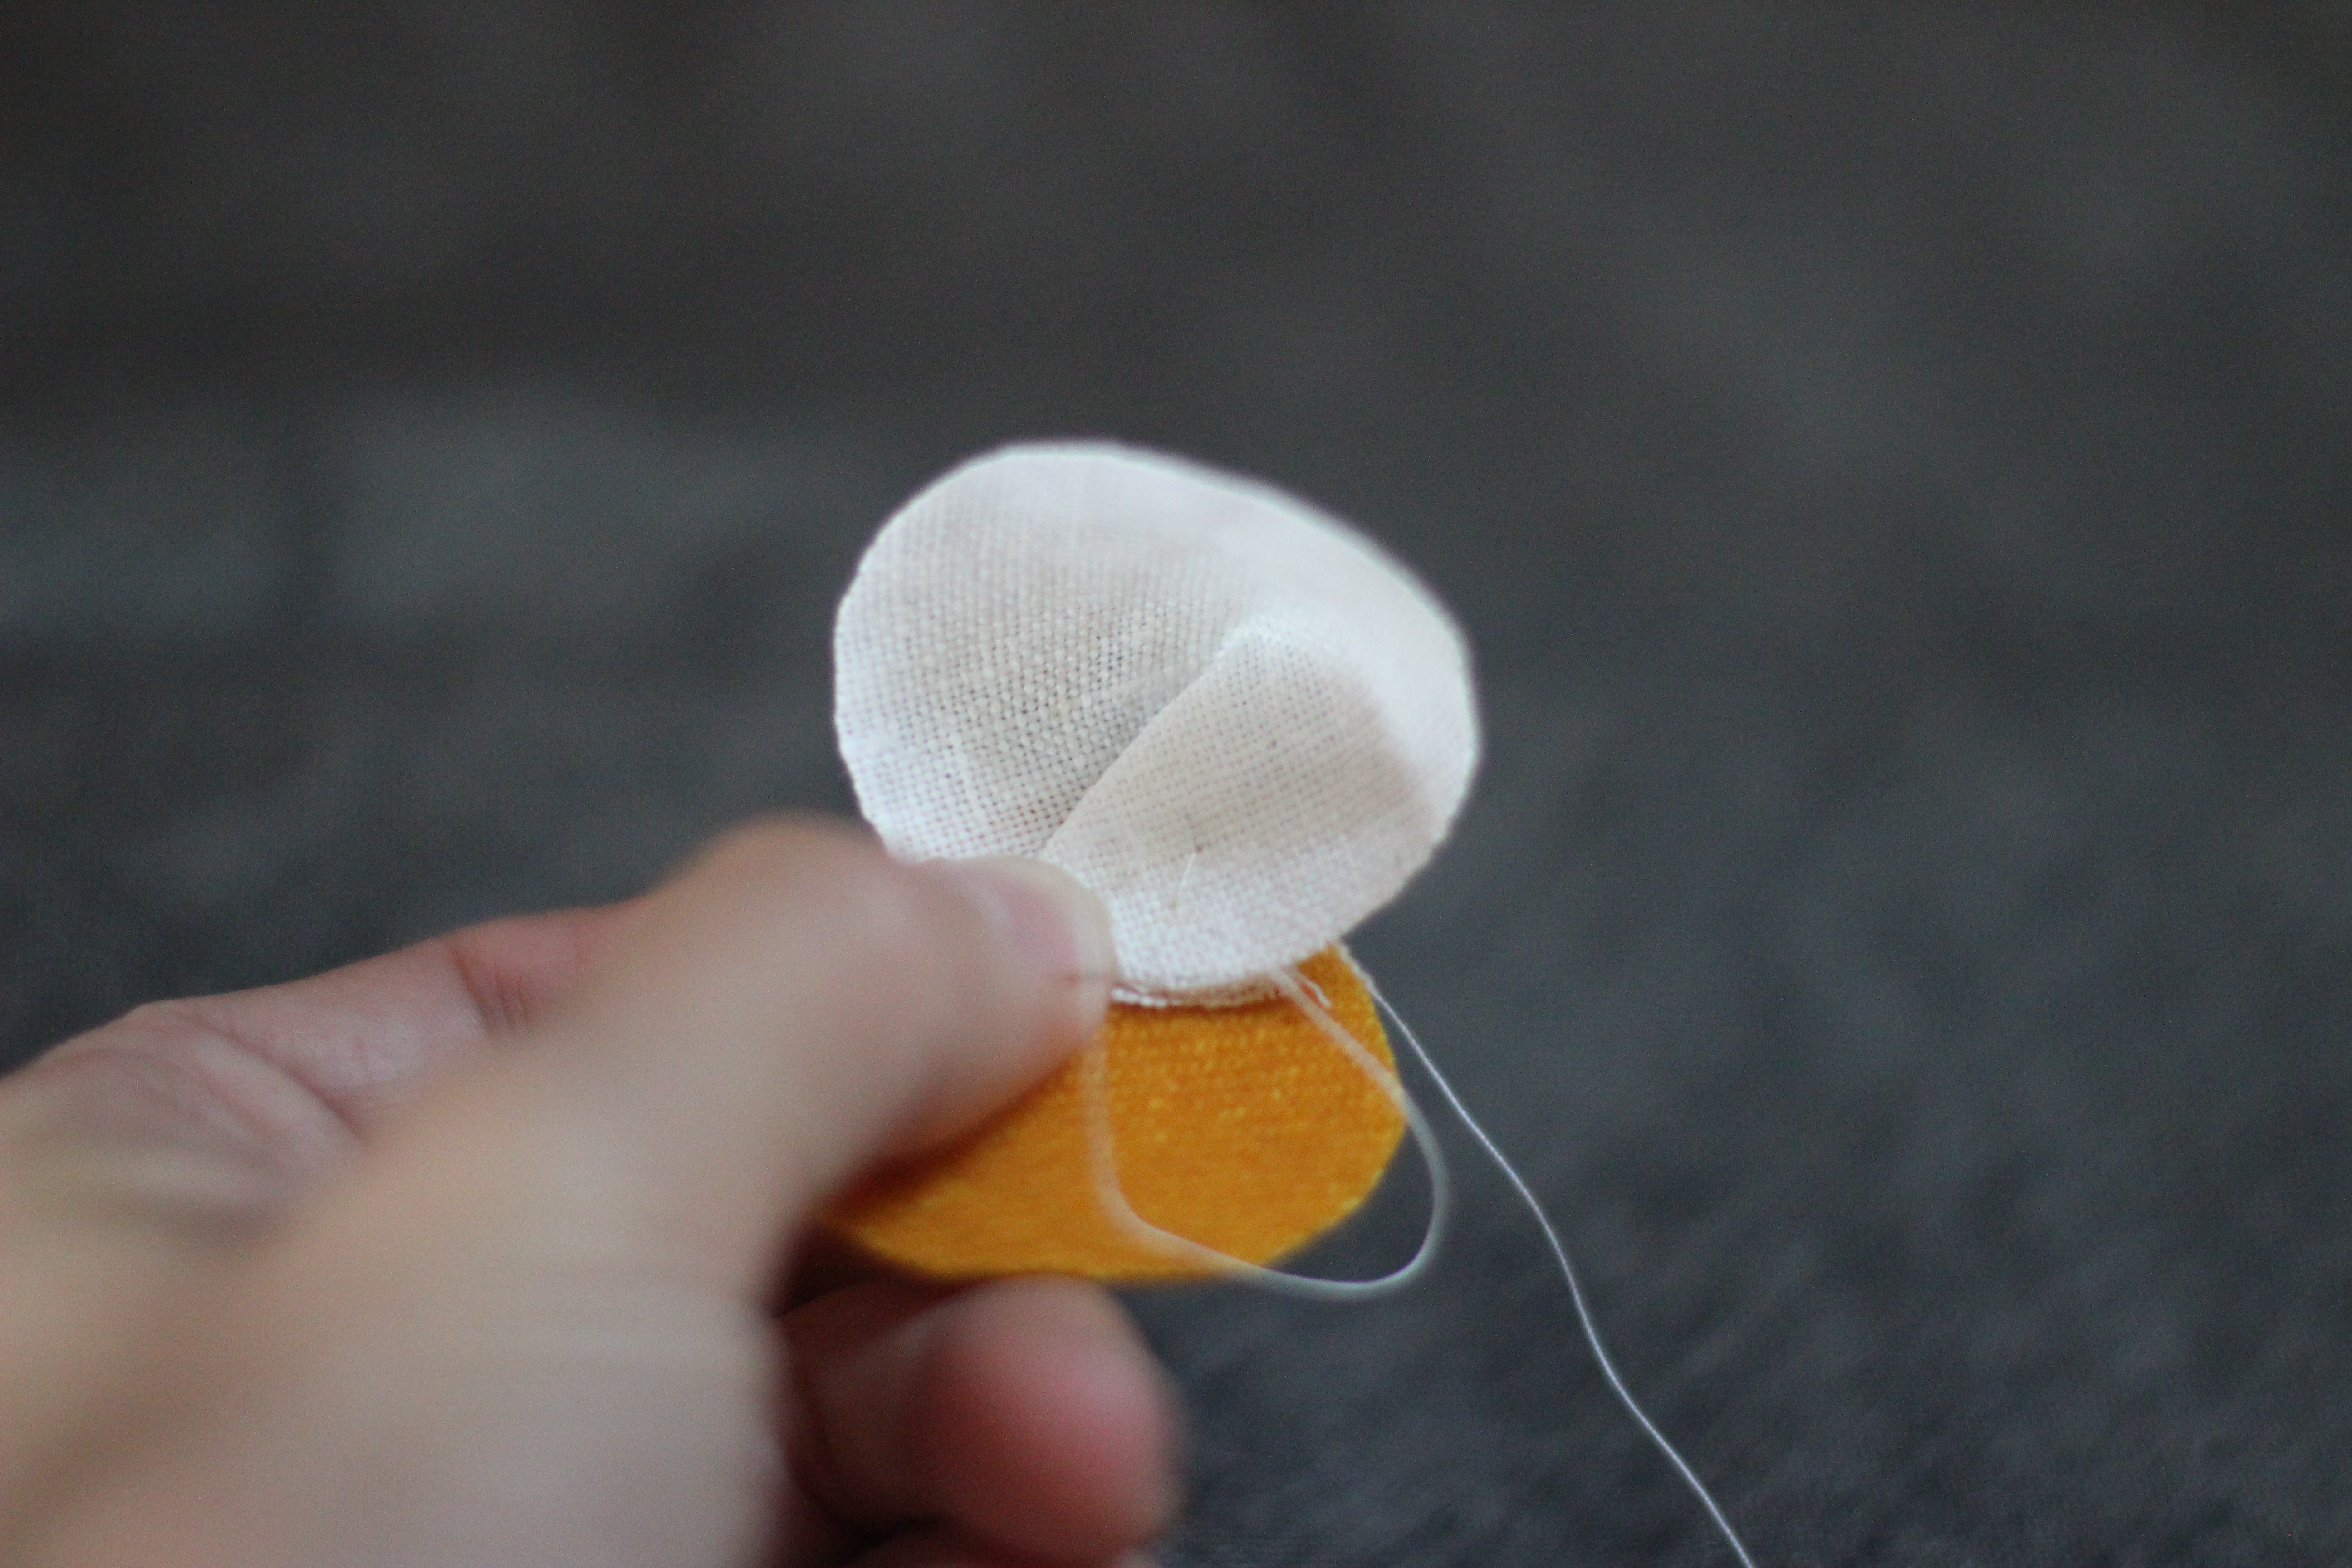
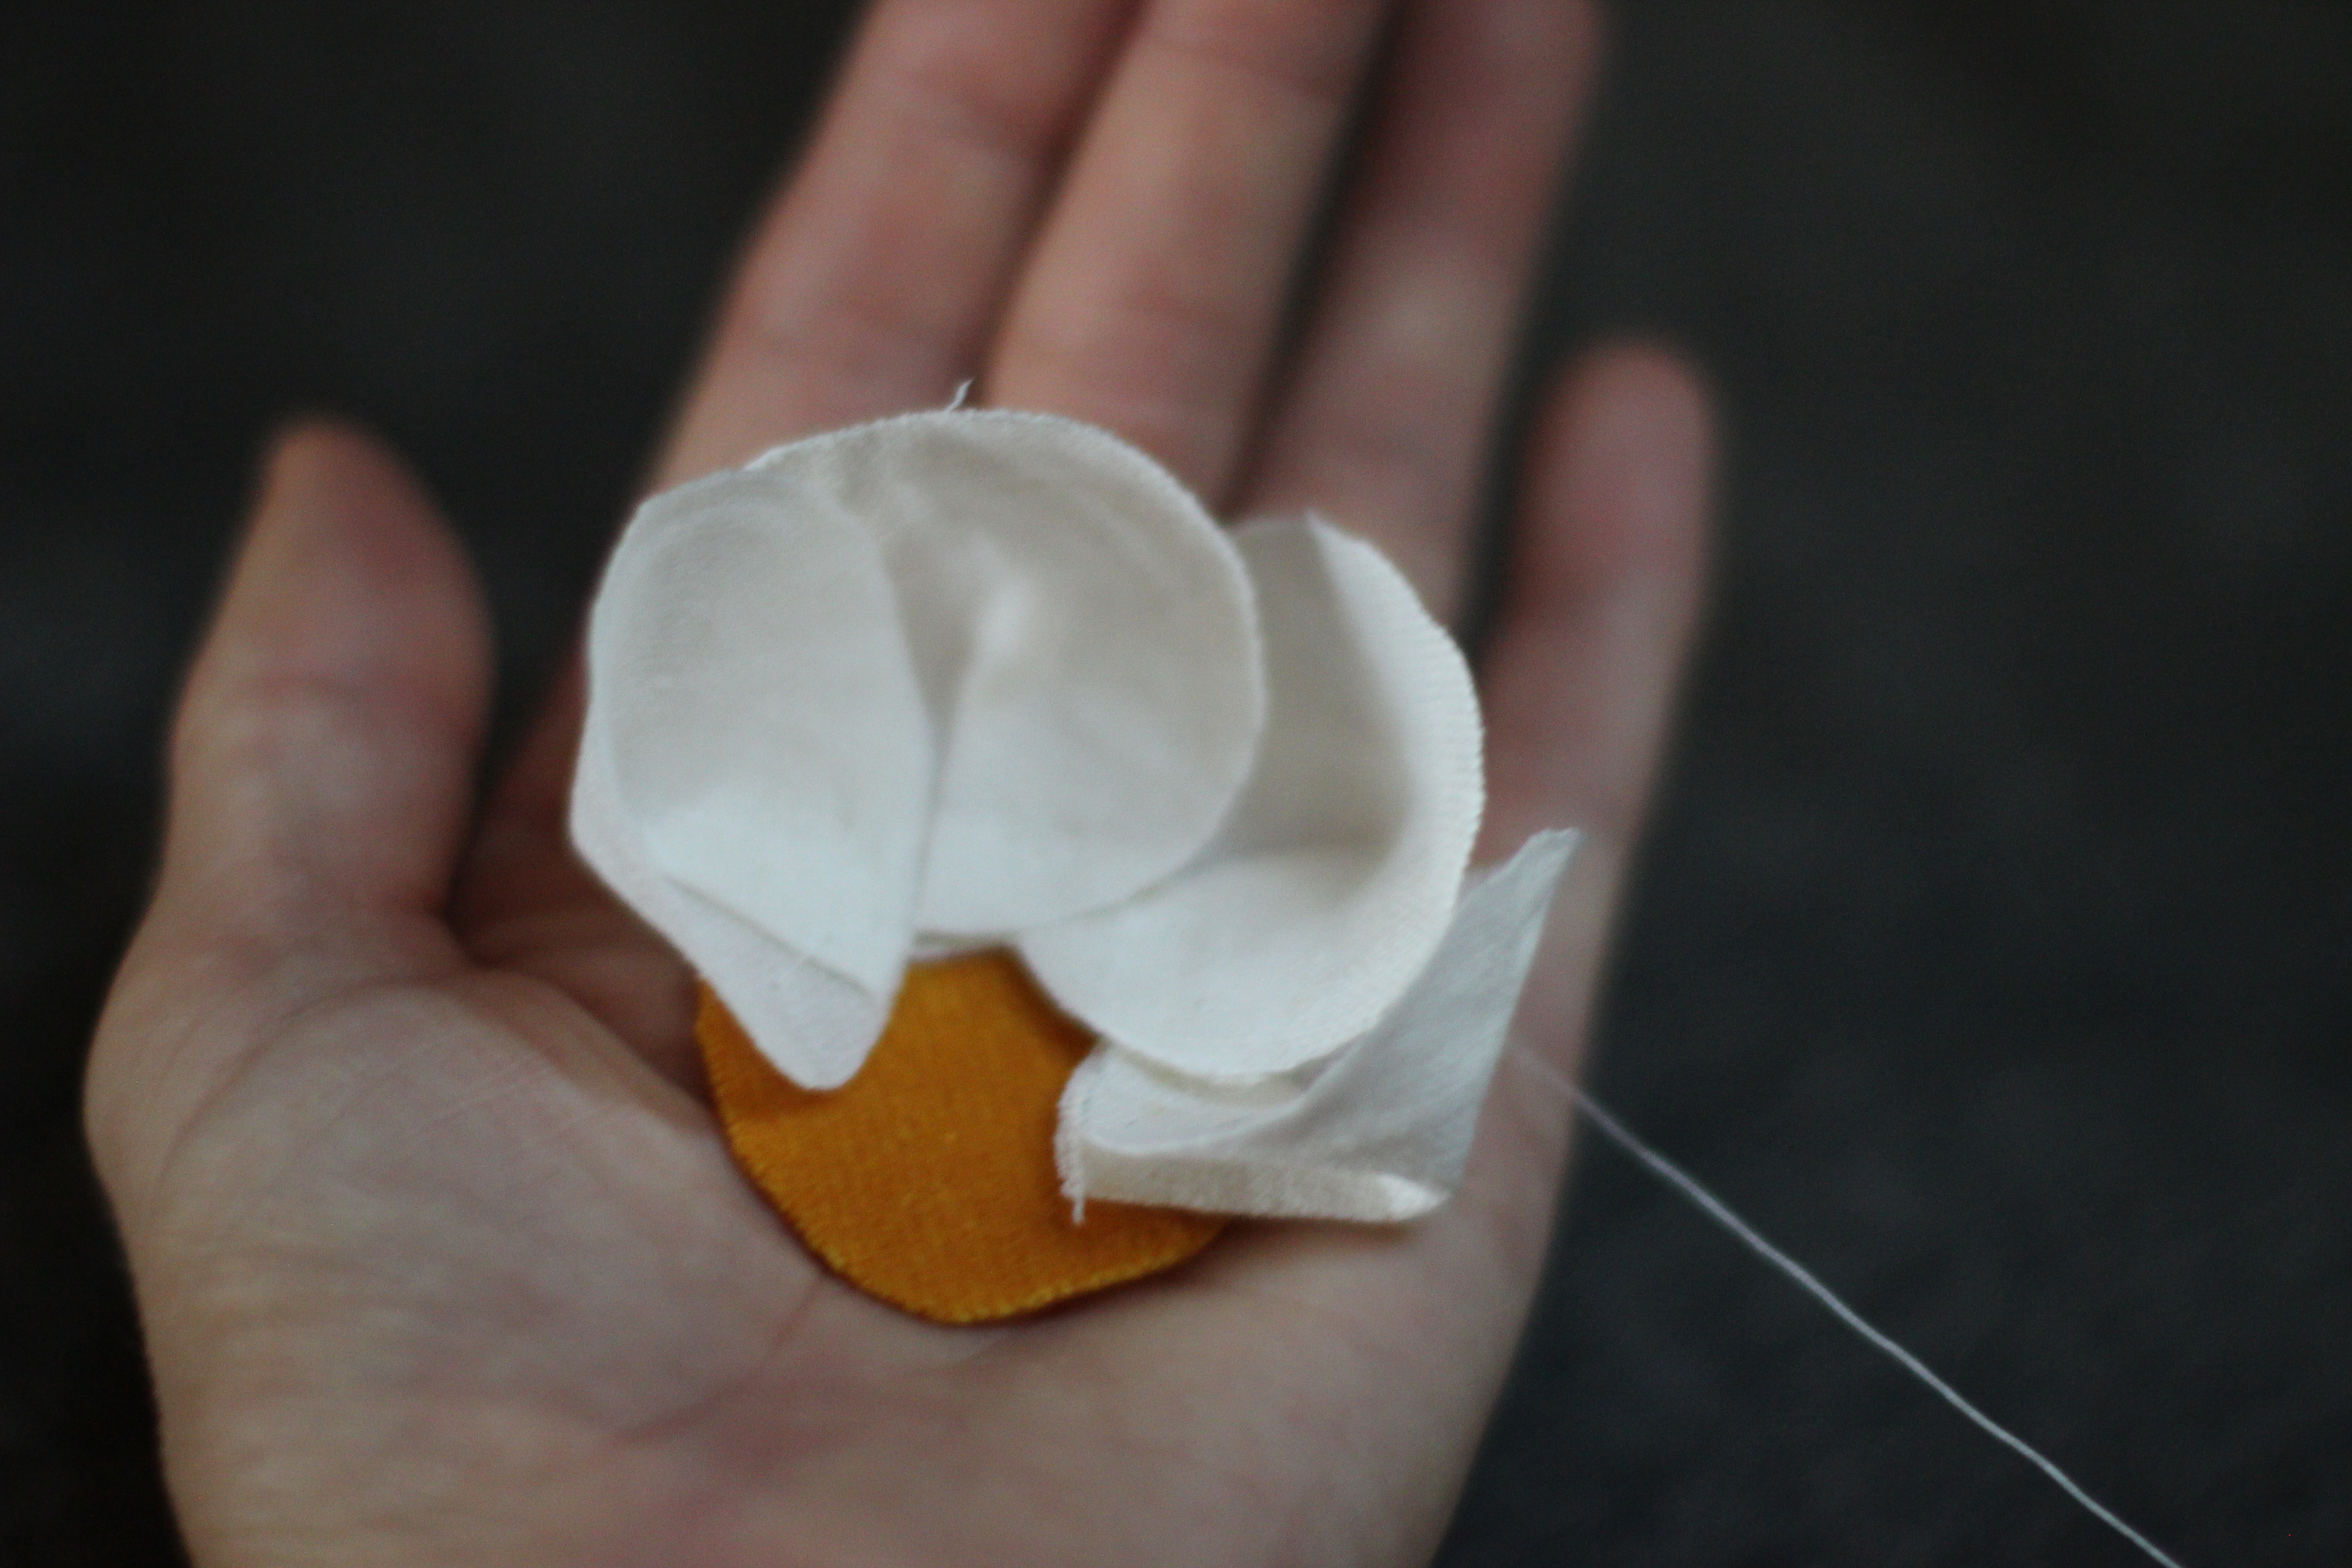
Continue to overlap the petals until there are two overlapping layers making sure to keep a center small circle of felt visible. In a short period of time you will end up with a linen rosebud.
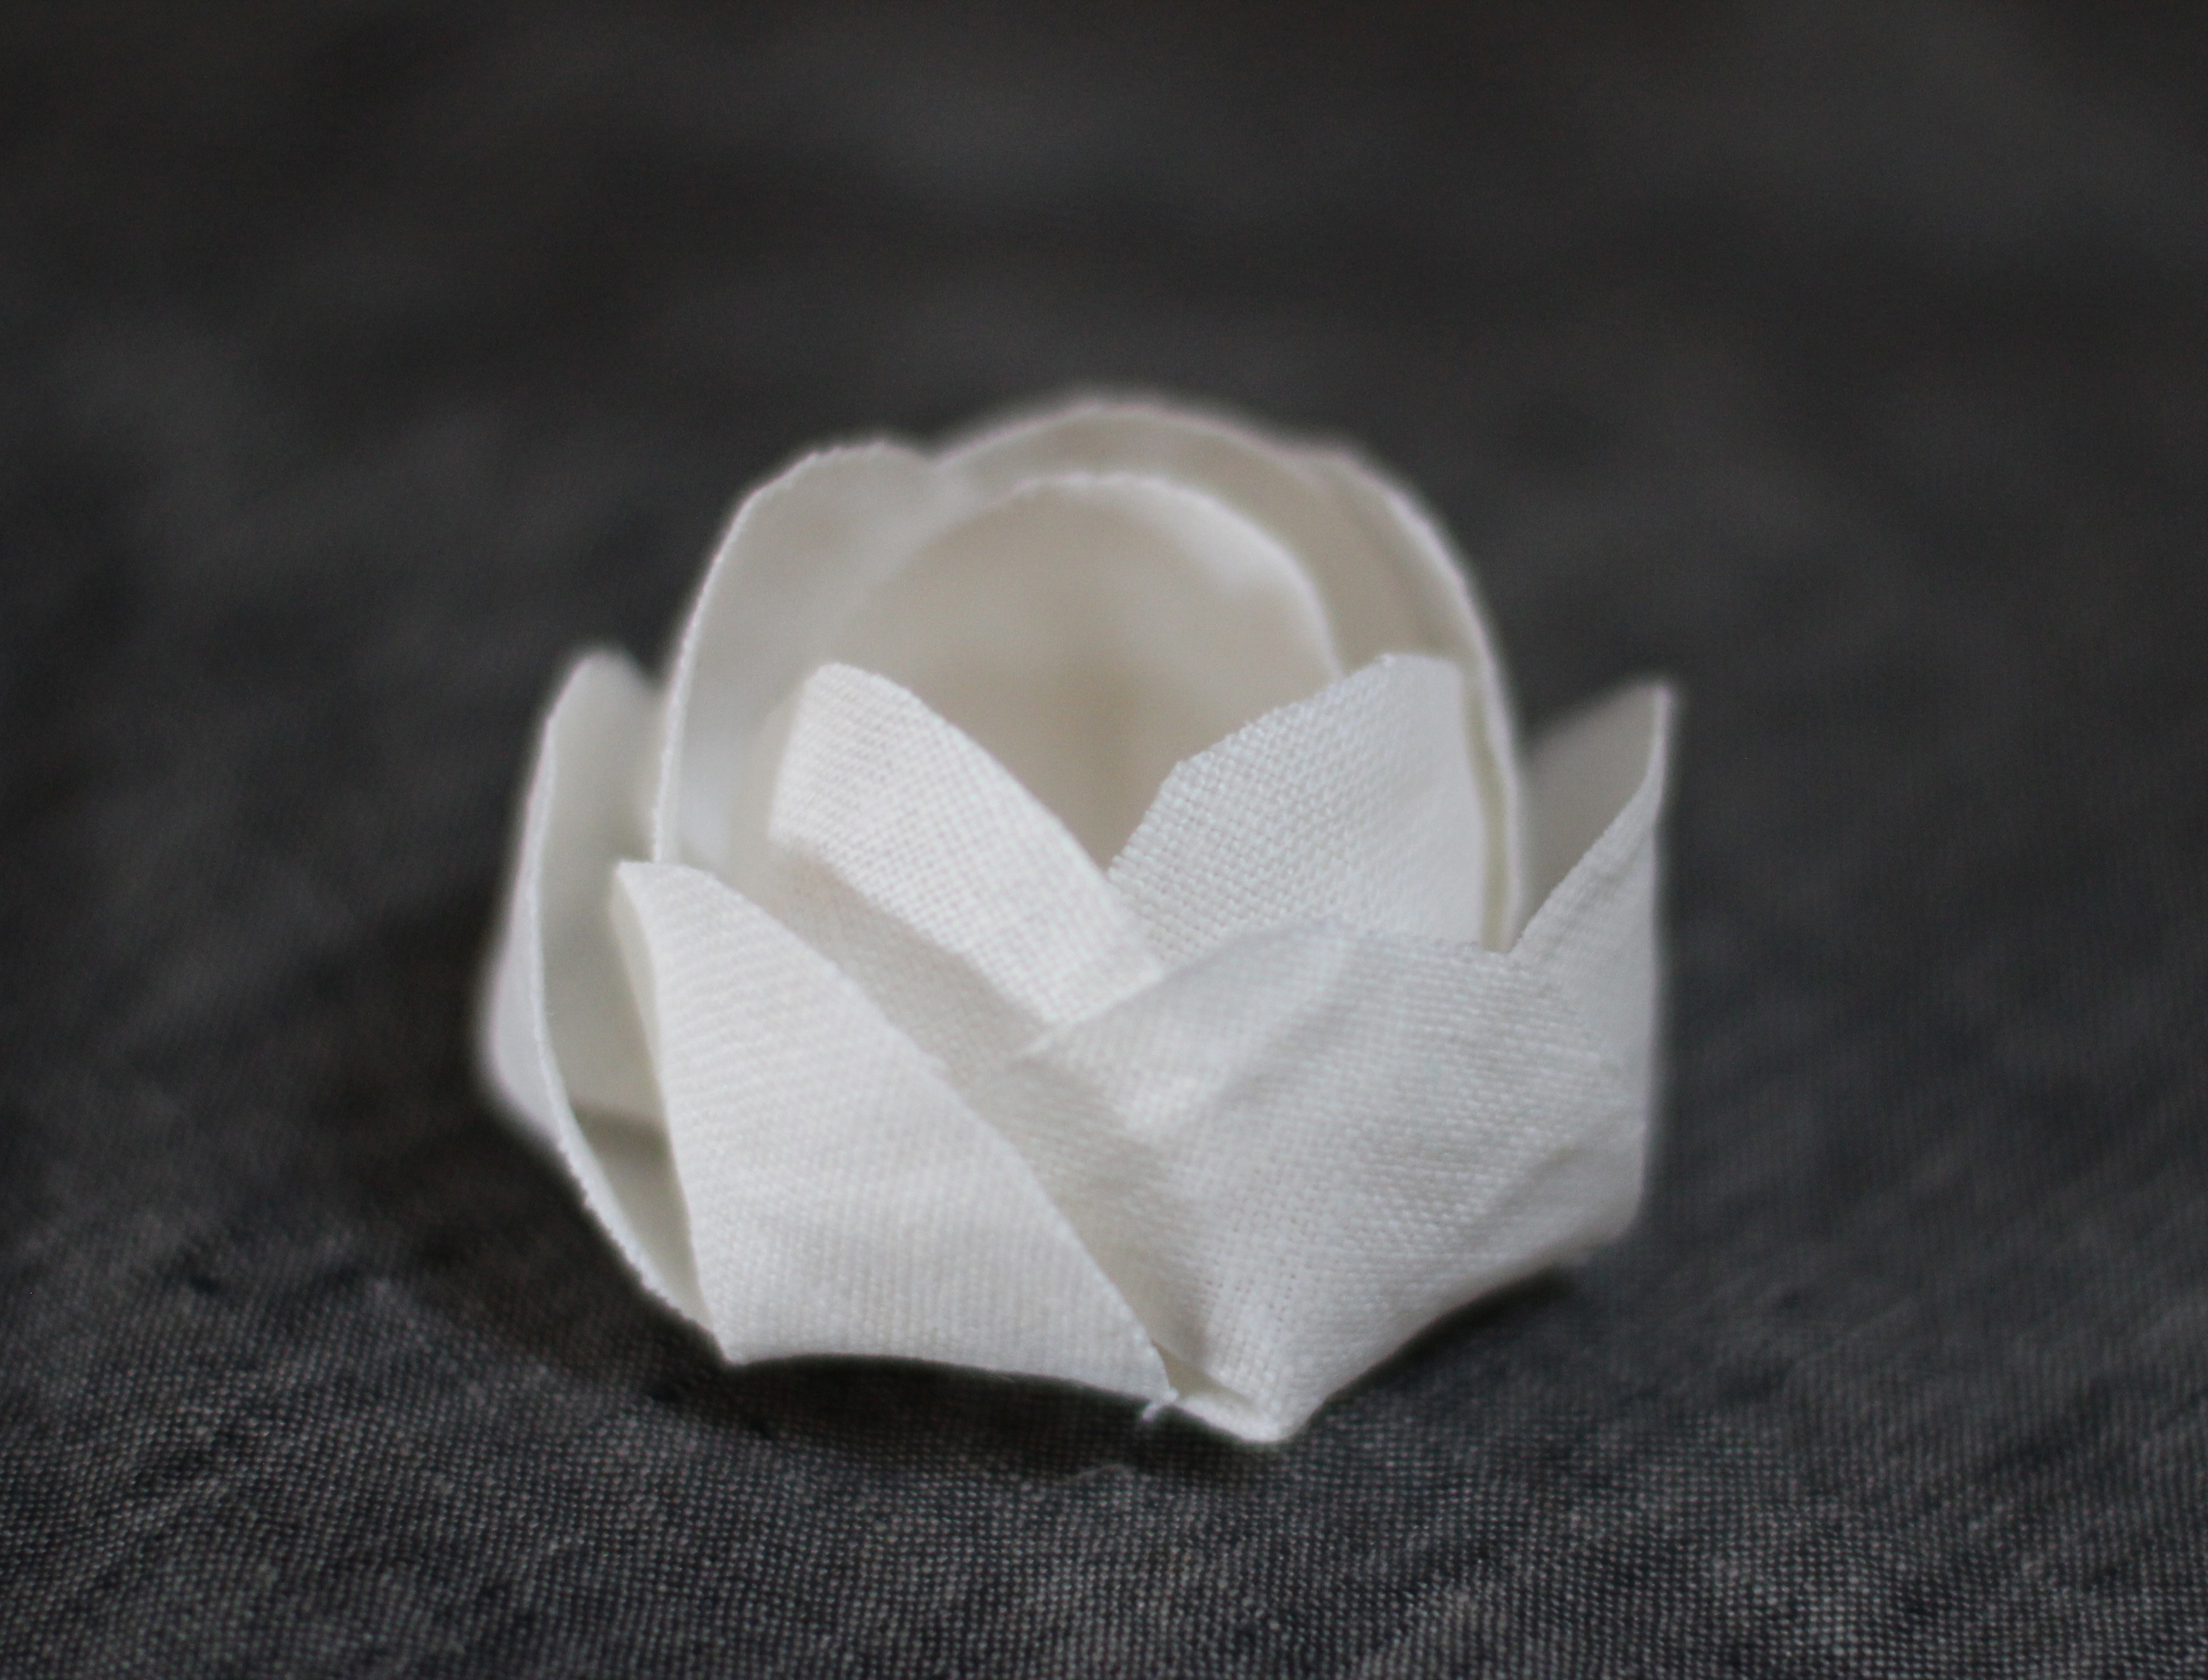
To complete the flower, attach a pin to the second piece of wool either by inserting it into the wool or by sewing it on and then use a glue gun to attach the second piece of felted wool to your flower.
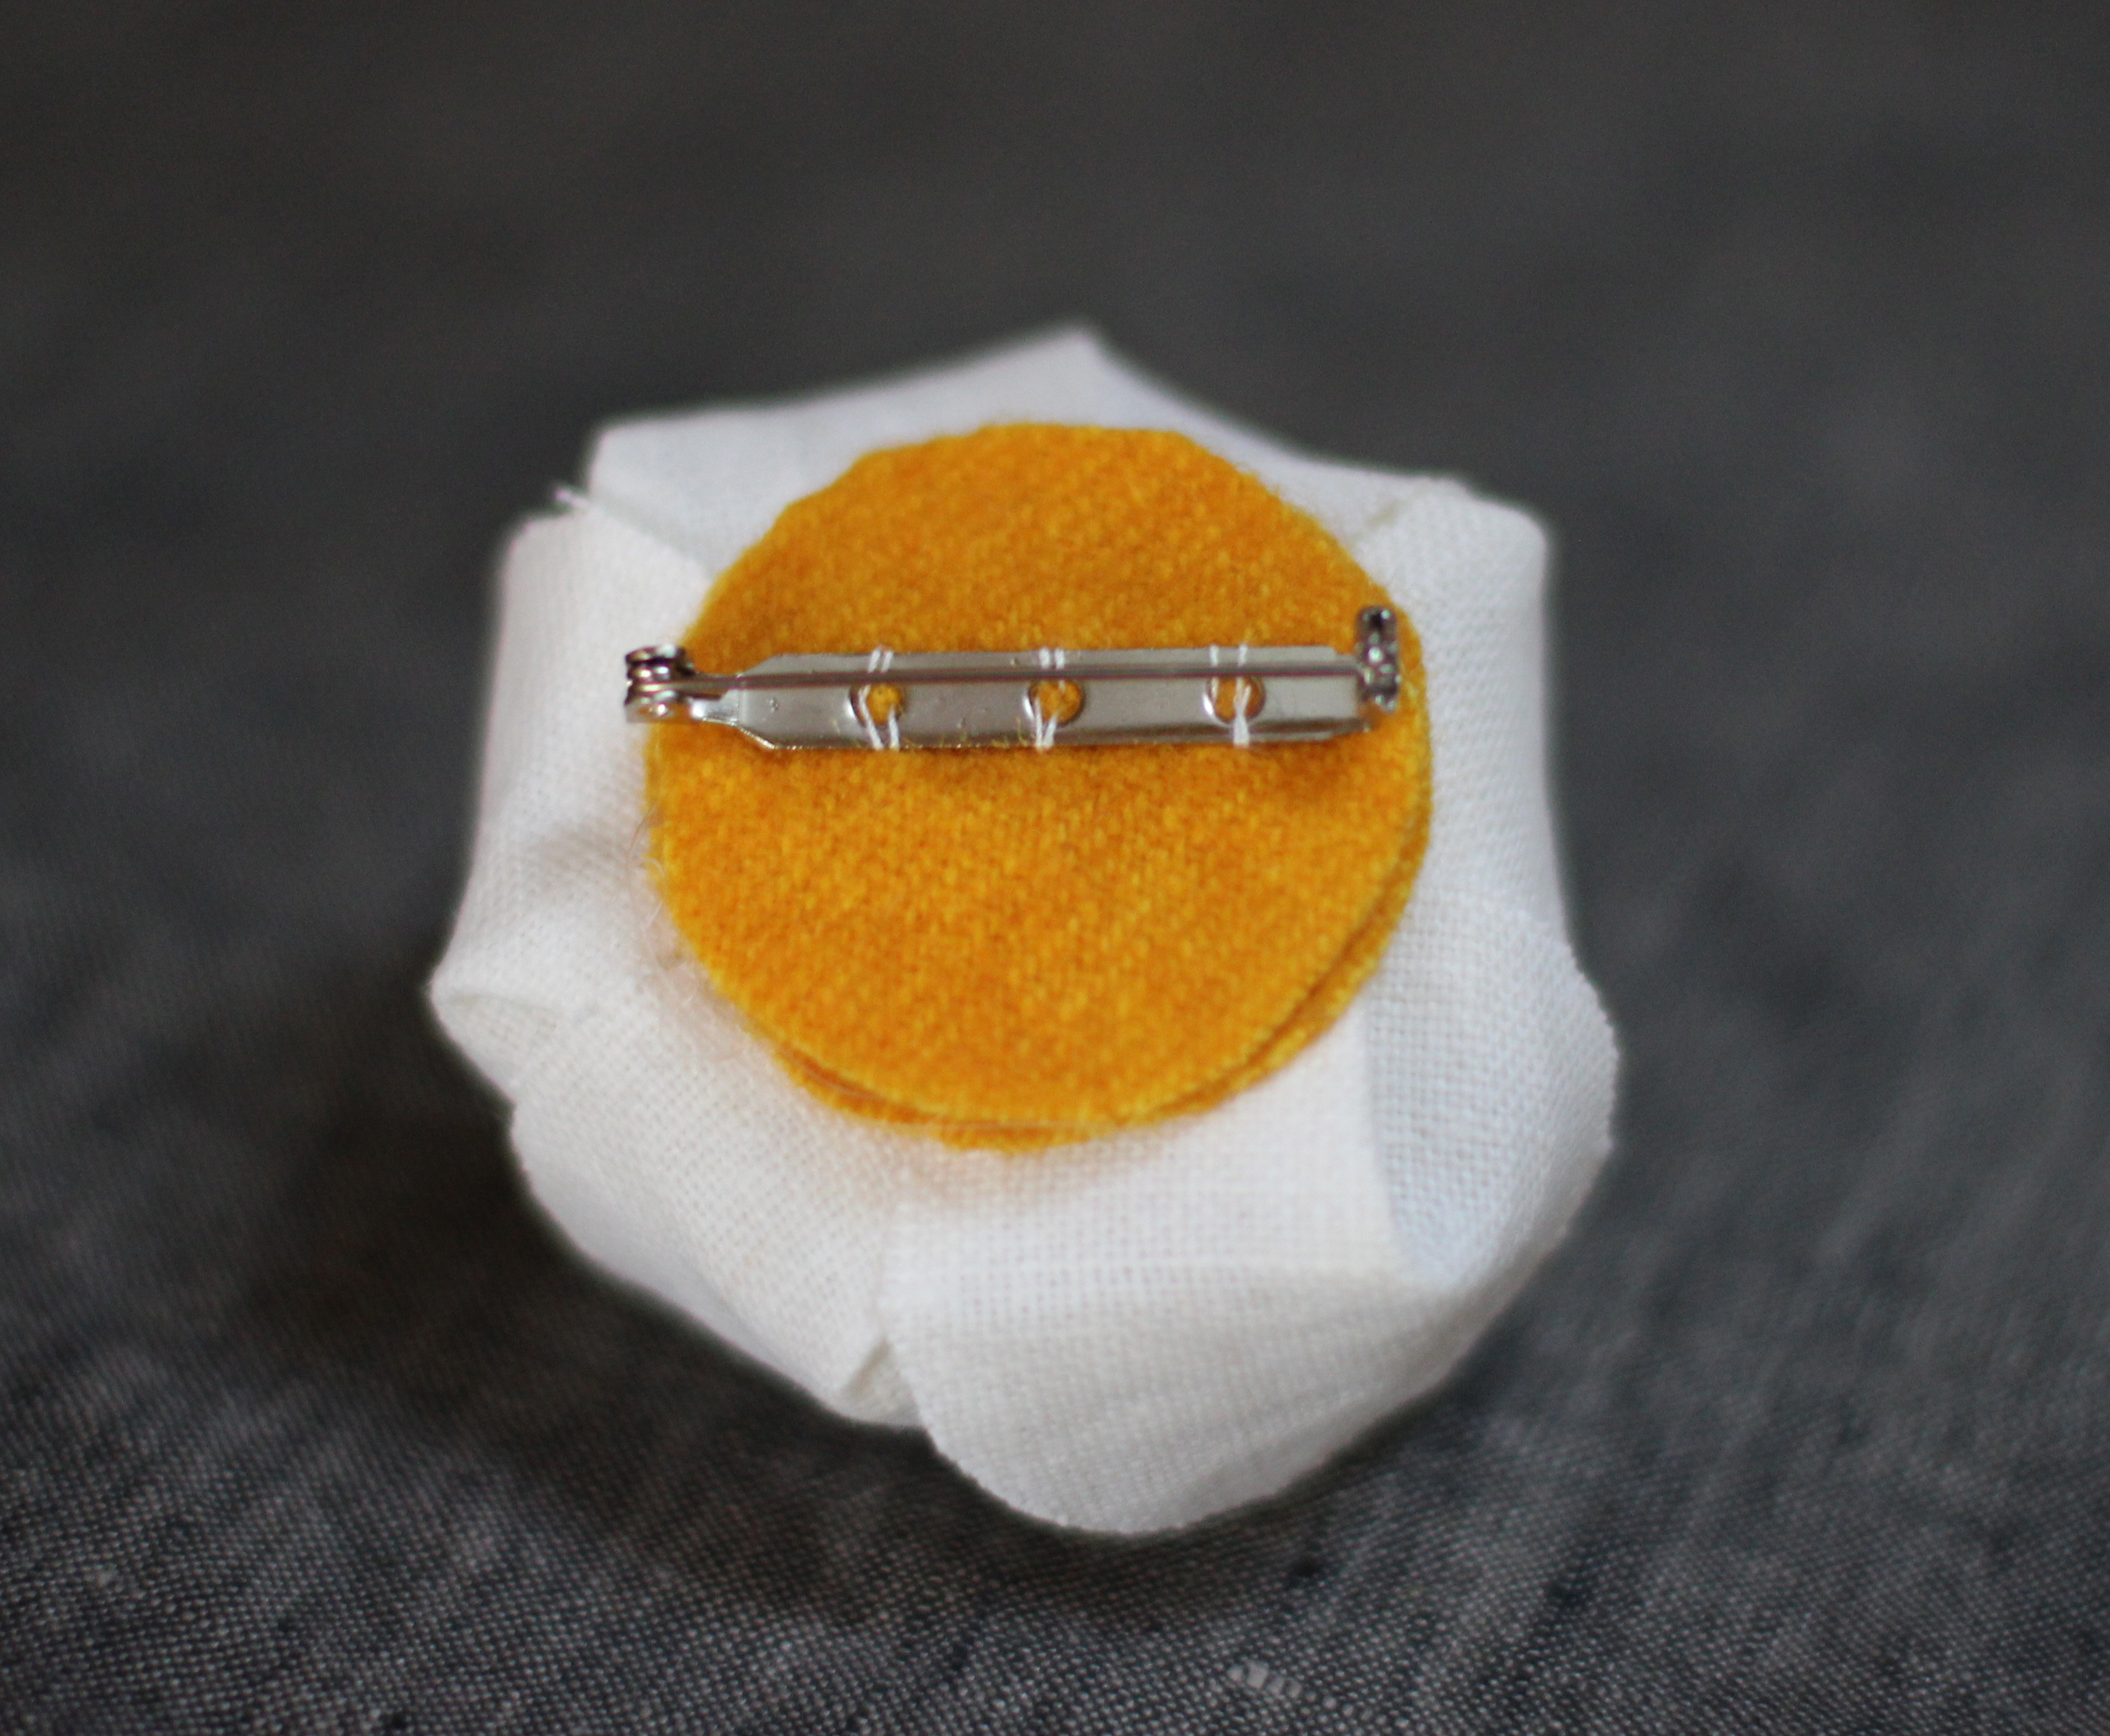
I’m warning you, these flowers are pretty addictive partly because they are so darn easy to make. Enjoy!
Noodlehead Super Tote-apalooza
As I start working on my fifth Version of the Noodlehead Super Tote, I felt like this bag addict had the cred to weigh in on a wonderful pattern. Anna, the author of the nifty blog Noodlehead (http://www.noodle-head.com) is the genius behind this bag design.

The bag can be sewn in two main versions, one with an inset top zipper closure and one without. Four of the bags I have made have the inset zipper and the current version I am working on is without one.

My favorite parts of this bag are the little details. There is a useful front pocket that has a magnetic closure. Anna gives a helpful tutorial on how to insert and secure the magnetic closures that I have since used in other projects (tutorial here: http://www.noodle-head.com/2013/05/magnetic-snap-tutorial.html)
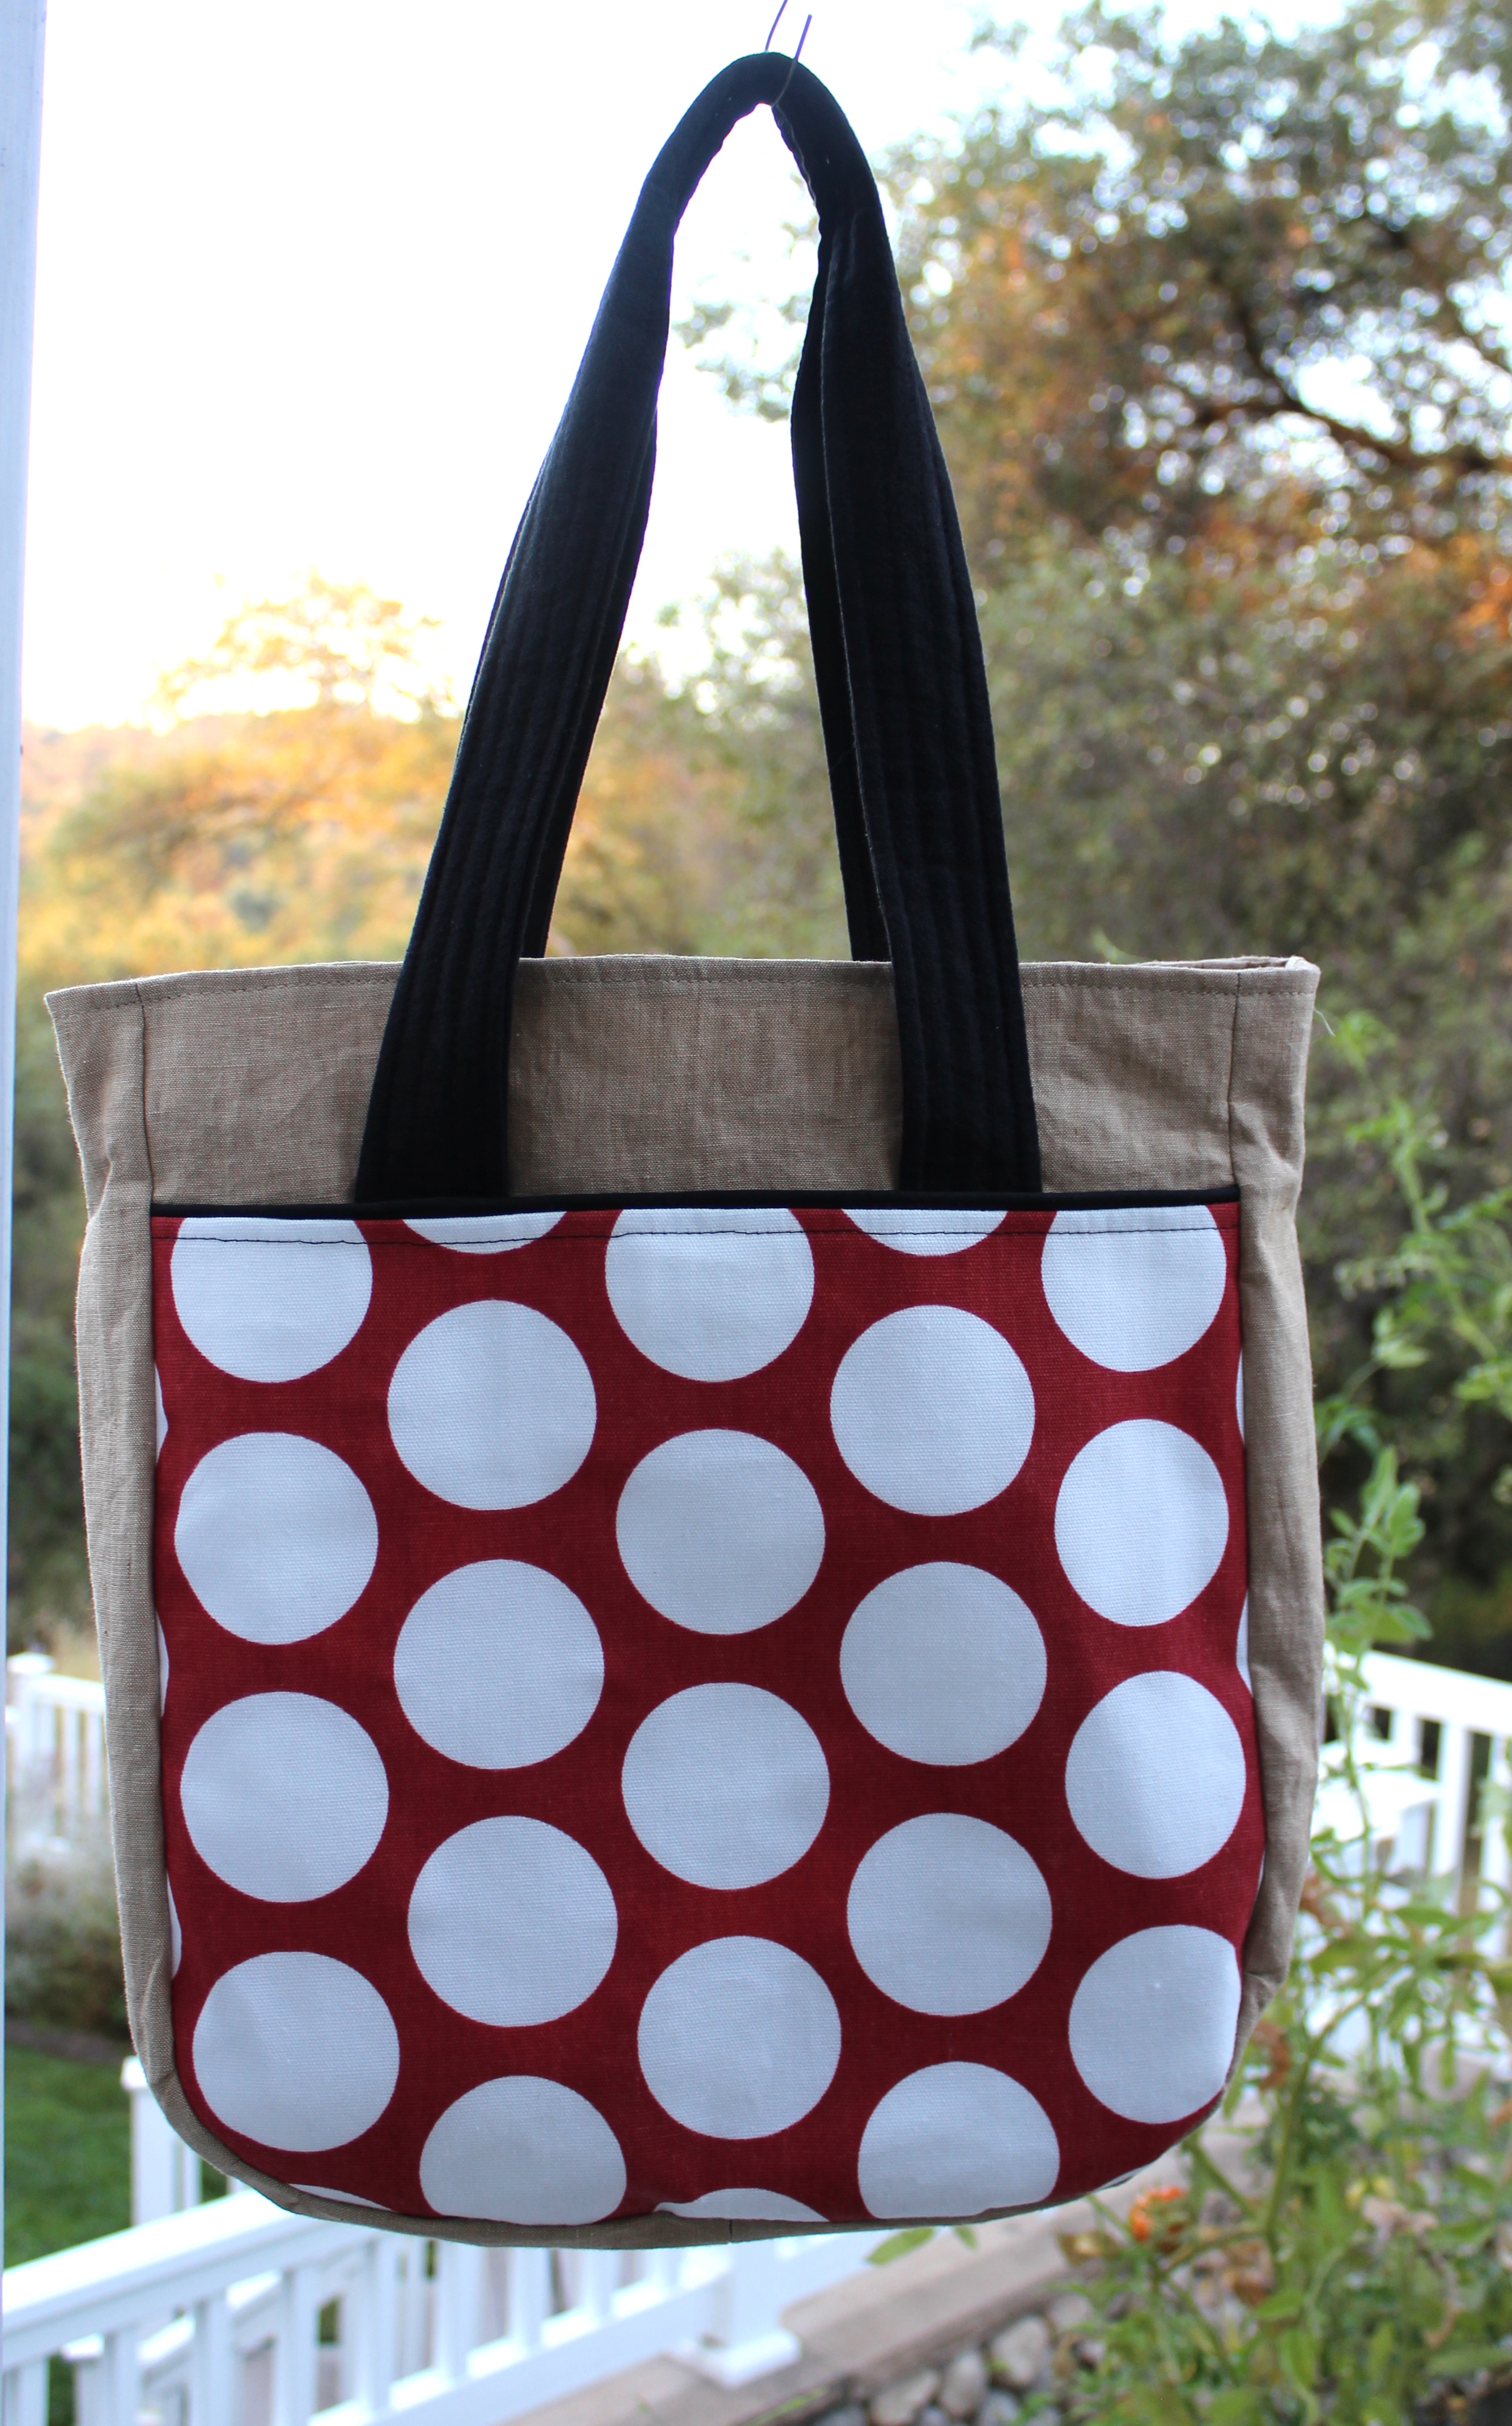
The inside pockets and the inset top zipper are other design features that I really appreciate. They make the bag appear very professional.


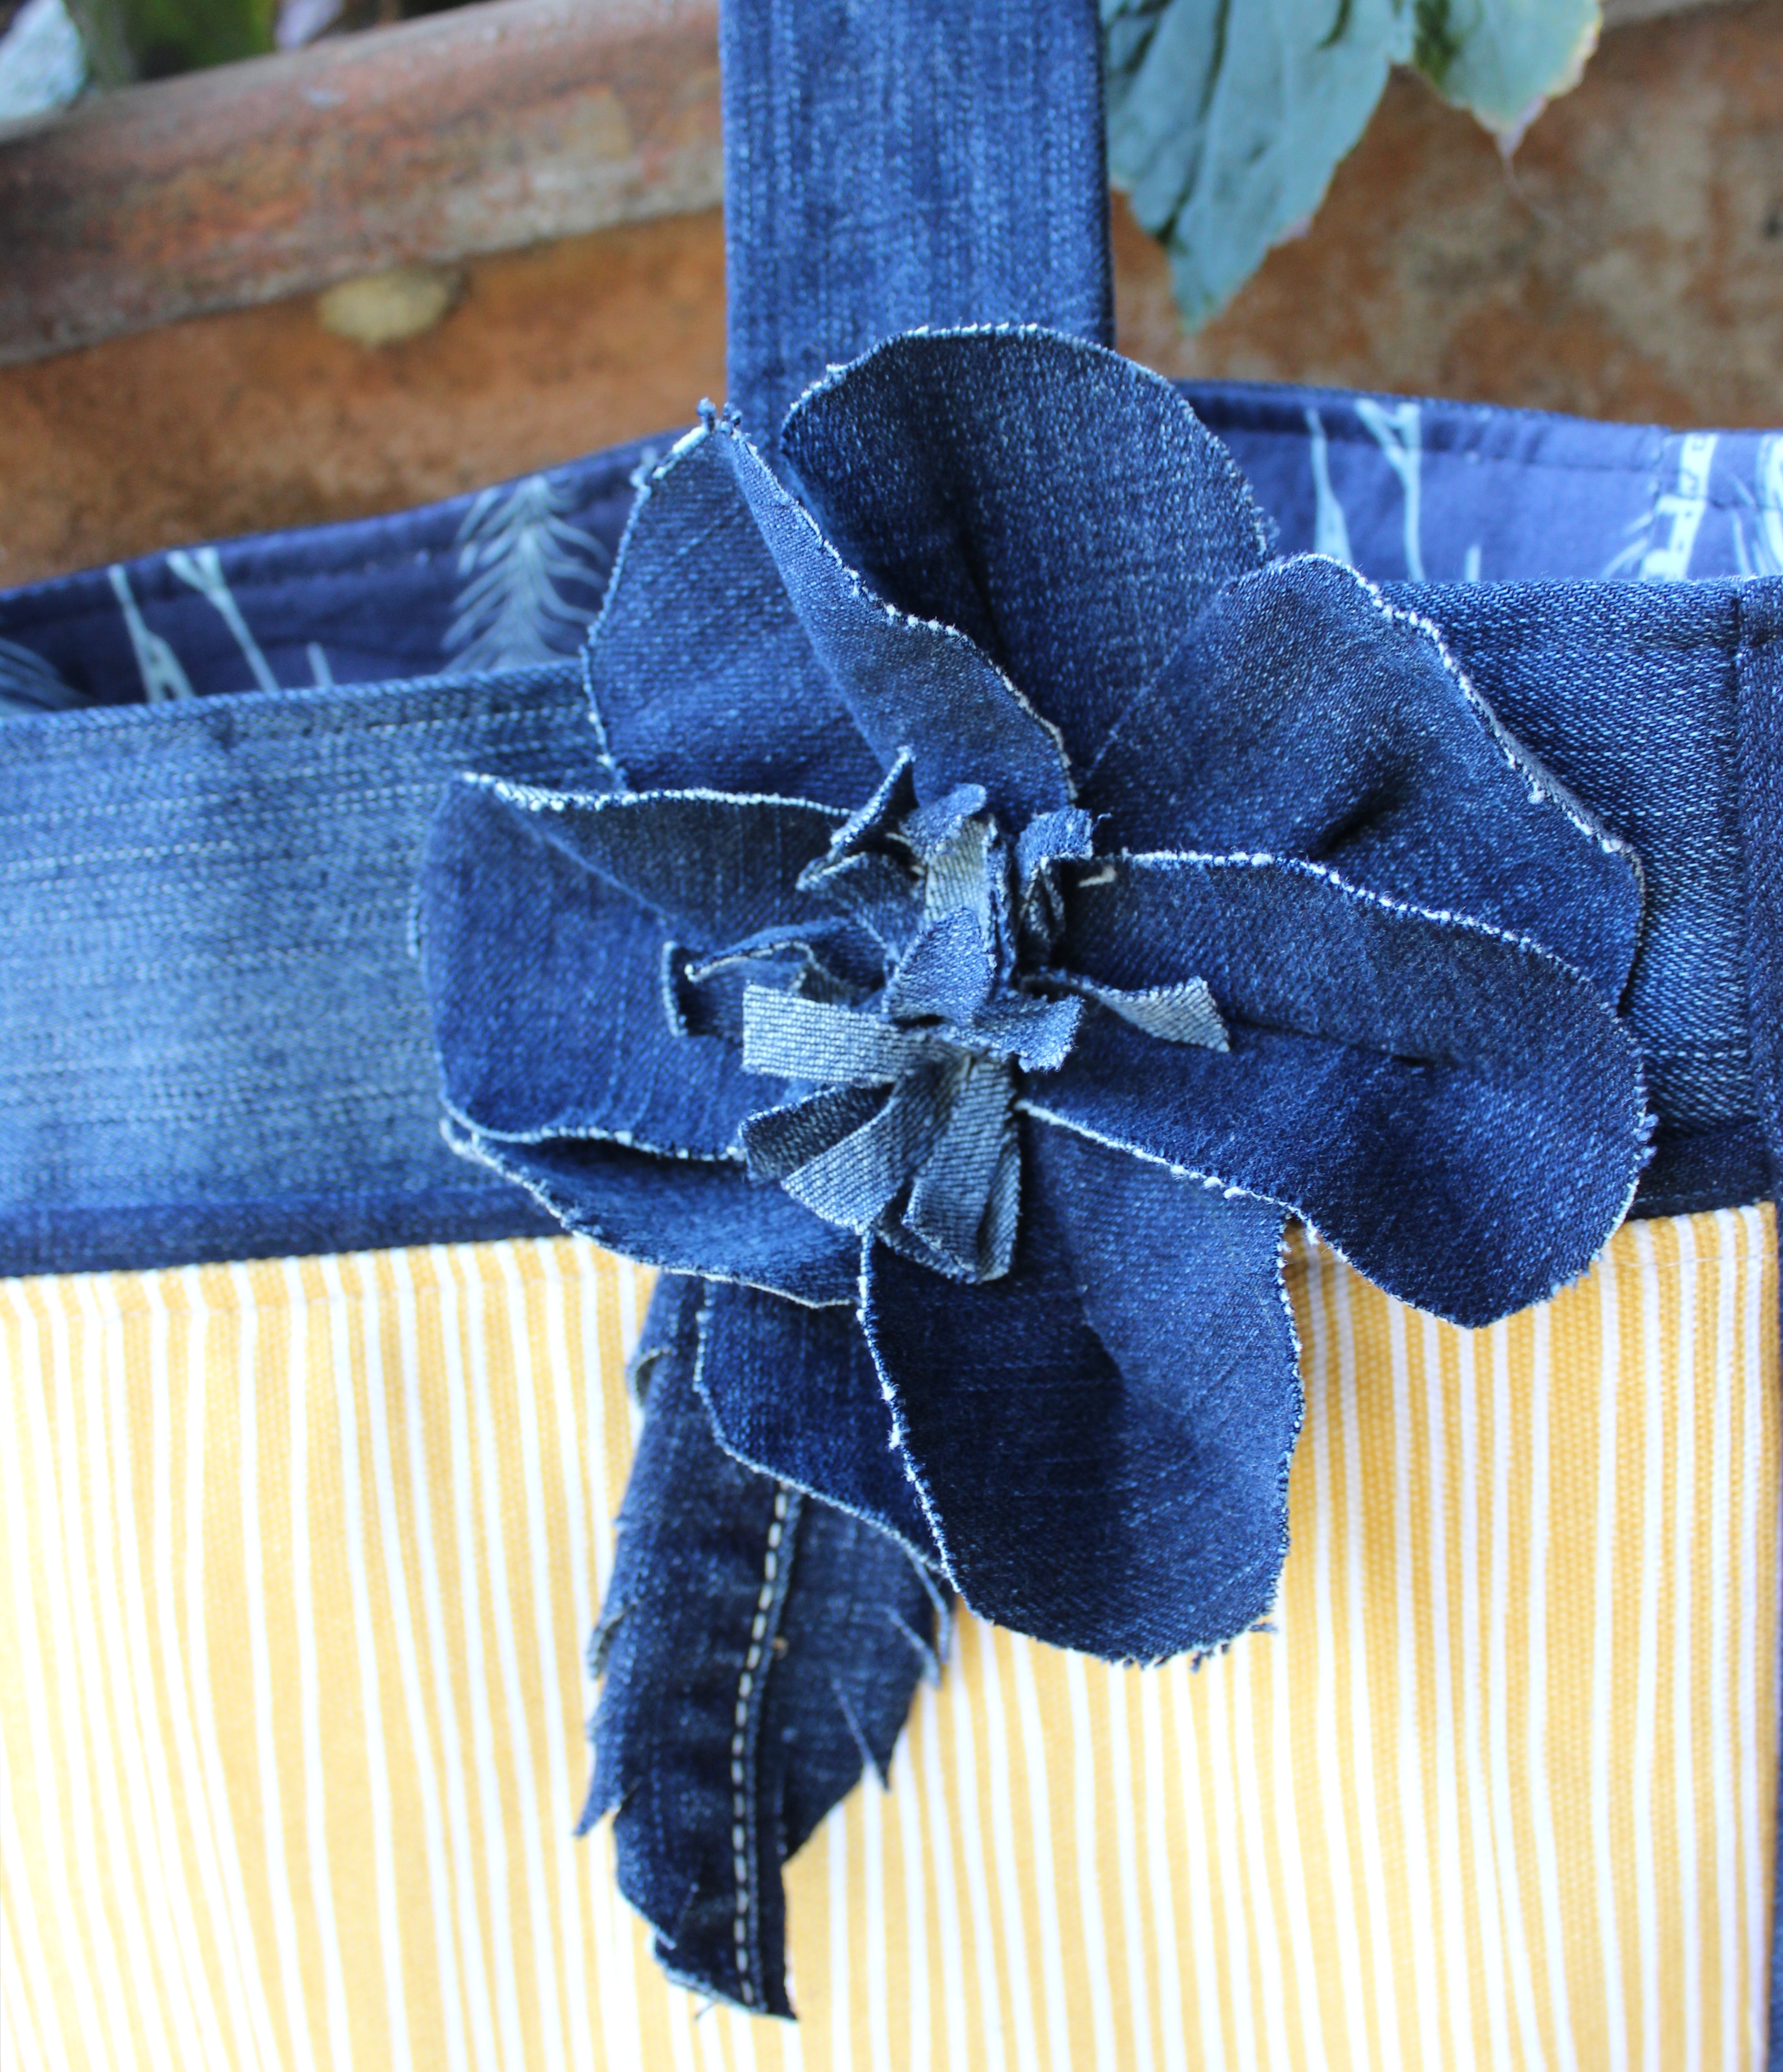
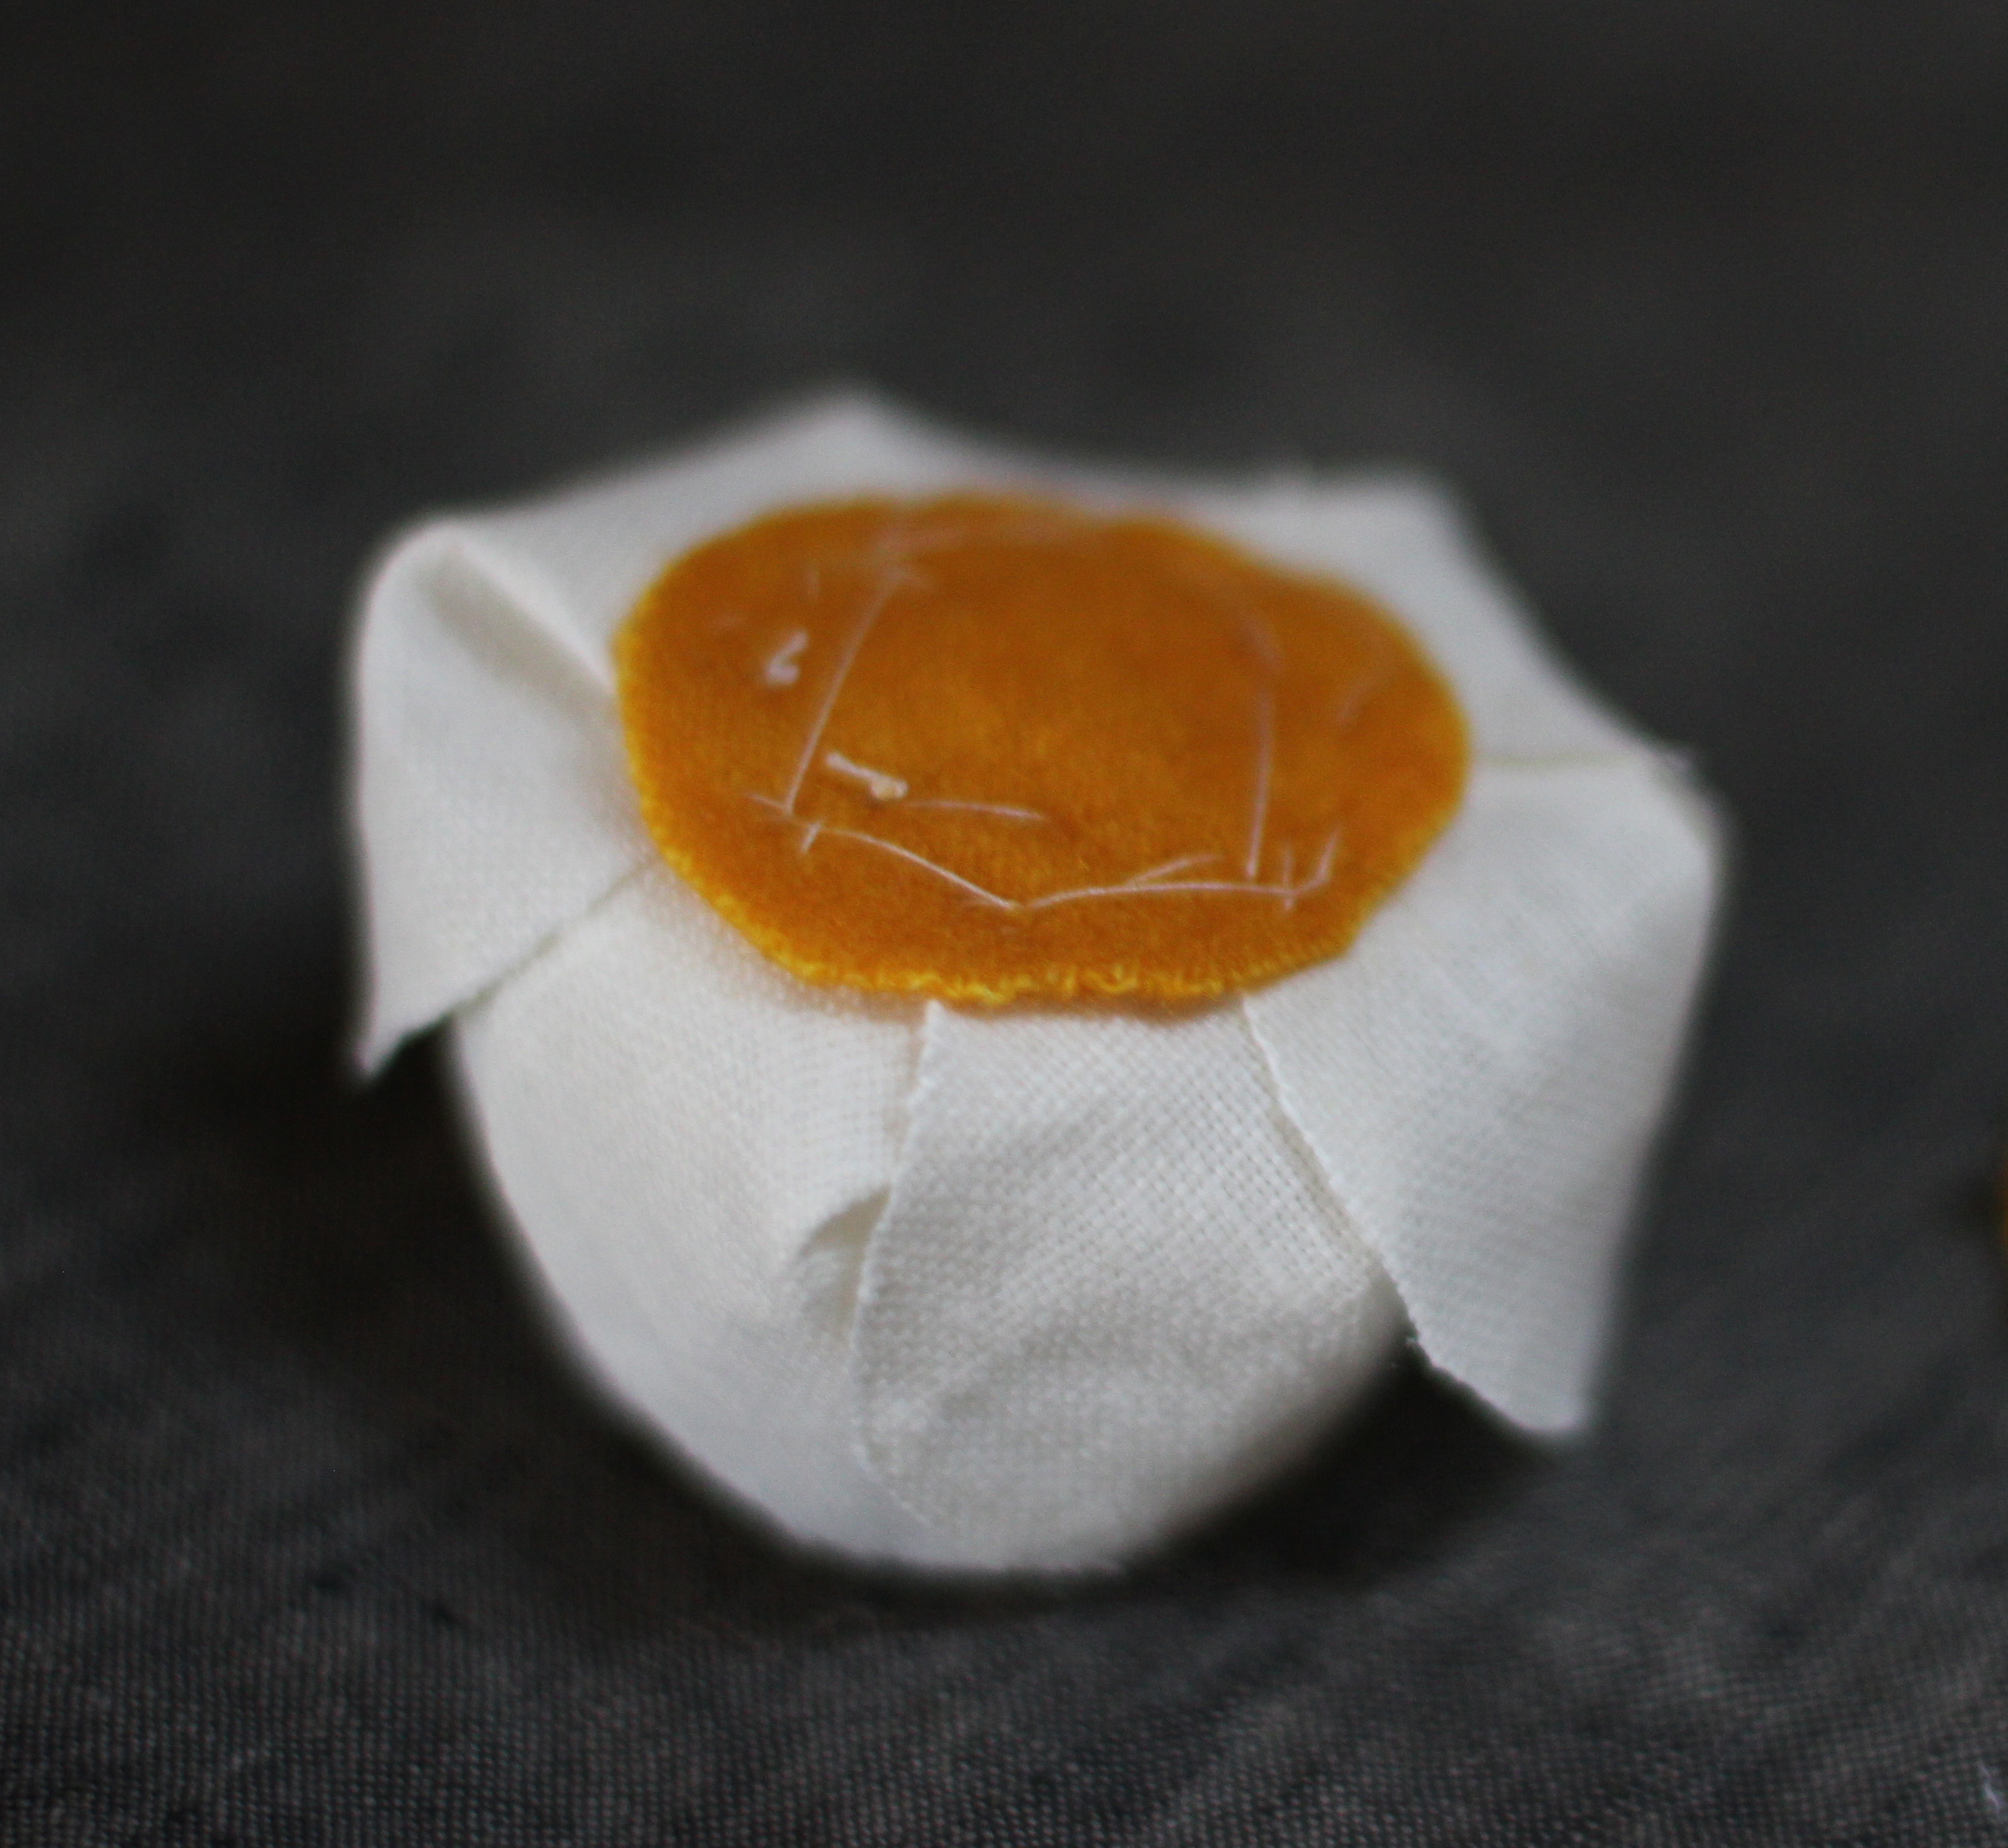
The only modifications I have made are to add a stiffer Pellon fusible interfacing in my later bags (I tend to like pretty sturdy bags) and in the above bag I added a fabric flower embellishment. (tutorial here: http://pm-betweenthelines.blogspot.fr/2012/07/denim-flowers-diy.html) In my latest bag, I plan to add a removable linen flower pin. You can see examples in my flicker photos. I have seen several other adaptations by others that I would love to try as well: quilt as you go cover, embroidery on the front pocket, etc.

I heartily recommend Anna’s bag pattern which can be purchased here: http://www.noodle-head.com/2013/05/super-tote-pattern.html
Care Package
I have been working for the last month on a Care Package for some cherished family members one of whom is sick. I wanted to make each of them something handmade and unique.
First up, above, a handmade water bottle cover made of linen and hand dyed wool.
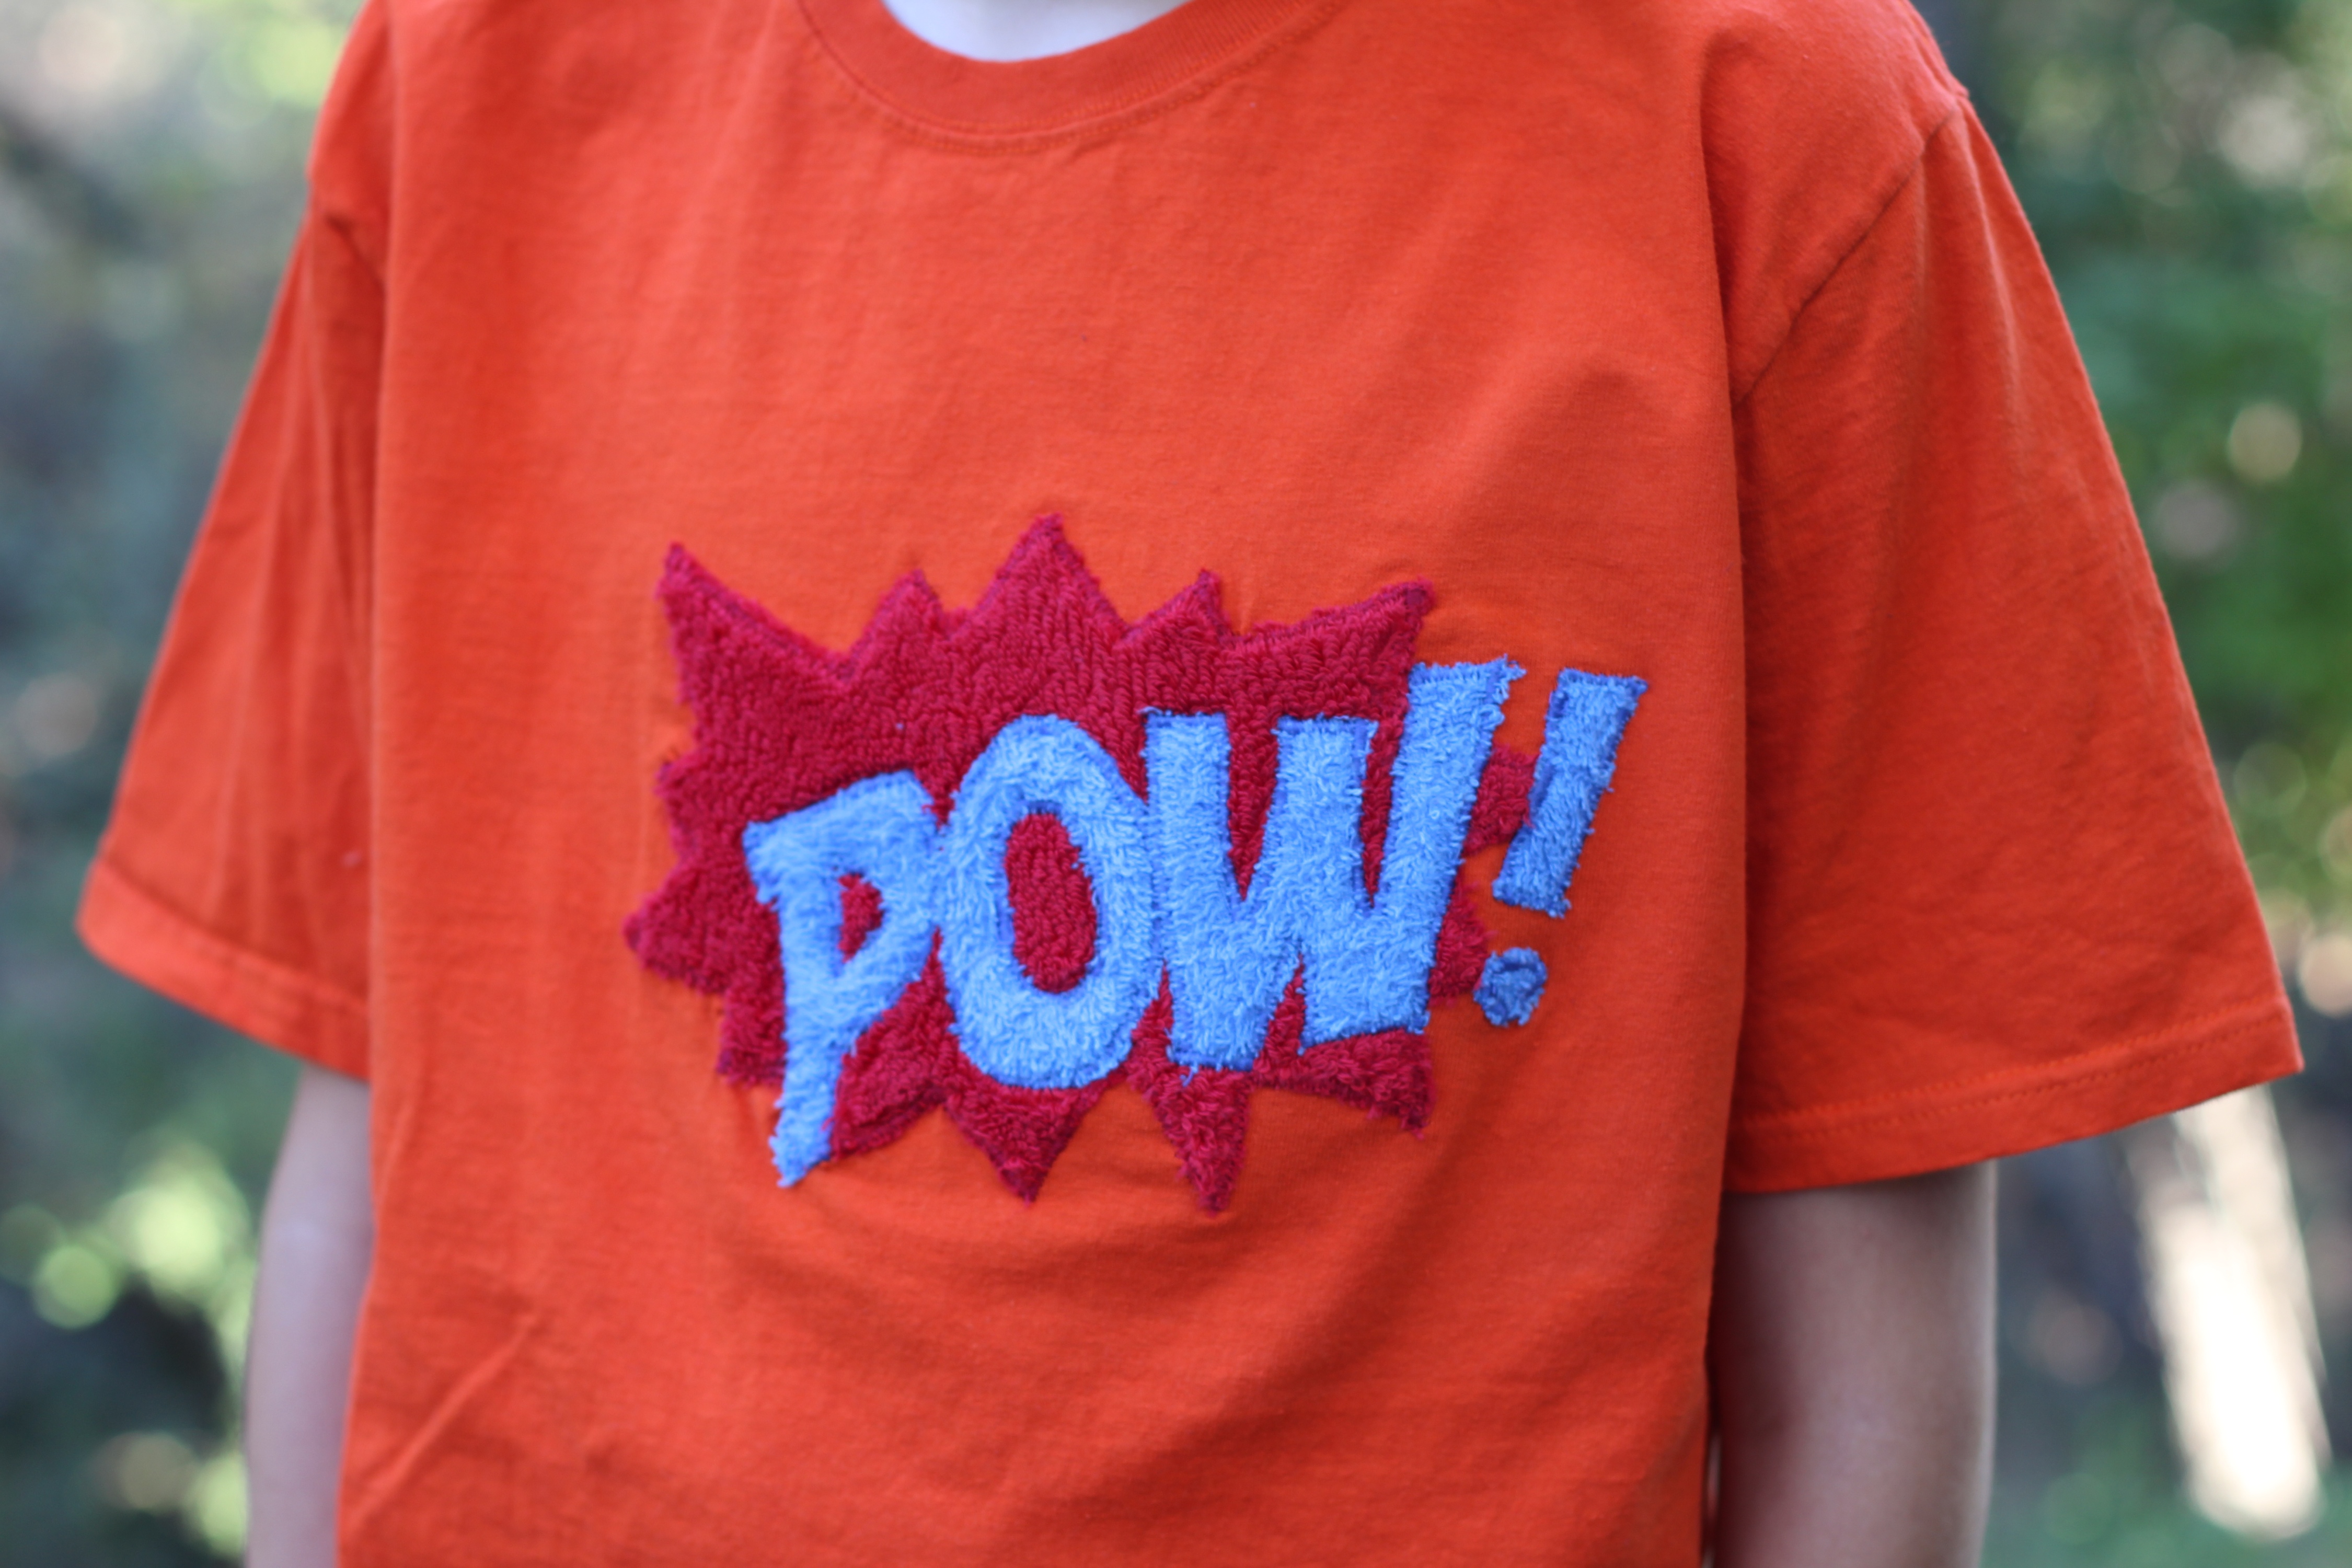
Next were gifts for some tween relatives. I always find this age so hard to make for as they are often less interested in handmade items. The POW! shirt and the Halloween motif shirt and sweatshirt were big hits with my kiddos so I am hoping they will be popular.


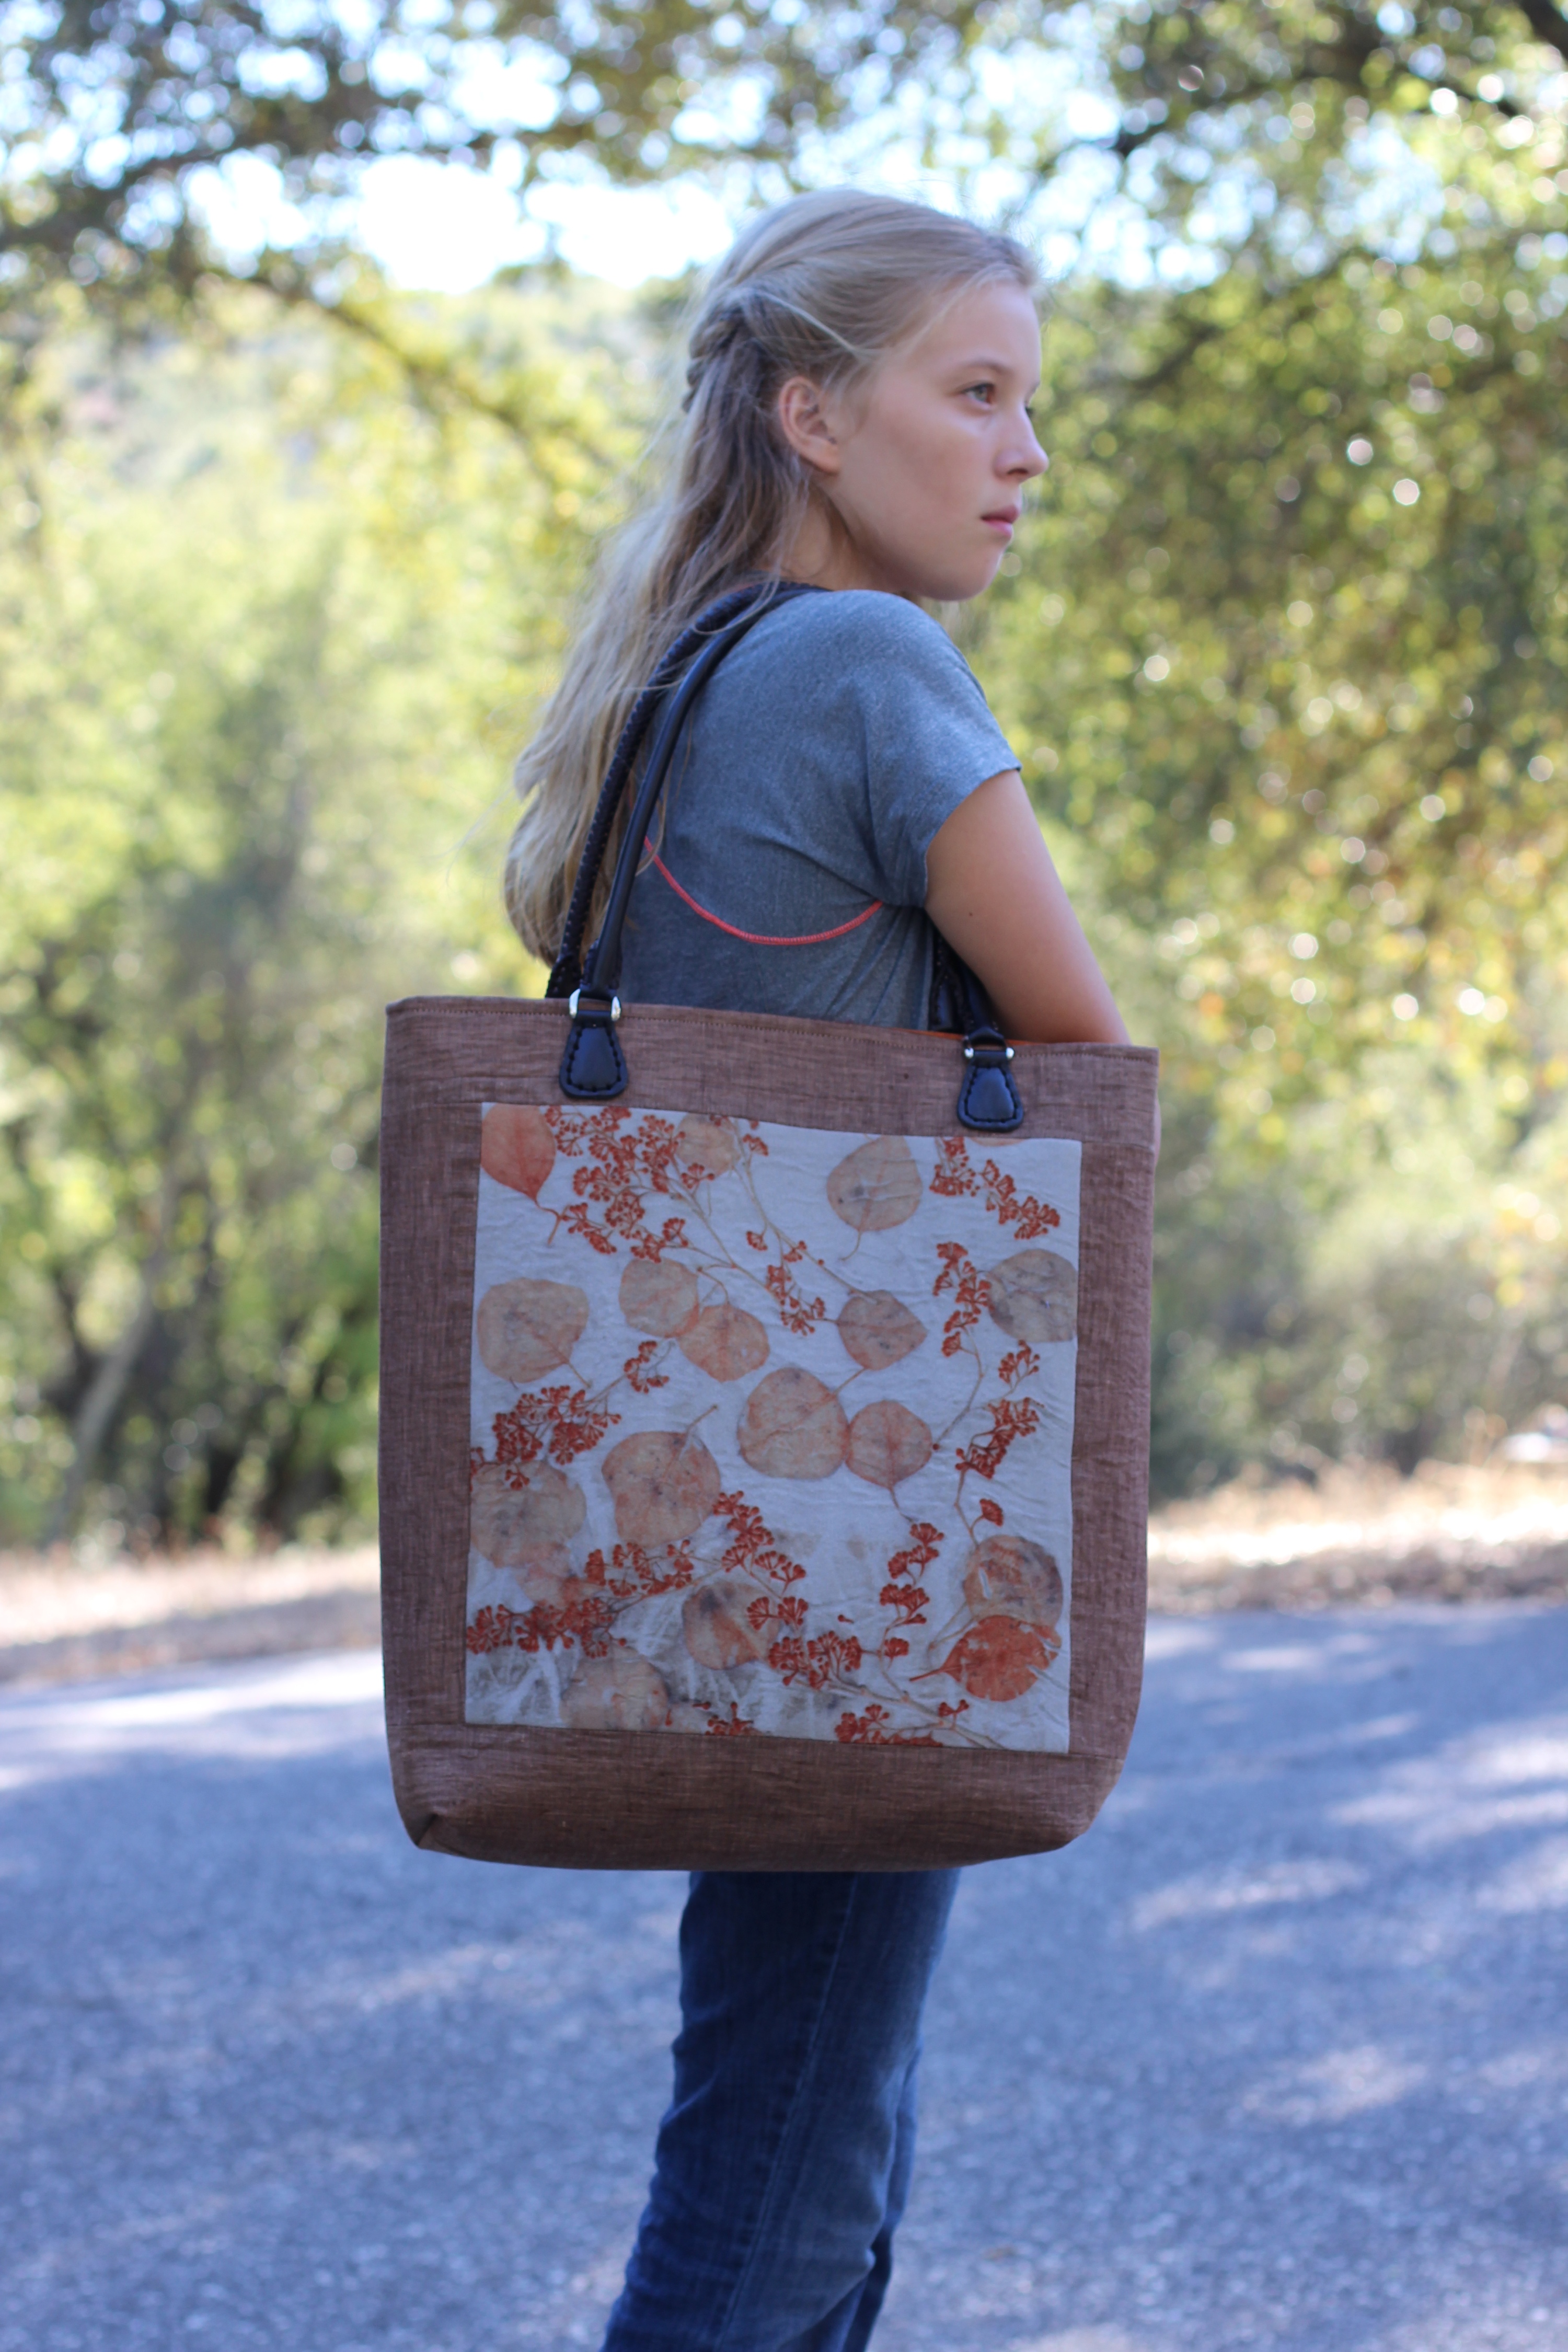
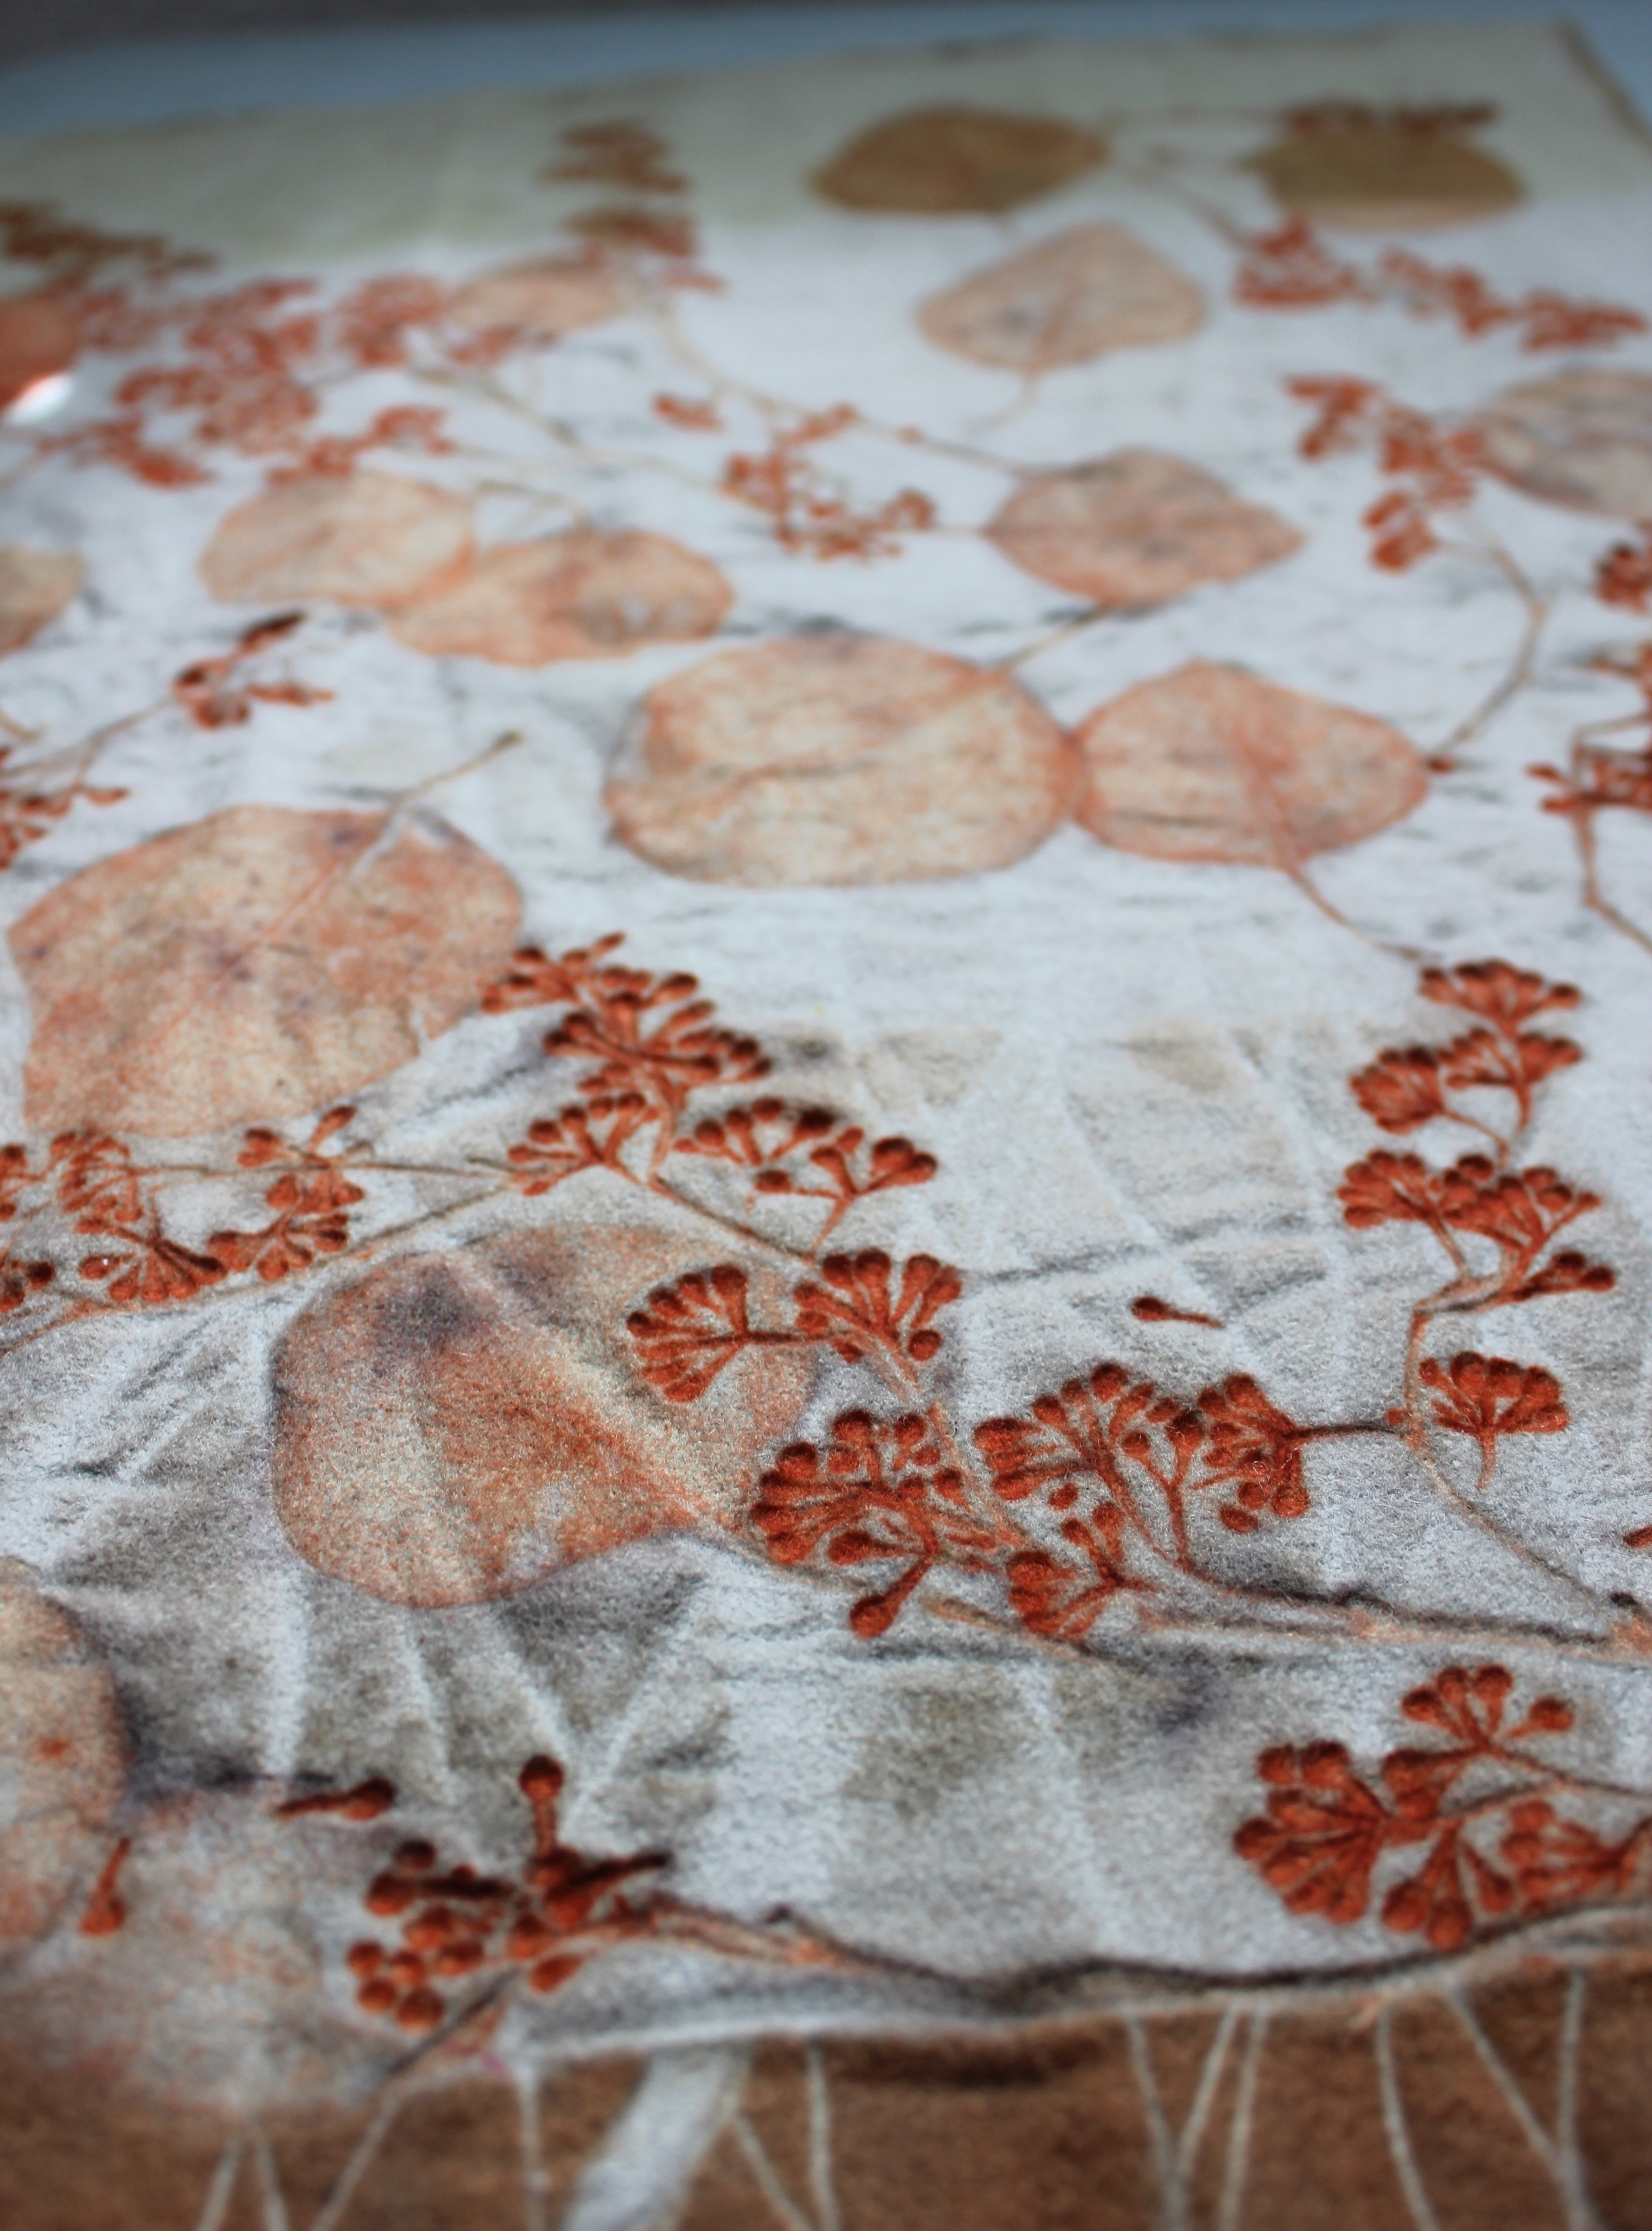
For the next item, I designed a bag around a beautiful piece of hand dyed wool. The outside is linen and the inside is a quilting cotton. The leather handles are by Muench, beautifully handmade in California but a little bit pricey and difficult to find anymore. I’m holding on to a treasured stash of a few more of these handles.

Lastly, I made one of my favorite hand knit hats. The pattern is free and found here: http://happyknits.com/blog/free-pattern-rikke-hat/. The picture shown is of a previously made hat. The current one is a nice variegated green. I love this pattern. It is very easy to follow and quick to knit up.
Hope the recipients feel the love I put into them.
Hello!
Creating/Travel/Family/Medicine-These are the major themes of my life and I hope to share them in this space.
