
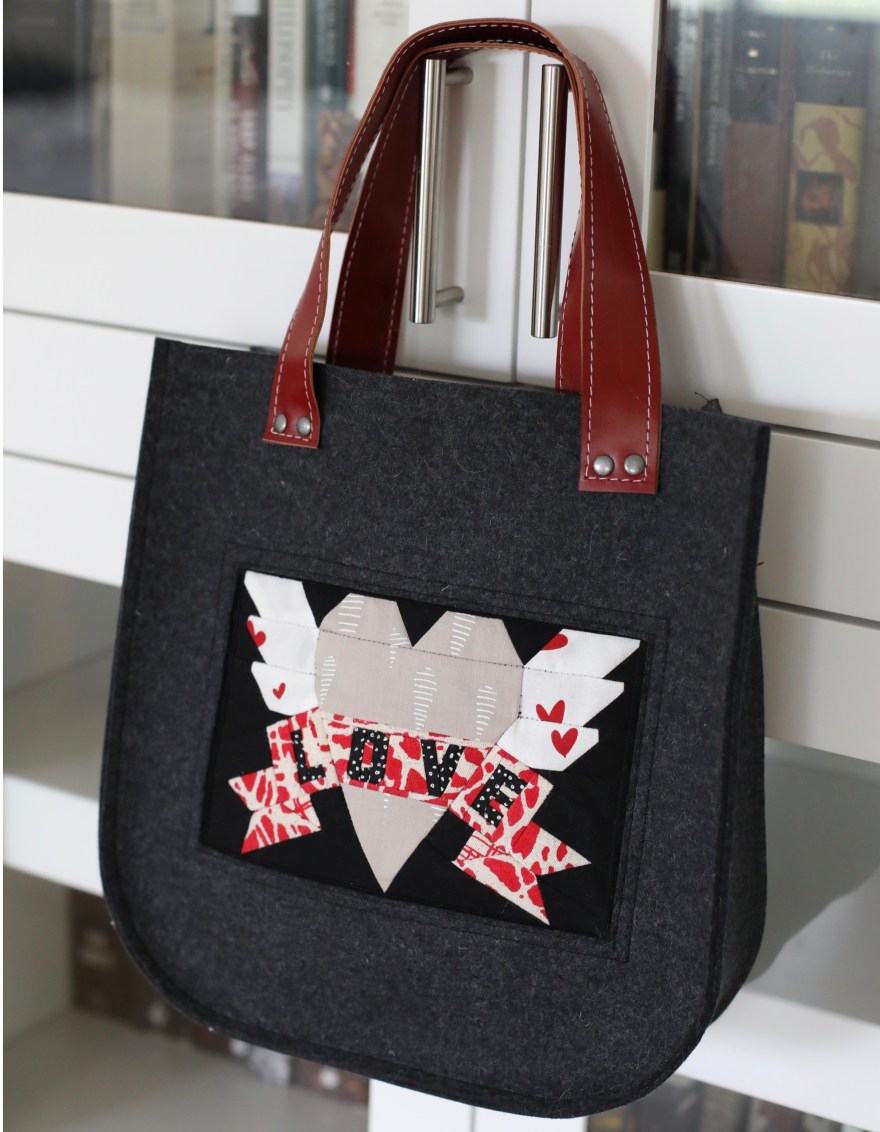
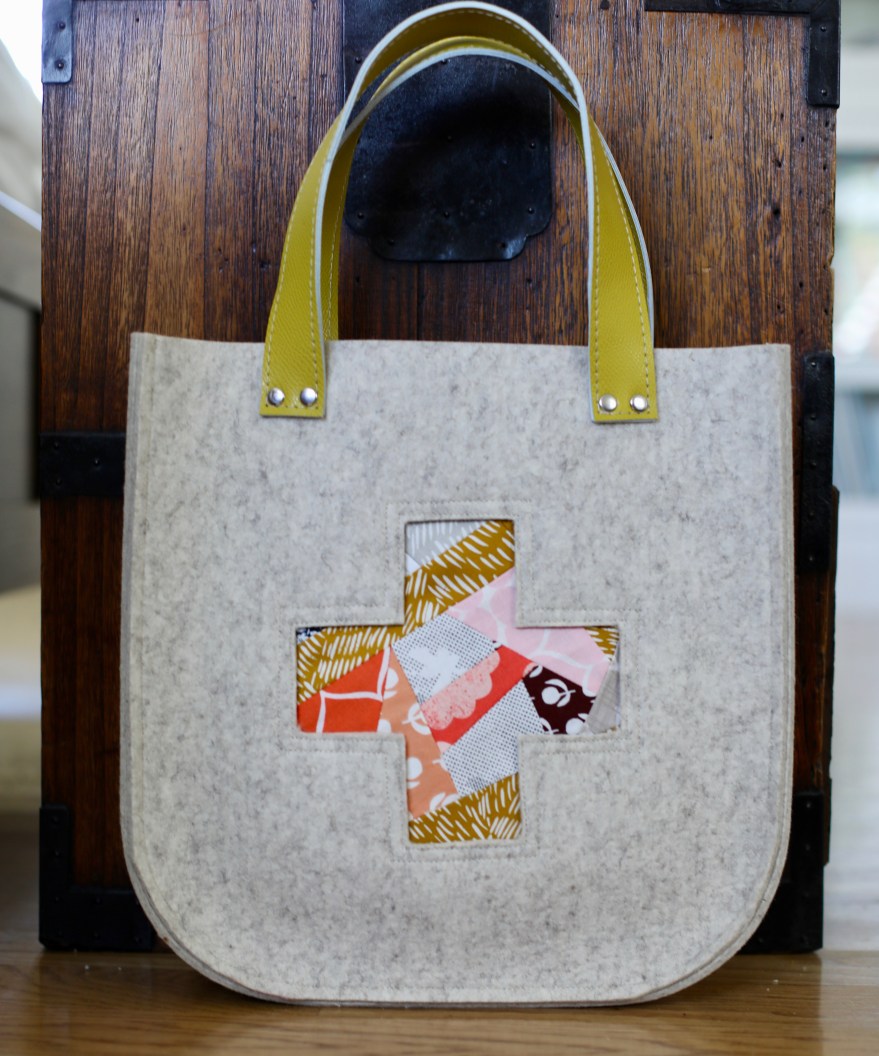
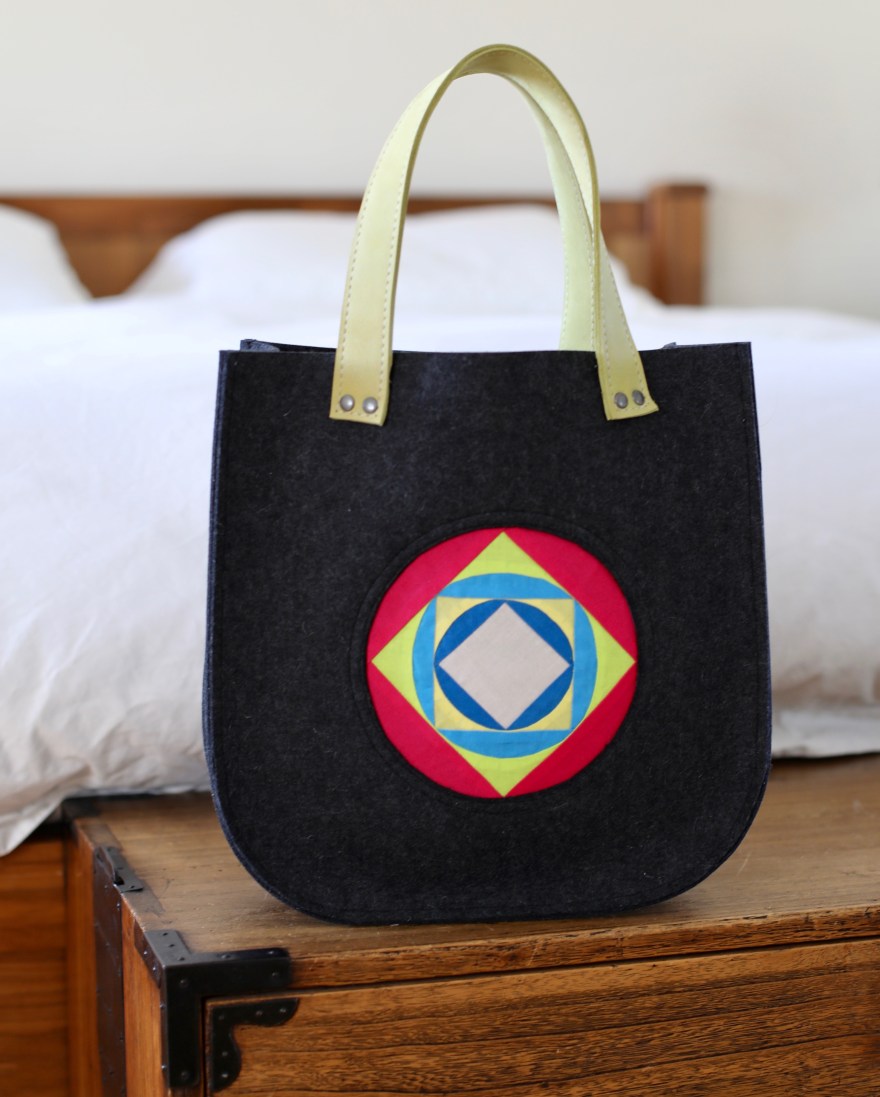

I love simple designs made with top notch materials. I also love combining nontraditional materials together. In this case I share a very simple tote design using thick felted wool along with leather handles and quilting cotton scraps. There are so many other ways to experiment with this bag design and I hope those who try it take my instructions as a jumping off point to explore their own creativity.
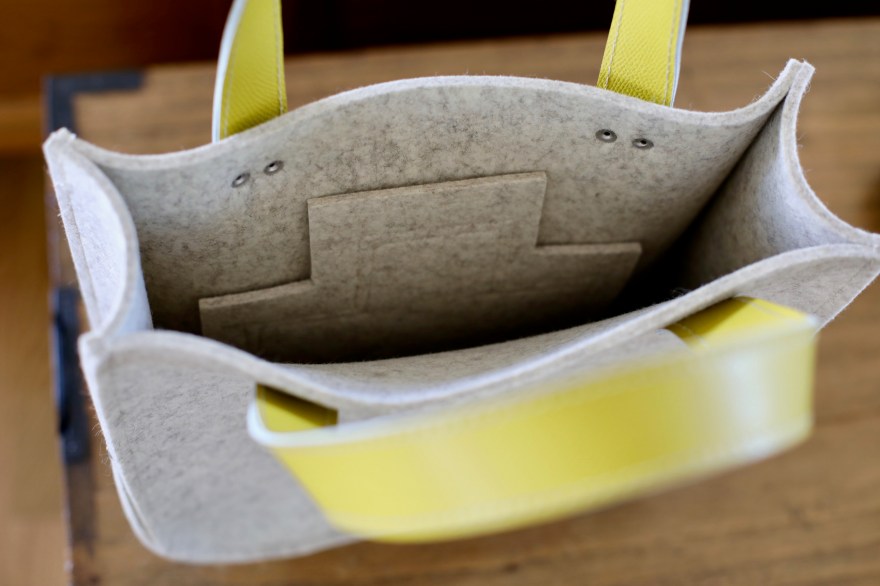
One finished tote including handles, measures approximately 19 inches high, 12.5 inches wide and 4 inches deep.
Supplies
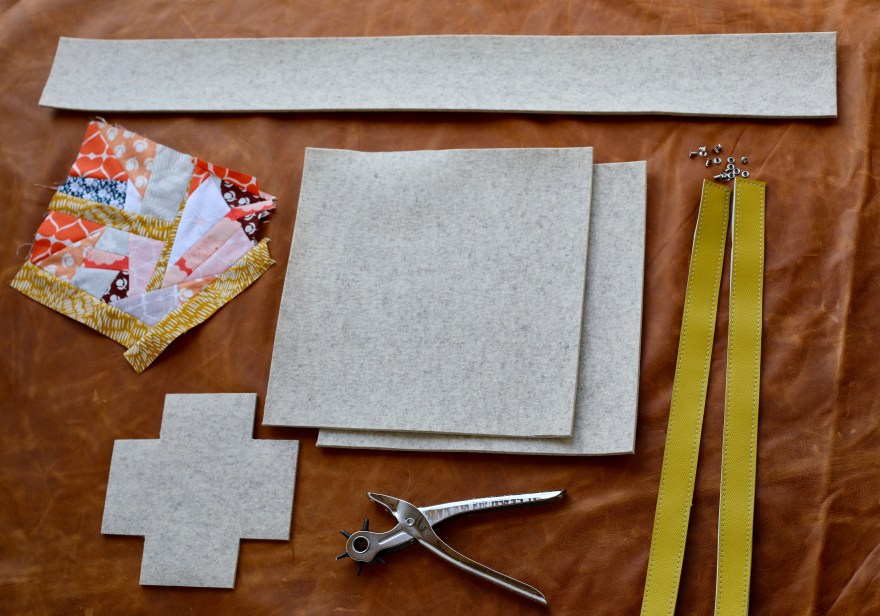
3 mm Felt ( I purchased mine from Aetna Felt www.aetnafelt.com . One 72” wide yard made 4 bags. You can also use leather or 5 mm felt but both are much harder on a domestic machine)
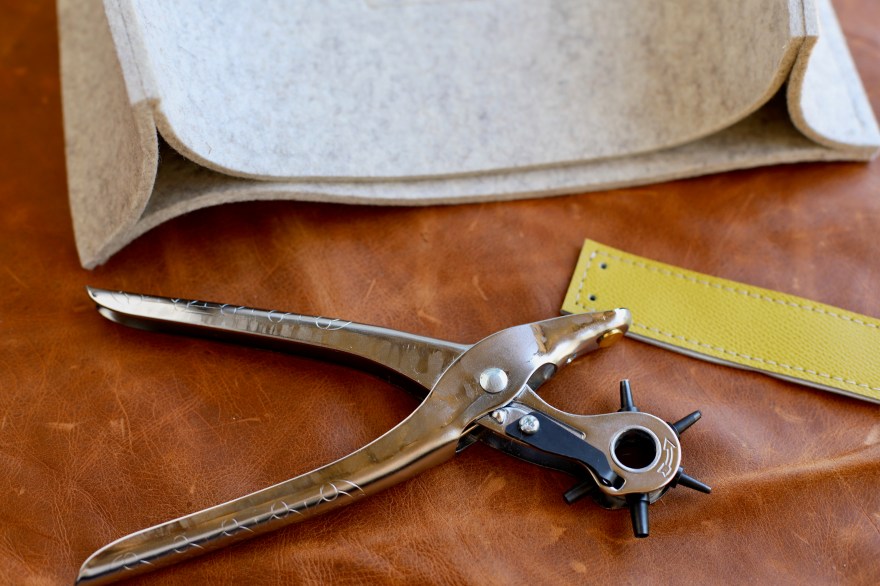
2 thick leather pieces 18 x 1 ¼ inch for handles or two 18 inch premade handles (I demonstrate with some stitched 18 inch leather bag handles I made but plain leather will work perfectly well. If you are intimidated by leather and rivets you can also use webbing as handles and sew them directly to the felt)
Exacto knife
Fabric Marker (I like Dritz Disappearing Ink pen)
Quilter’s Ruler
Rotary Cutter
Pieced block or textile that you want to feature on the bag in a reverse applique technique less then 9 1/2 x 9 1/2 inches (I have used paper piecing patterns, leftover quilt blocks, improv panels made from scraps. The sky is the limit.)
Double sided fabric tape (optional)
Leather Hole Punch
Small Sized Rivets (If you are uncomfortable with rivet setting, screw in rivets are a nice alternative and if you chose to use 5mm thick wool, I recommend medium sized rivets)
Thread
Sewing Machine
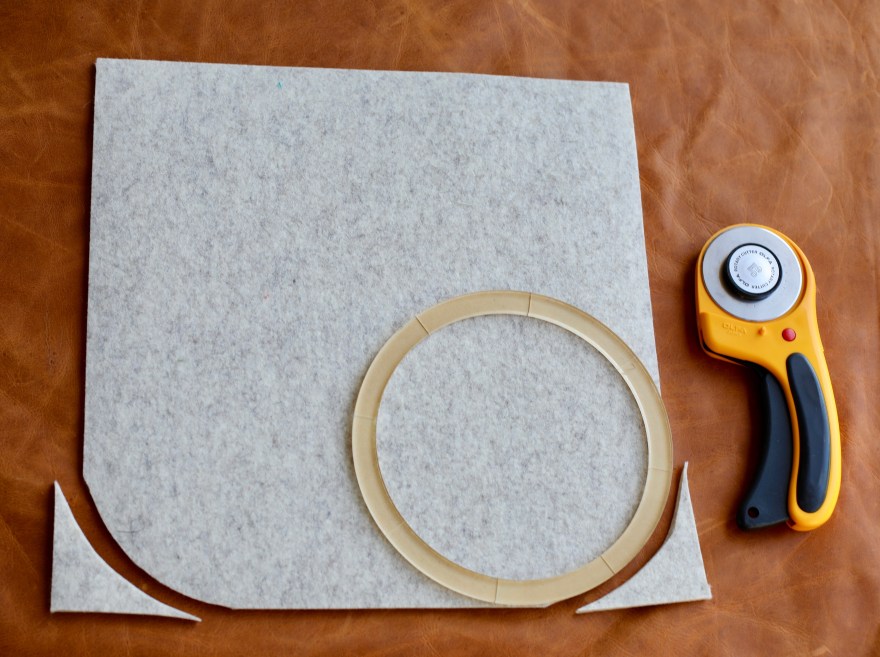
Step 1: Cut Out Your Pieces
Cut two pieces of Felt 12 ½ x 12 ½ inches (front and back pieces)
Cut one piece of Felt 36 x 4 inch (side piece)
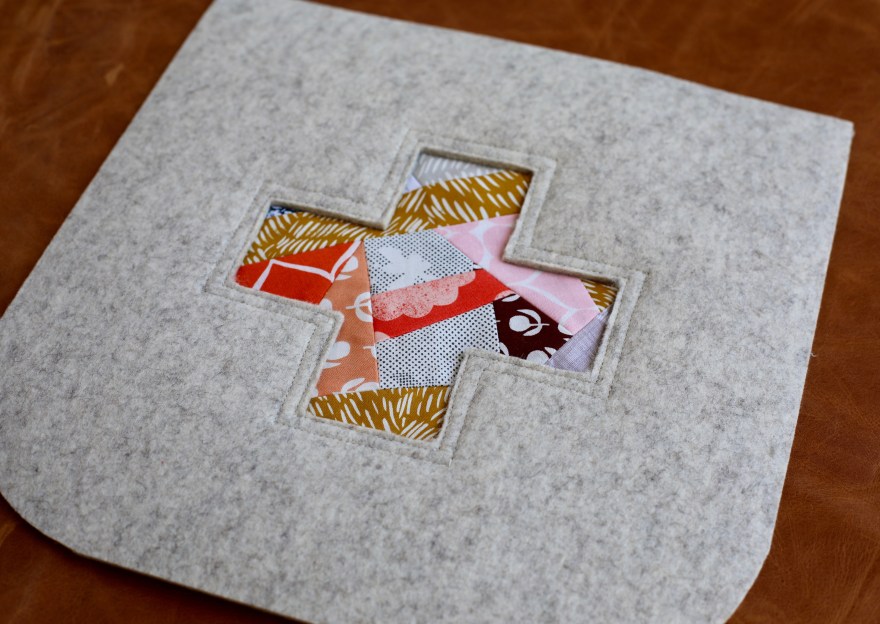
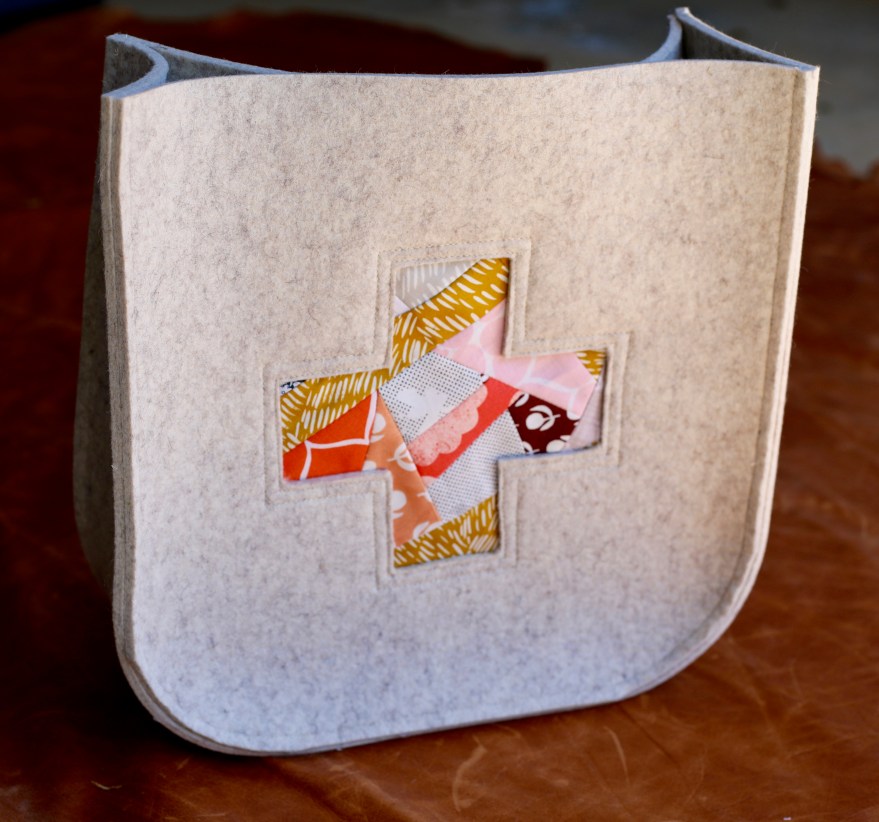
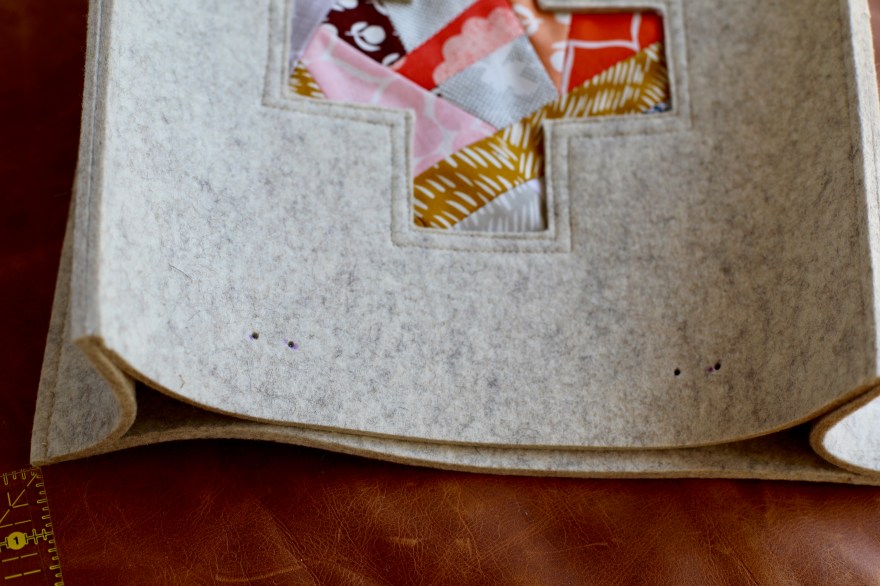
Cut a piece of felt that is 1 inch larger on all sides then the cut out motif you plan for your front. (For example, if you choose to cut out a 6 inch circle in the front felt to show off a special paperpieced block then cut out a 7 inch felt circle. The front felt bag piece with the cut out motif, your chosen feature textile/block and this third felt piece will form a sandwich that once finished will make the inside of the bag look more professional.)
Round the bottom corners of the front and back felt pieces. (I used a 7 inch diameter circle but a round plate would work well too.)
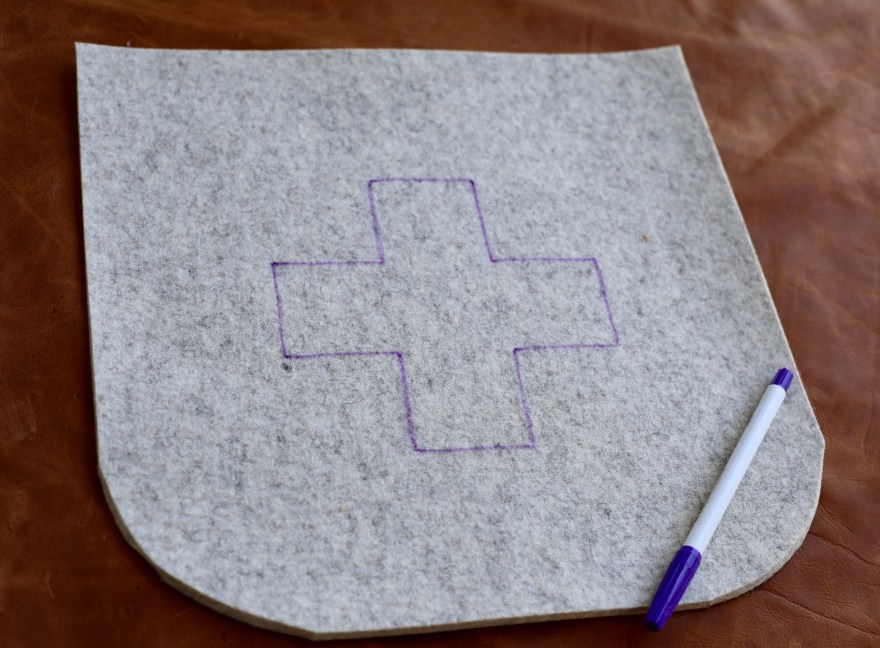
Step 2: Prepare your Front Felt Piece for Reverse Applique
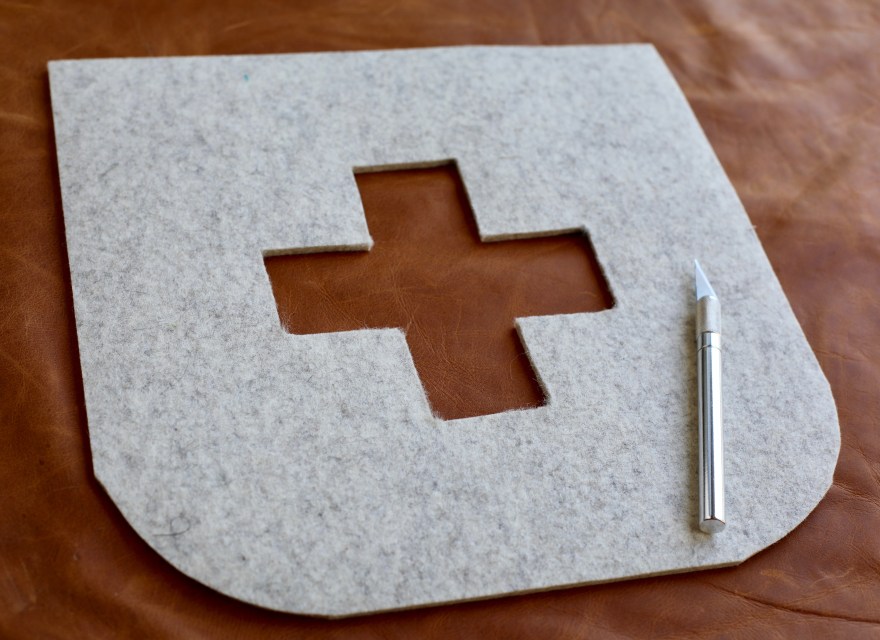
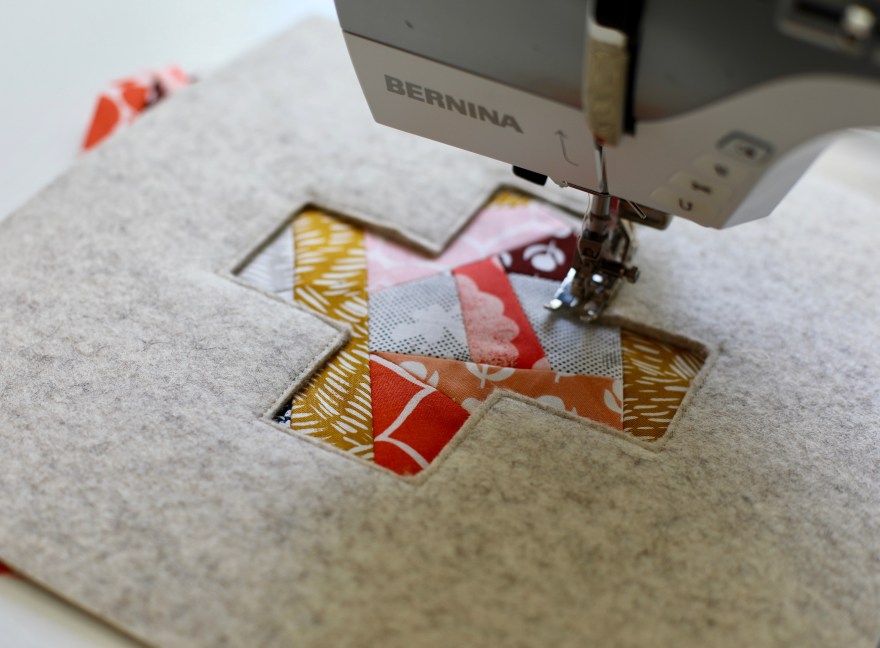
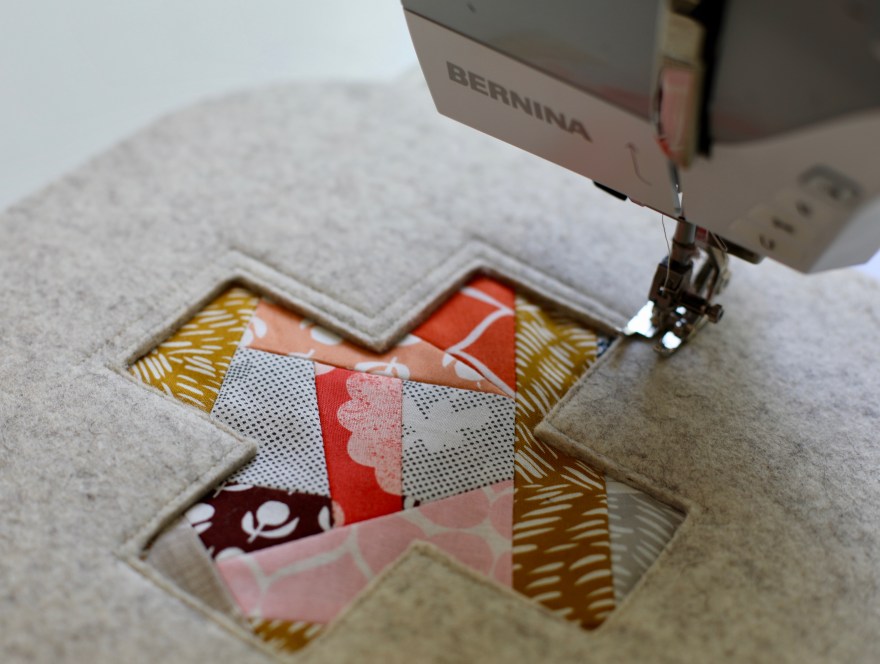
Choose a cut out motif that you will use on you front felt piece (in this example, I used a 6×6 inch red cross sign) , mark with your marker and cut out with an Exacto knife. In previous iterations of this design, I have used a circle, rectangle, lightning bolt and a combination of shapes that will show off the piece I plan to show off in the reverse appliqué. Let your imagination guide you.
Once your motif is cut out in the felt, sandwich your block or textile between the front felt and the back extra felt piece centering them all as best you can. You may use reversible tape to secure everything in place if needed.
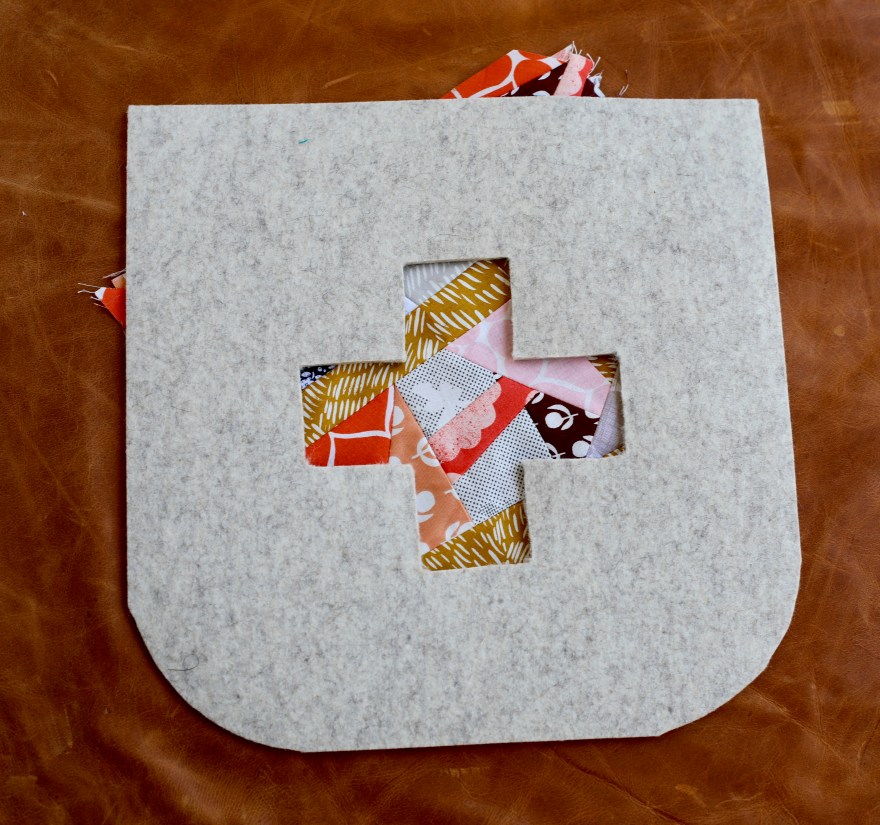
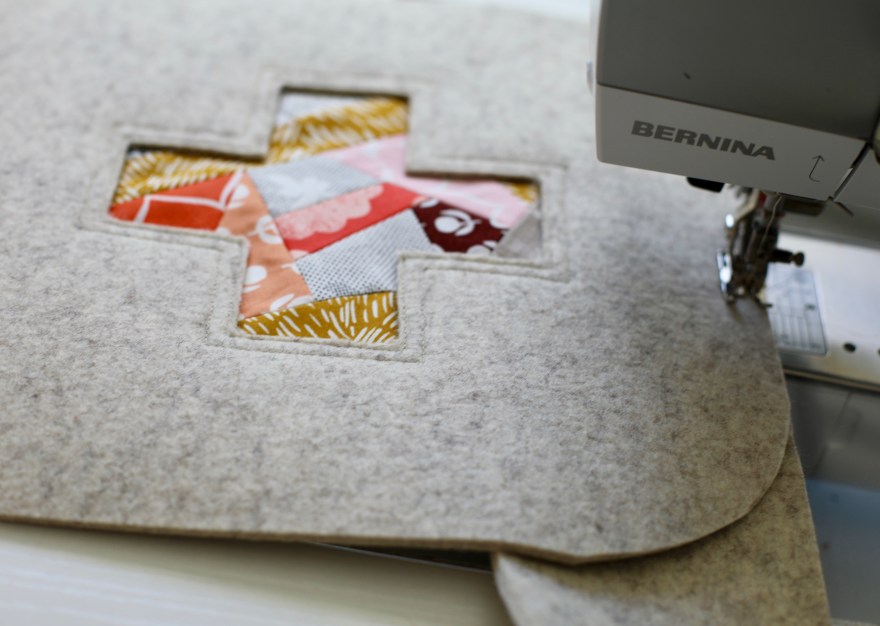
Stitch 1/8 inch around the reverse appliqué motif through all layers.
Turn the whole piece to the back and trim away the extra fabric.
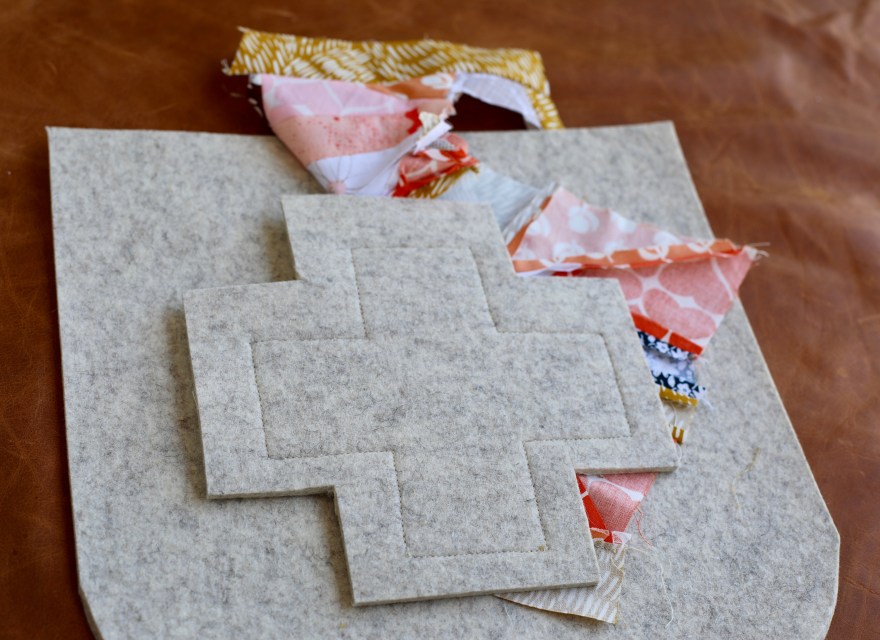
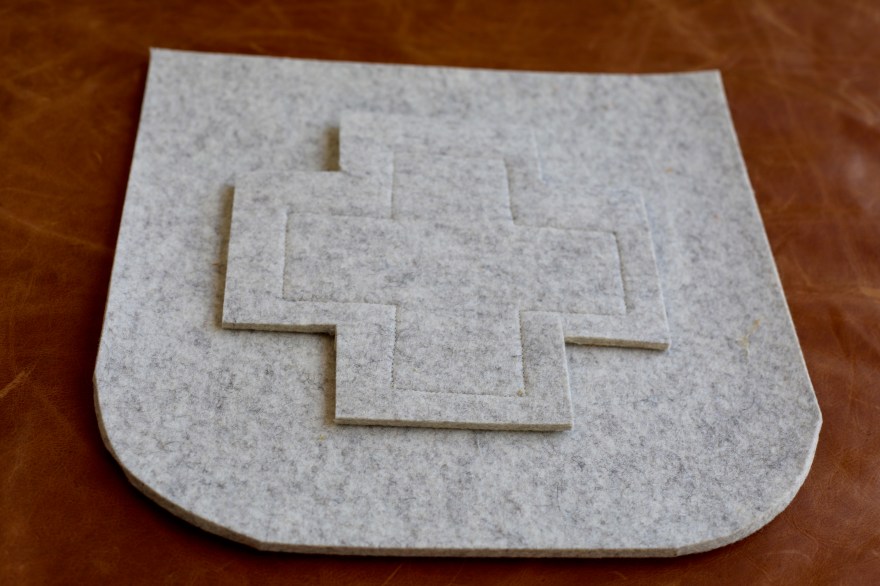
Further secure them all together by stitching 1/4 inch again around the block through all three layers.
Step 3: Sew the Bag Pieces Together
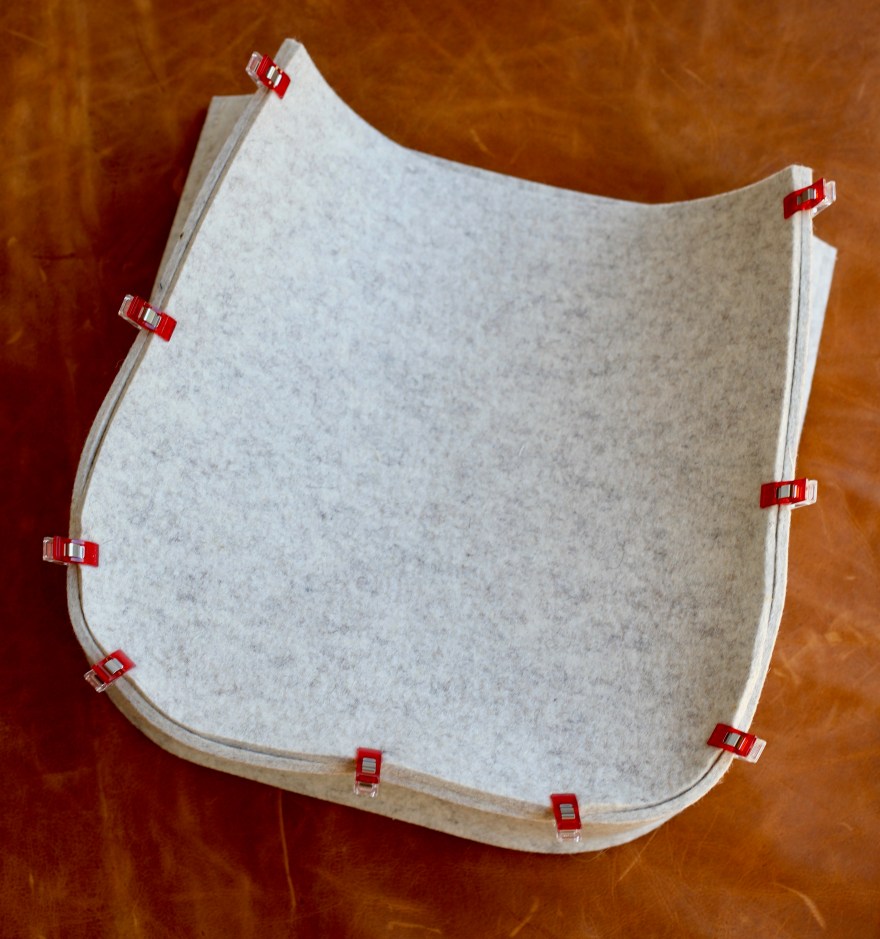
The seams on this bag are all to the outside and there are only two of them. SO SIMPLE!
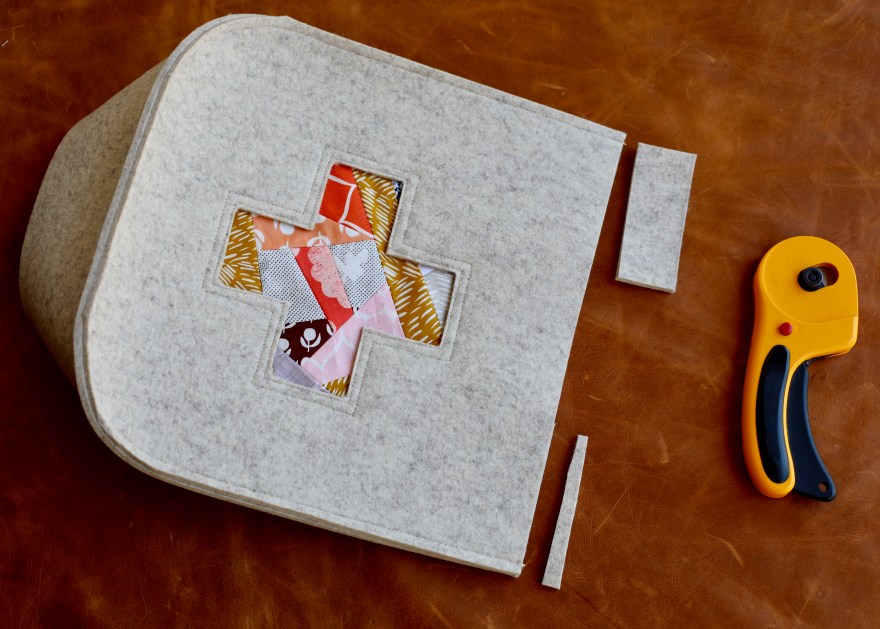
Wrong sides together, using a 1/4 inch seam allowance, sew the front felt piece to the long side piece. Trim any extra felt that is hanging off the top. (Of note, I do not use clips or needles when sewing this first seam but just guide it as I go around the corners. For the second upcoming seam I use a lot of clips)
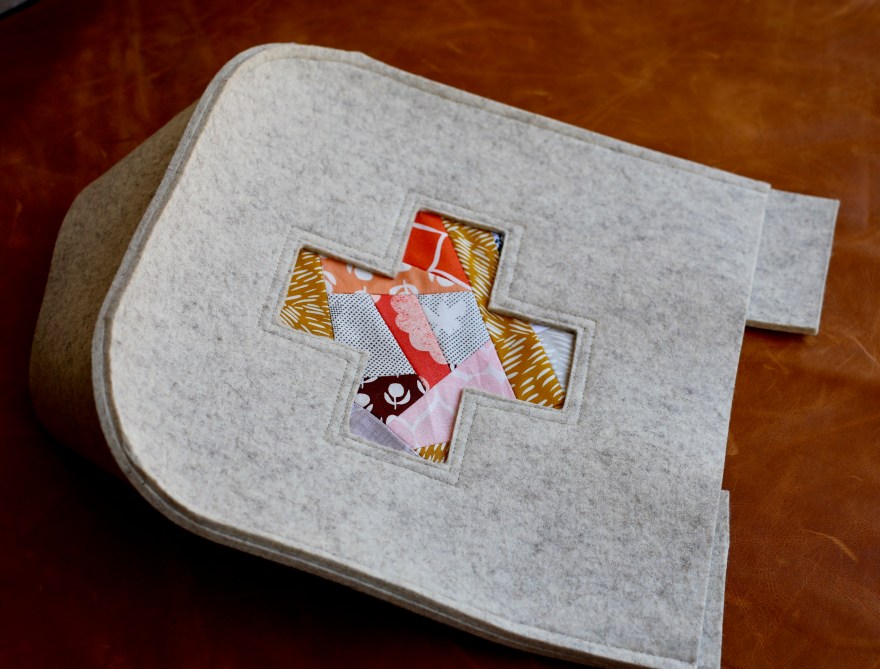
Wrong sides together and using a 1/4 seam allowance, sew the back felt piece to the side piece.
Step 4: Attach the Handles
Using your hole punch, punch two holes along the horizontal bottom of each end of the handles about 1/4 inch in from sides and bottom.
Set your ruler 2 ½ inches from the side and 1 ½ inch from the top. Align your bag handle at the edge and mark the handle holes on the felt with your marker.
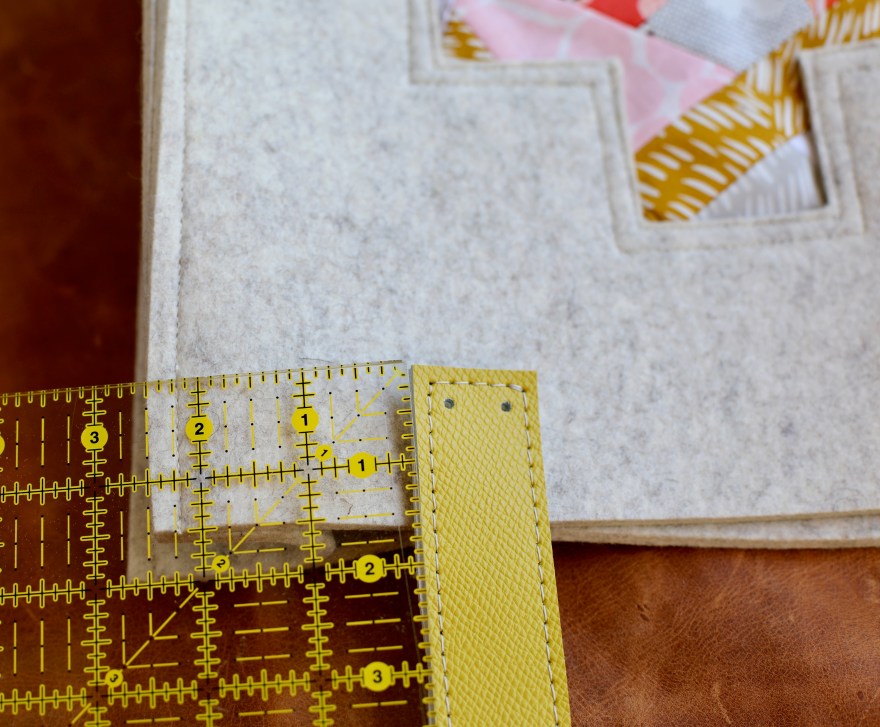
Using you hole punch, punch holes at these marked sites and attach your handles to the bag with rivets.
Congratulations On Your New Bag!
Tag me @entropyalwayswins on IG and use the hashtag #themetrotote so I can see your beauties.
Best!
Hillary

Very cool! Thanks for sharing the tutorial, Hillary!
Of course! Hope you can use it!
Hillary
Sent from my iPhone
>
I love that last bag with the bullseye-ish cutout! Do I need to use a heavy duty needle (maybe a leather needle?) to sew through the felt?
Hi Morgan. I have successfully used a universal needle and a leather needle on the 3 mm felt.